
or, the less eloquent title
This F#%&ing S%*#hole
In complete contrast to our subject matter, today is is March 27, Candy Day! How many days can someone live on candy? Once, a woman tried to answer this question. Today marks the anniversary of this brave woman’s death. By the way, I tried this myself and lasted for twelve days. No holiday for me, though… I guess you have to die before you get a day named after you.
Previously on Wild Arms 3: We conquered Gunner’s Heaven, and earned (in a roundabout way) the third Guardian Lord. Just one more to go!
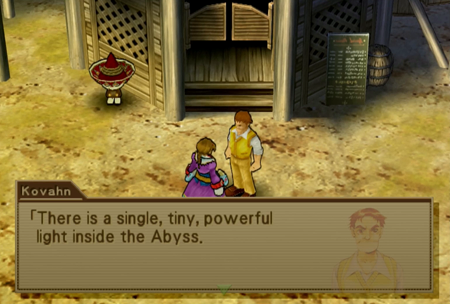
The last Guardian Lord is Zephyr who presides over Hope. We don’t have much of a lead on his whereabouts, but if we chat with our old buddy Pike…

“’A ray of hope will lead you through the darkness.’ Have you heard that before? People in my hometown used to say that all the time. It’s like when you’re feeling down, you think it’ll stay that way forever, but tomorrow is always a new day.”
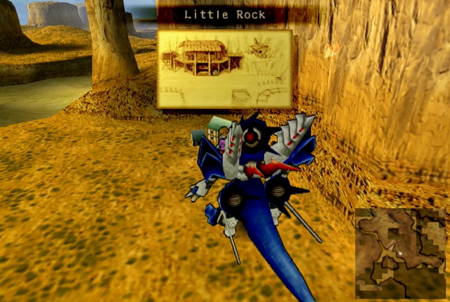
It could just be a coincidence, but we haven’t stopped by Little Rock in a while, so let’s see if they have any further information about keyword “Hope”.
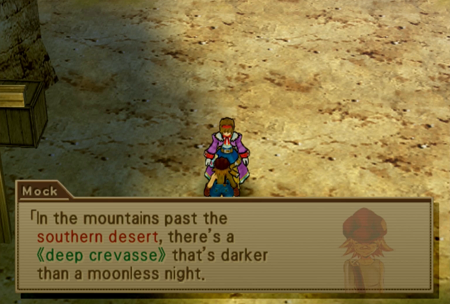
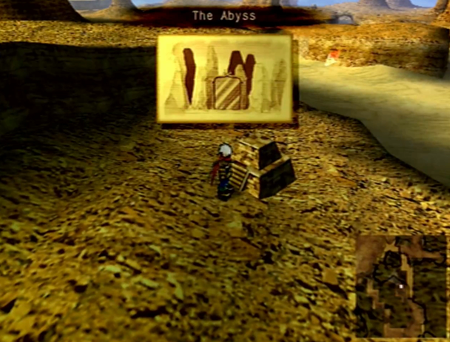
The talk of the town is a nearby(ish) dungeon by the name of the Abyss, and how it hides “hope”. That certainly sounds relevant!
Thanks for the directions!
(Remember a few hours ago? Way back when we had just murdered the Huskarls?)
While we are here, you may remember that there was a treasure chest hiding over in the upper mountainous area of town.
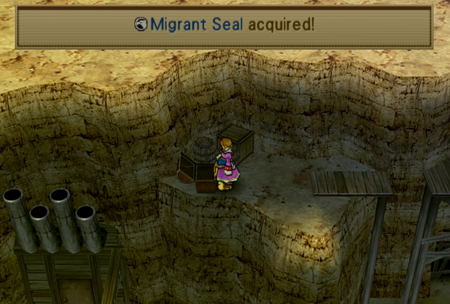
With Virginia’s Gale Crest (obtained back at Nidhogg Pass before the finale of Chapter 2) we can earn another Migrant Seal. Good! We’re going to need all the help we can get soon enough…
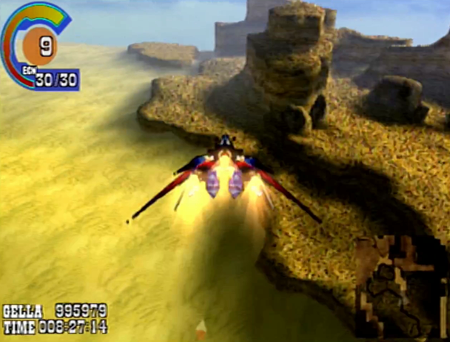
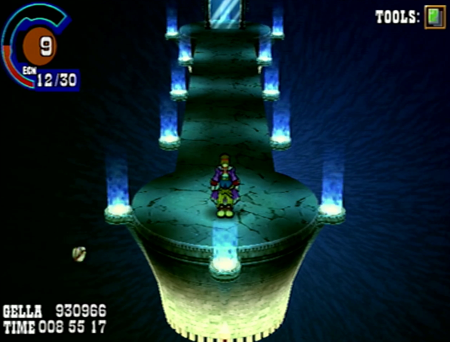
While you might be able to sorta-kinda find a way to walk/sandcraft over to the Abyss, you cannot access this dungeon until you have your dragon. Why?
Well, a not-so-little rock is blocking the way to the Abyss. And what do we say to obstructing rocks?
My airship has missiles, Rocky.
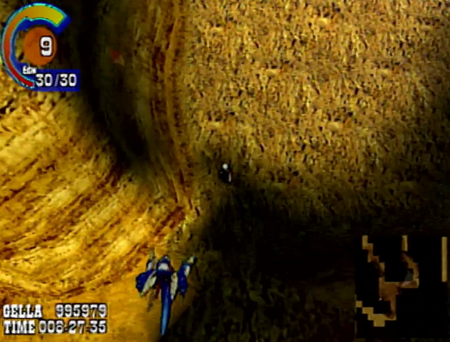
Blammo. Now we can access this stony area.
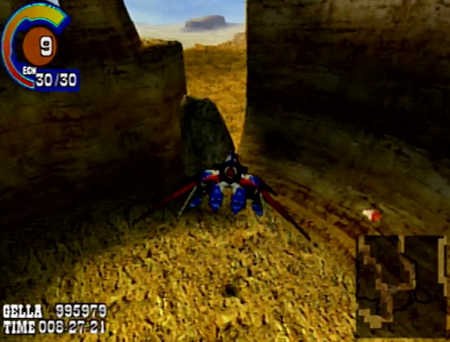
Ah, the time-honored tradition of making an area inaccessible without an airship, but then requiring your poor party to hoof it to make it any further. Final Fantasy 1 would be proud.
The local fauna is…. Spikey.
Look at those toe beans.
Gone in a second
Ultimate destruction
Gods are warring
Sorrow never ending
Endless chaos
For an eternity
Welcome to the abyss
-Robert Frost
(Probably)
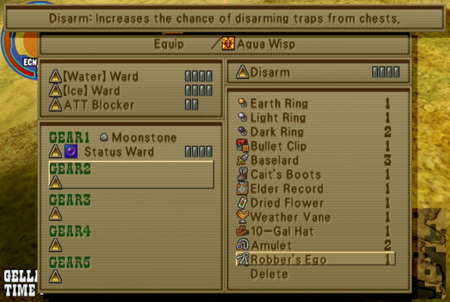
Before we go in here: we earned the Robber’s Ego way back during the Faraway Lands dungeon (remember? Where the golem tried to kill us, but dad helped out?). It aids the user in disarming trapped chests. While it does not have 100% accuracy, it is highly recommended for the many, many trapped chests you will find here.
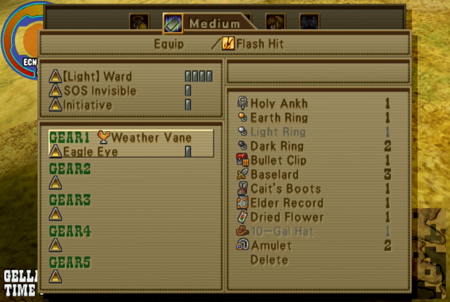
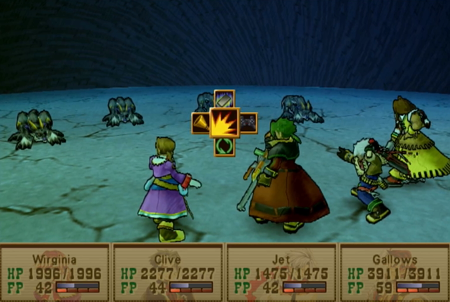
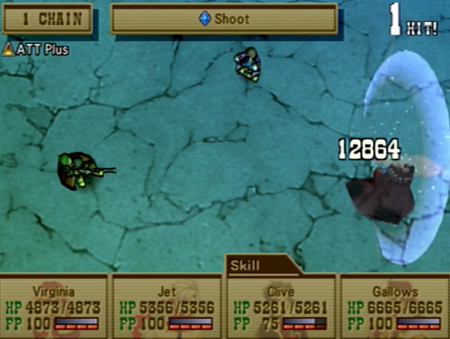
Additionally, we have one Guardian that comes pre-equipped with Eagle Eye, and we secured an additional Weather Vane (which confers the Eagle Eye ability) during our night in the museum with Shane. There are two more Weather Vanes in the game, and they are available as part of the Millennium Puzzle sidequest. We won’t be tackling that sidequest until next update, but it is highly recommended that everyone have those Weather Vanes/Eagle Eye when entering the Abyss. Eagle Eye protects against surprise/solo encounters, and… well, spoilers, we are going to see the importance of that soon enough.
For right now, until otherwise stated, my party only has two Eagle Eyes equipped.
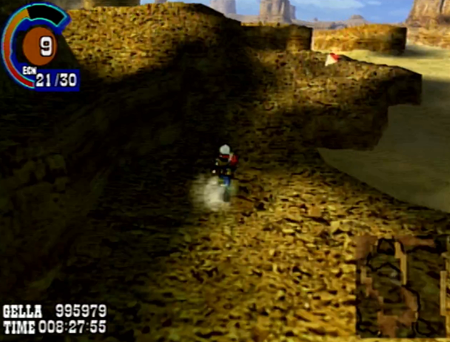
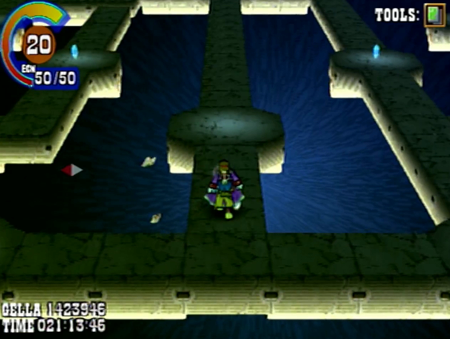
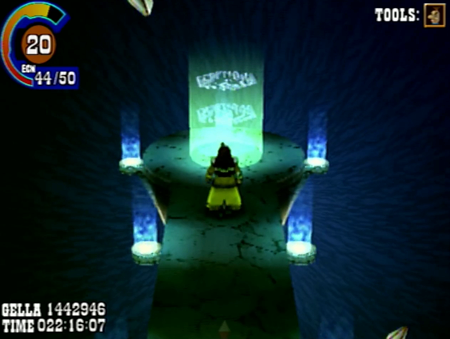
Welcome to Flavor Country.
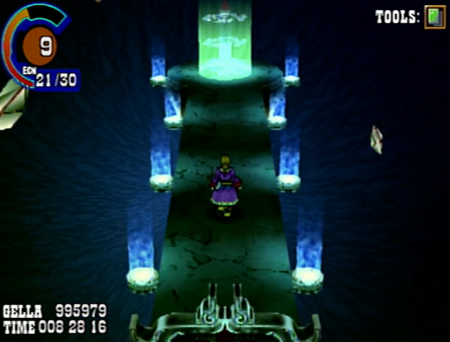
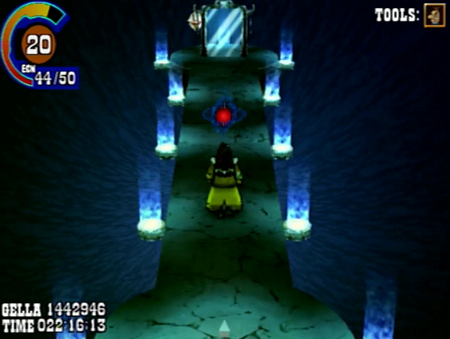
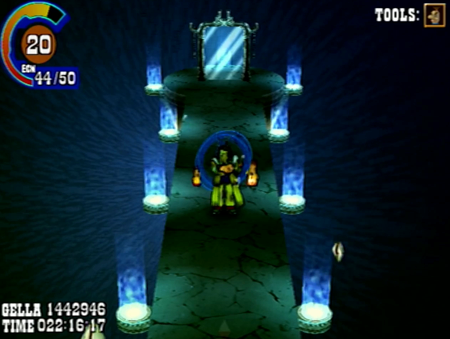
The first floor of the Abyss is an exit and a magic mirror. If you are smart, you will only ever use the exit.
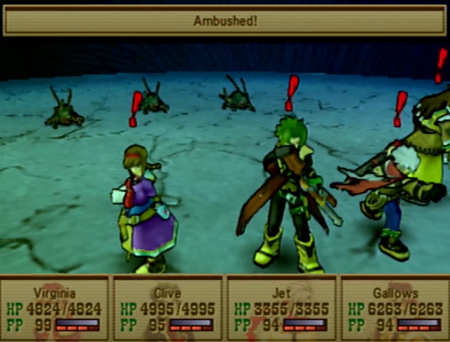
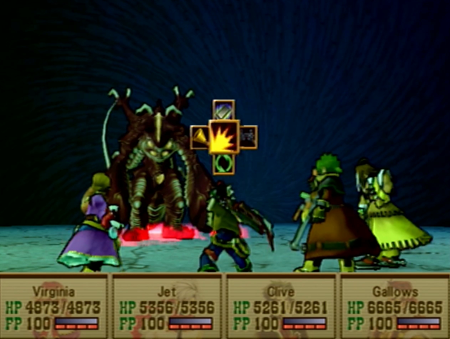
You can and will be attacked before the Abyss formally starts.
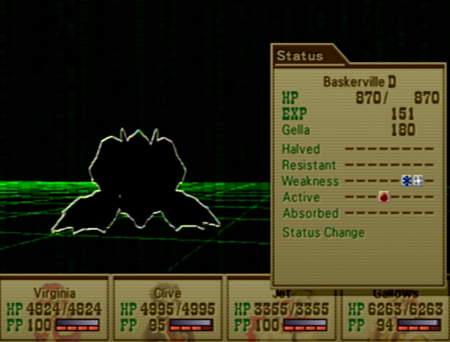
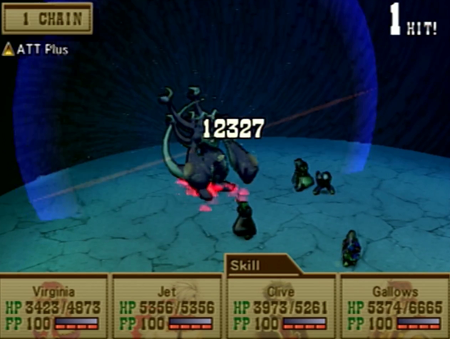
If you guessed “it uses poison attacks”, you guessed right.
Crap. Stone/Bronze? Damn. Just hitting right out of the gate with all sorts of status effects.
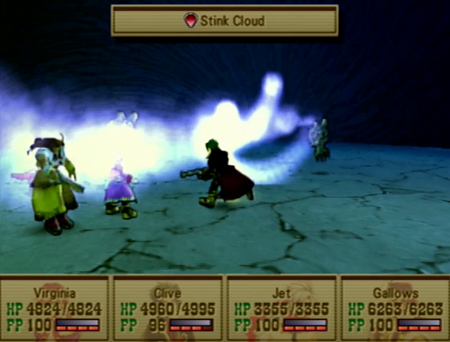
I guess Disease is also on the docket.
Point is that we haven’t even really started yet, and we already needed like three different status effect healing items. Be sure to stock up on those beforehand, too.
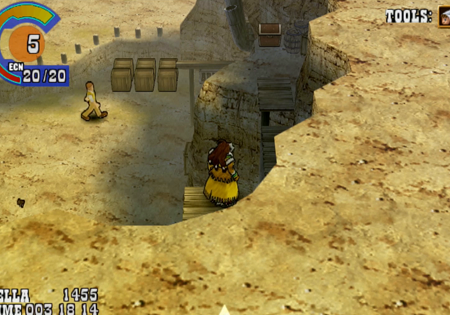
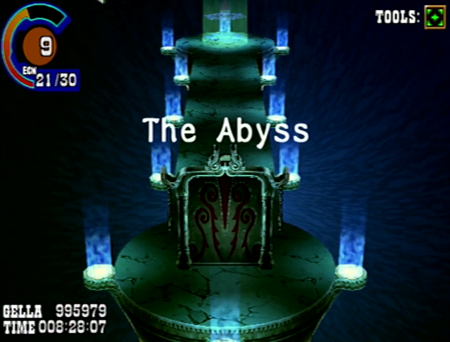
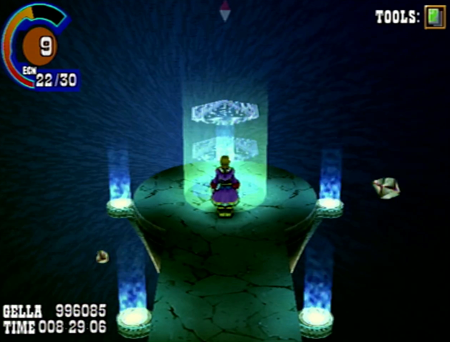
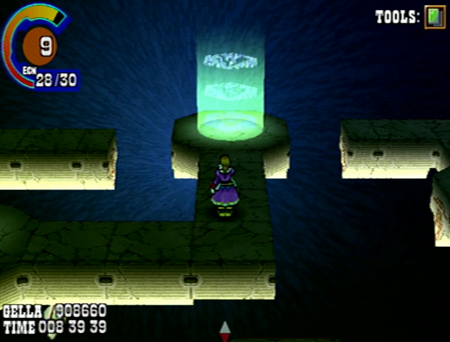
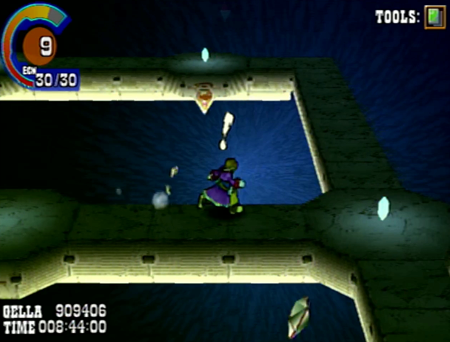
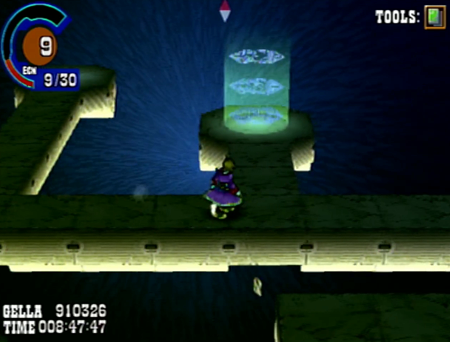
Okay! Now we are starting the Abyss in earnest! Once you begin this dungeon, you are stuck here until you get to an “escape” floor, or die.
Get used to seeing this.
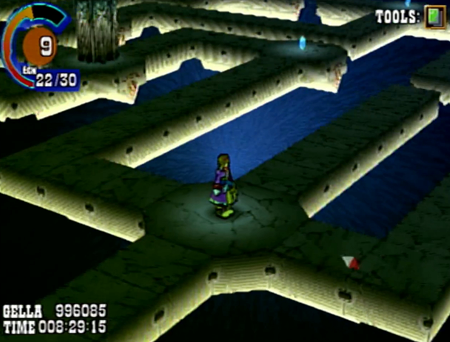
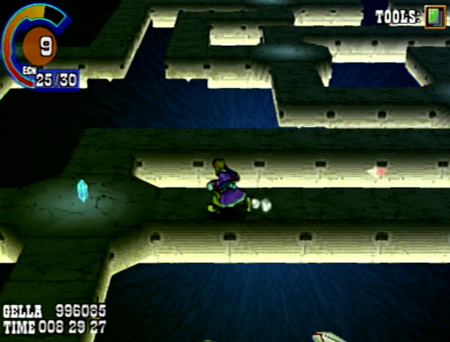
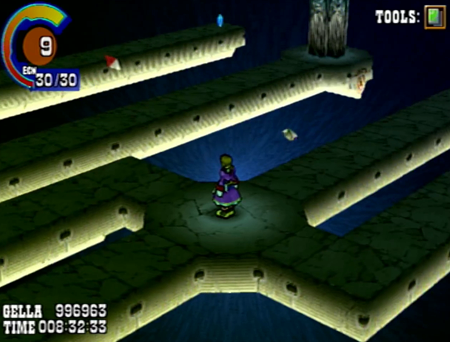
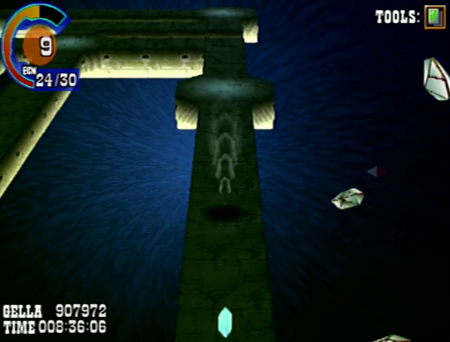
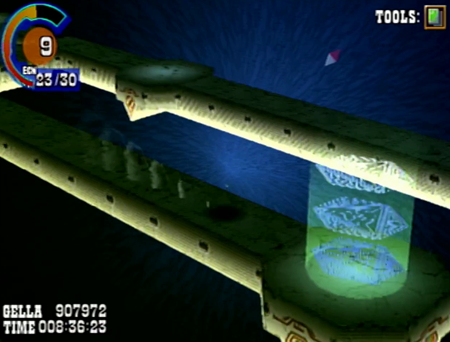
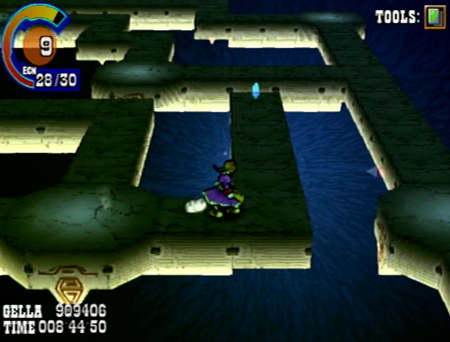
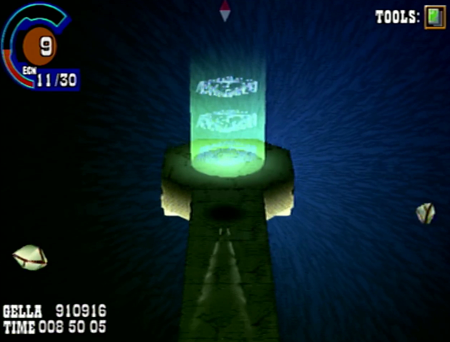
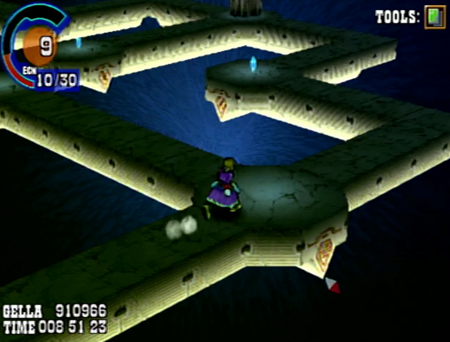
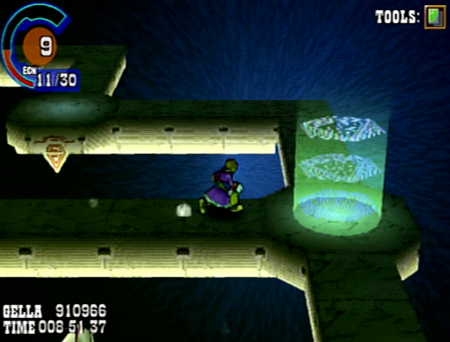
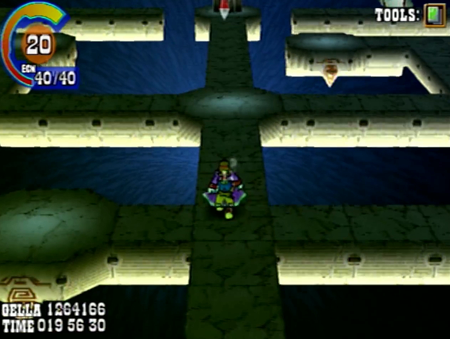
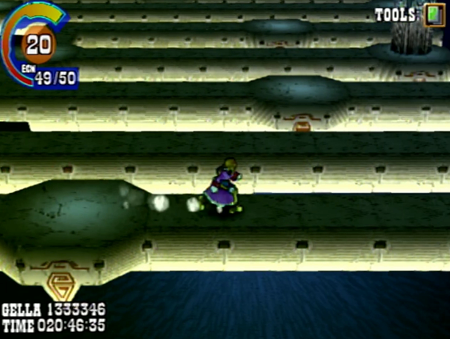
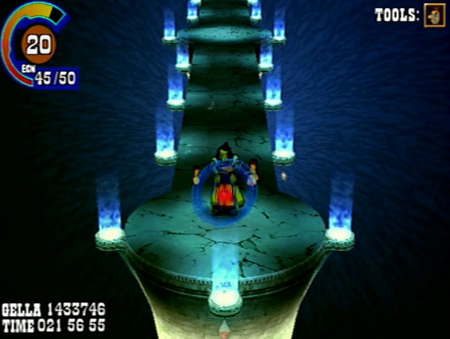
The Abyss is a randomly generated dungeon. It’s you, five crystals per floor, an elevator that only opens when you collect all the crystals, and a whole lotta pathways that need guardrails.
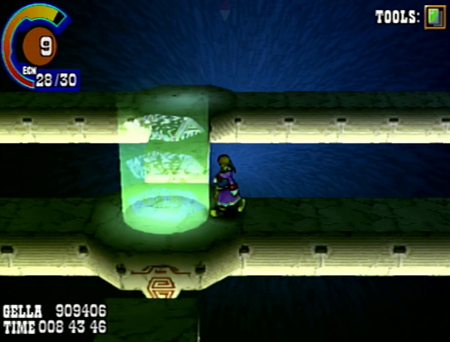
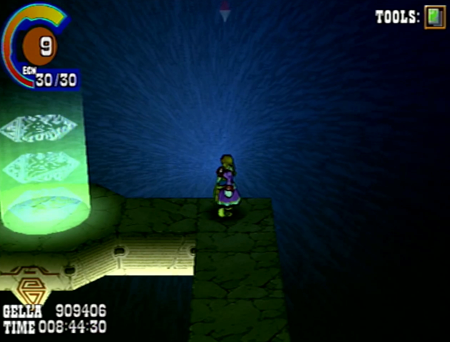
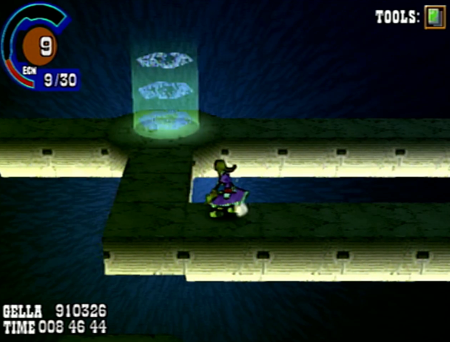
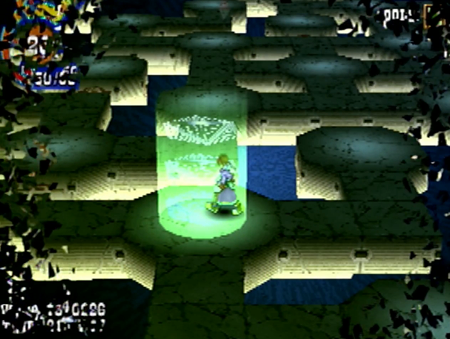
Each of the blue crystals are keys that unlock access to the next floor, and they restore a little bit of VIT and your ECN gauge. Essentially, they work like orange and white gems combined.
You must collect all the crystals, and they are randomly generated across the floor. Sometimes they are a short walk away, sometimes they require traipsing back and forth to a dead end.
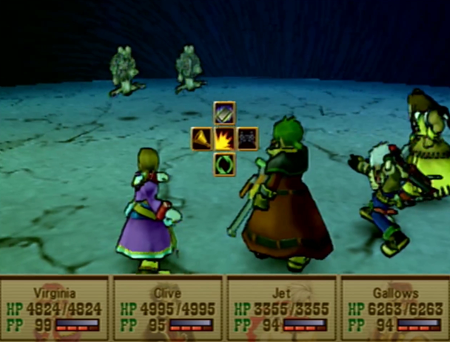
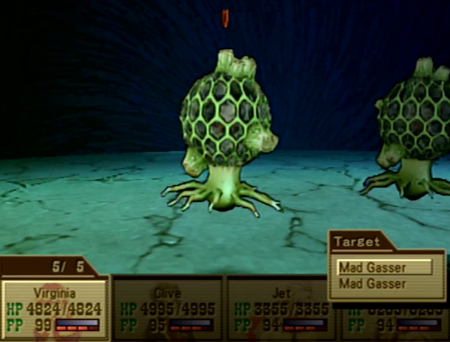
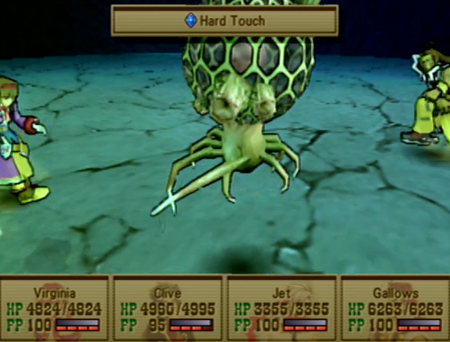
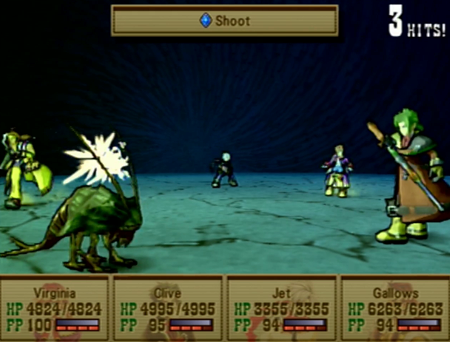
And, of course, there are monsters. There are monsters upon monsters.
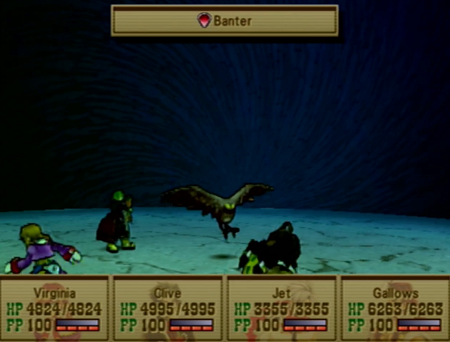
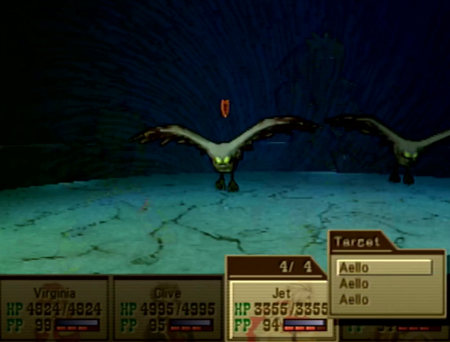
Like all crummy bird monsters in this game, these Aello will either do practically nothing…
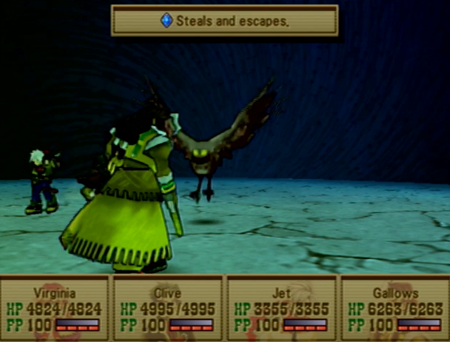
Or steal your most useful items. Note that unlike previous bird monsters, they can use “Steals and escapes” which does exactly what you expect from that name. No reclaiming a valuable lost item for you!
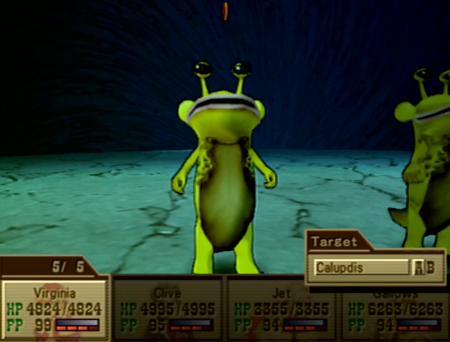
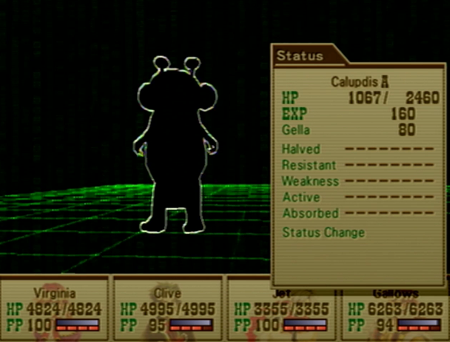
Other monsters on these floors include ugly looking bugs.
As mentioned earlier…
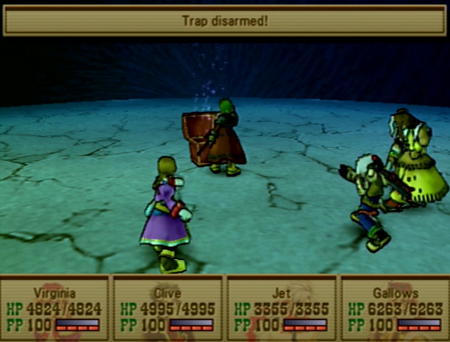
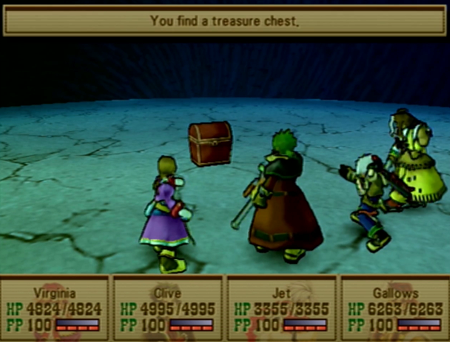
You really, really want to disarm traps. In a regular dungeon, losing half your VIT to a bad chest is annoying. In the Abyss, it could knock you down to limping as early as the second floor (of at least ten).

The good news about the Abyss is that even the early monsters here drop some useful items. This is a double-edged sword, as knowing that there are useful items encourages you to open potentially deadly trapped treasure chests. Your choice!

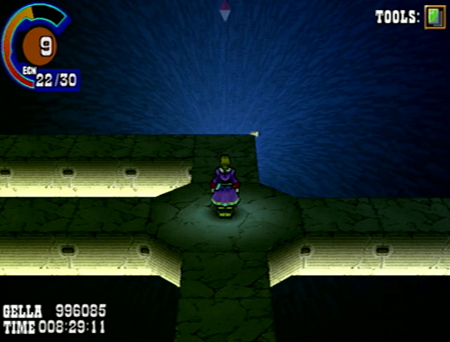
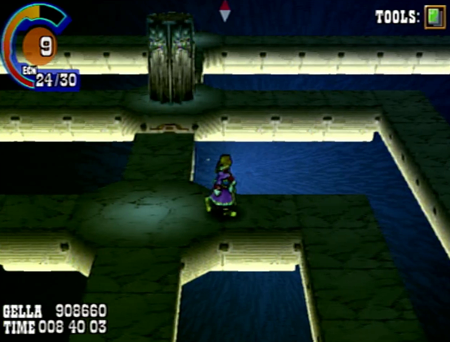
This is floor… eh, whatever. Every floor in this place looks the same. Let’s say it’s three.

That’s what happens when you obtain all the gems on a floor. I will admit that it feels good every time.
Look at that! That’s going to take a lot of walking.
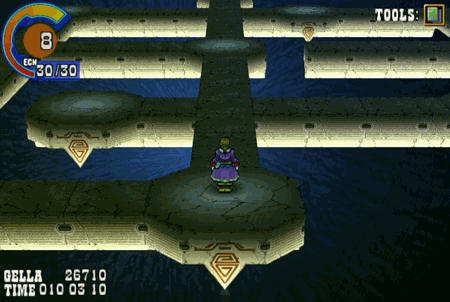
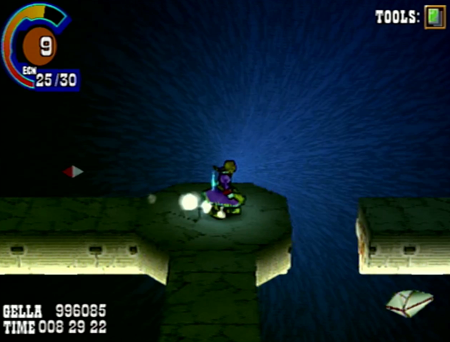
The only tool of any use in the whole Abyss is Virginia’s Gale Crest. While it will often send you sailing off into nowhere, sometimes you can use its single-minded dashing to make a beeline for your next destination. Note collecting a single gem will not stop Virginia’s barreling gale-dash, but if you collect the last gem of the floor, it will pause Virginia’s movement.
The hounds! The hounds!
Either open a FAQ or use some pen and paper: it pays to remember what monsters have what weaknesses across the Abyss.
Oh! These boys!
So these things look pretty innocuous, but their trick is…
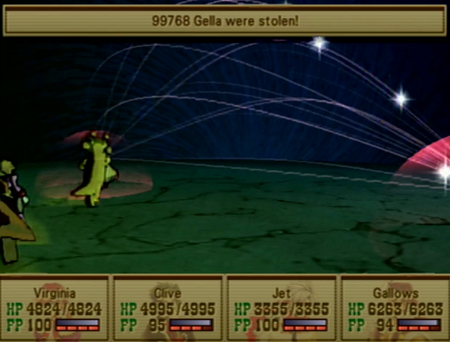
They will eat a tenth of your cash on one turn…
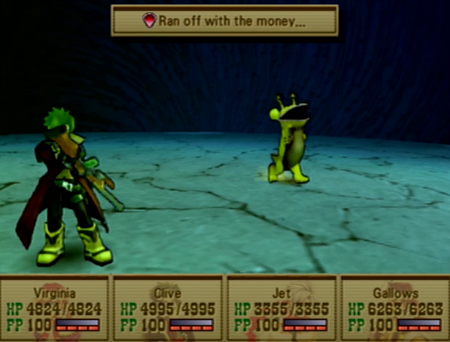
And then attempt to run off with it the next turn. You must kill them quickly to retain your savings.
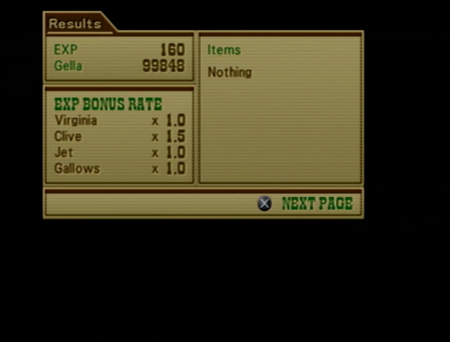
However, since you technically “win back” your gella on the results screen, you can farm these suckers to rapidly expand your coffers, as you can use a Gella Card to double their reward, and thus win “back” more of your gella than you had in the first place. This obviously increases rewards exponentially, and is thus the fastest way to fatten your wallet in Wild Arms 3.
But we’re not worried about money right now. Ain’t nuttin’ you can buy in the Abyss.
Moving right along. I enjoy using Virginia’s Gale Crest to move as quickly as possible.
This is why you need Weather Vanes/Eagle Eye. Being “surprised” is checked against each of your party members, so if the game randomly chooses one of your party members without Eagle Eye for the check, you can be ambushed. Like the trapped treasure chests, this is annoying in a regular dungeon, but can be brutal in the Abyss.
What floor are we on? Probably, like, five.
Look at that tiny, annoying gap! Have to go all the way around…
As you have likely surmised by this point, the challenge of the Abyss is budgeting your items, VIT, and encounter gauge against… ya know… dying. The more battles you encounter, the less resources you have, and the gems only restore a meager amount of VIT/ECN. There are absolutely zero fill-ups for items like Heal Berries or status restoring items, and you have to rely on the completely random drops for any help there.
As an obvious corollary to that, coming in here with as many Migrant Seals as possible is recommended. At a meager Level 9, we must entertain a number of battles that would otherwise never impact the encounter gauge.
Are we there yet?
Note that falling off the platforms only means you have to restart that floor from the entry point, and the gems do not respawn, so you do not lose any real progress. Sometimes when a gem is in the middle of nowhere, falling off is your best option.

Nature produces the most wondrous creatures.
And the most punishing abysses.
… Is this even another floor? I don’t know anymore.

Oh, here was a fun time.
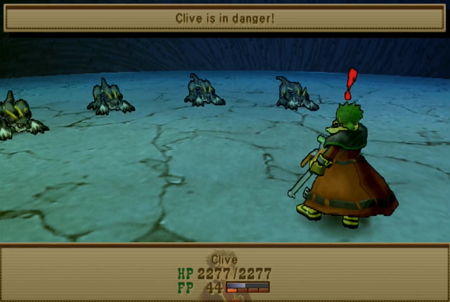
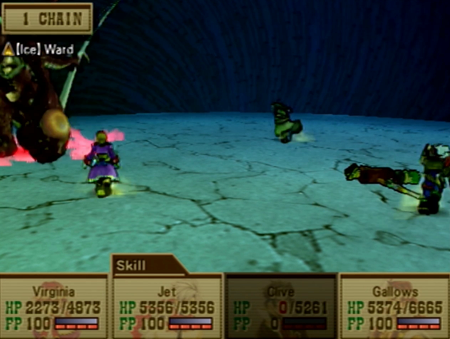
Clive got solo-ambushed in the "real" level playthrough.
I am moderately certain the only way Clive could have survived this is if he guarded every round until help arrived. Though I am not convinced his magic resistance would have held out for even that…
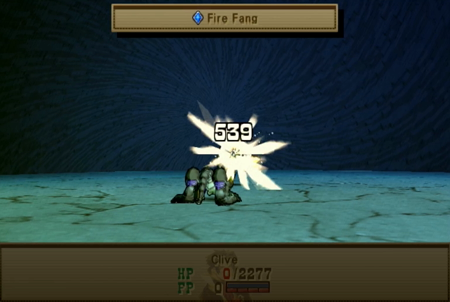
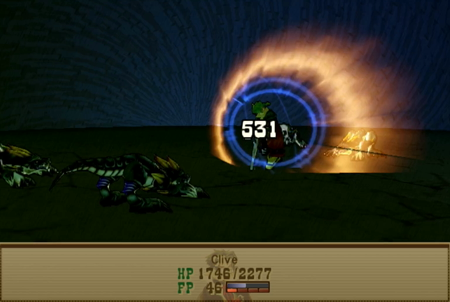
Clive dies alone in a pit.
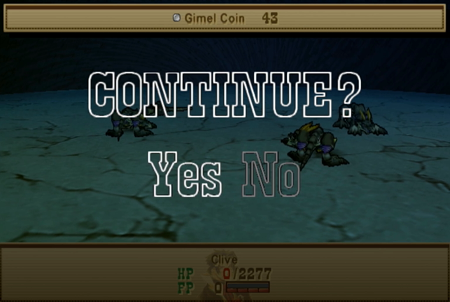
Yes, dying as a lone combatant counts as a game over, even though the rest of the party is alive and well… and probably like five feet to the left. However, as long as you have Gimel Coins, you can continue from any party wipe. This is my “normal” playthrough, and I already have 43 unused Gimel Coins ready to go for this eventuality. Very glad I do!
Apparently continuing grants us the full party from the beginning, so this mob is back to being instantly surmountable.
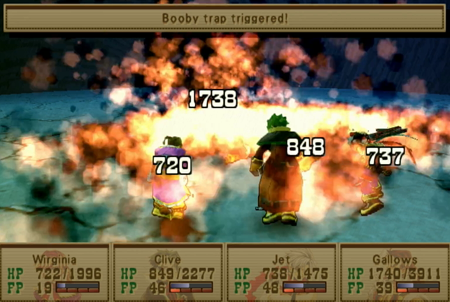
And then we got a booby trap on the treasure chest. Cursed battle. Absolutely cursed.

But it was worth it! Those stupid dogs dropped a Fire Ring, and we need all of those we can get for… later events.
Anywho, hoping that Game Over reinforces how badly you need maximum Weather Vanes for this dungeon. Clive died to the easy monsters of the Abyss! Imagine what happens when there are boss-caliber creatures stomping around!
And that is a good illustration of the Abyss in a nutshell. Since you are locked into an “Abyss run” once you start, there is a recurring risk/reward danger going on here. You can farm gella lizards or fire doggies for their rewards, but with an inability to casually escape at any time, you could lose it all if you get too greedy.
… Well, if you get too greedy, and forget to bring a cache of Gimel Coins, at least.
And now we are evidently on floor ten, because we hit the elevator, and…

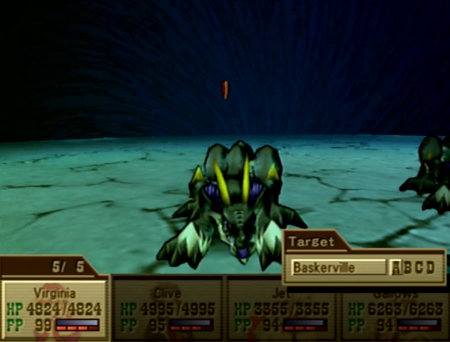
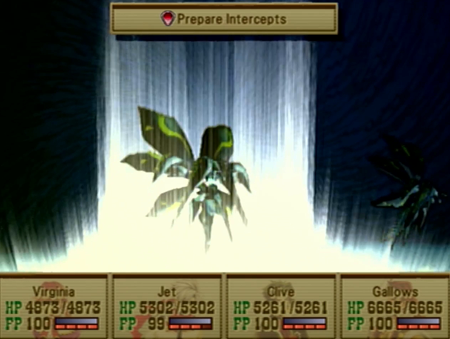
Battle!
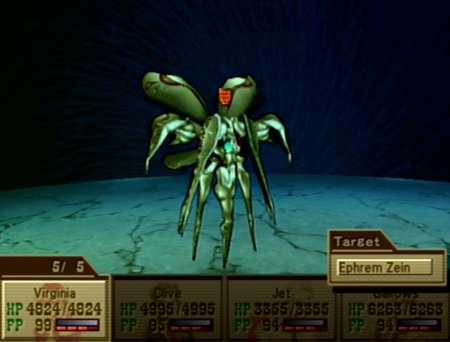
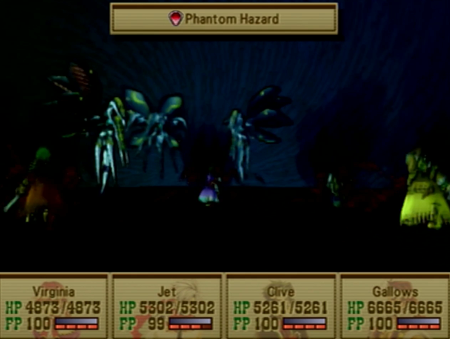
Ephrem Zein is… some kind of metal bug thing? I don’t know.

Ephrem Zein is your bane if you have been coasting through the Abyss on auto battle.
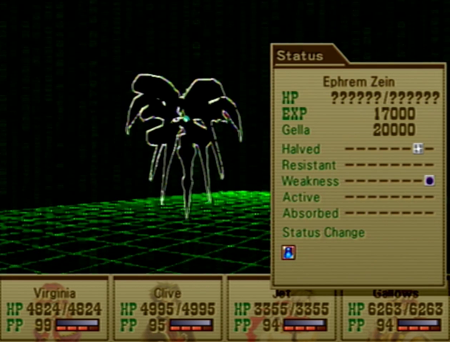
It is weak to dark, but absolutely do not cast dark magic on it, as that “status change” at the bottom shows this thing has a permanent reflect status going.
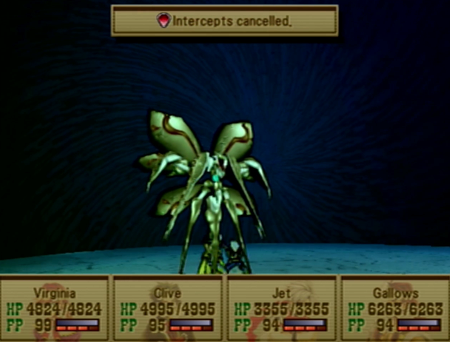
So Zein has one trick: it will counter damn near everything. Spells get reflected, physical attacks incur a punishing counter.

However, the trick is that it technically has two turns: one where it puts up the counters, and one where it drops the counter ability. And Clive is so damn slow, he always acts after the counters come down. So the answer to this riddle is to only use Clive to attack.
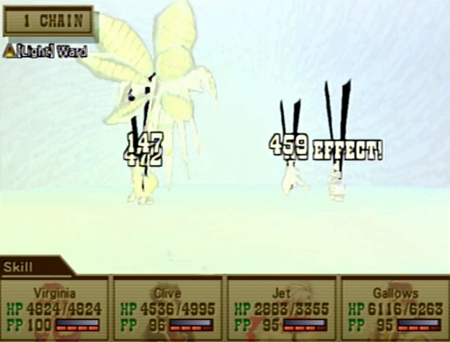
Here is what happens if someone other than Clive attacks. It’s a hit-all light attack that can be a bear if you are already exhausted from the rest of the Abyss.
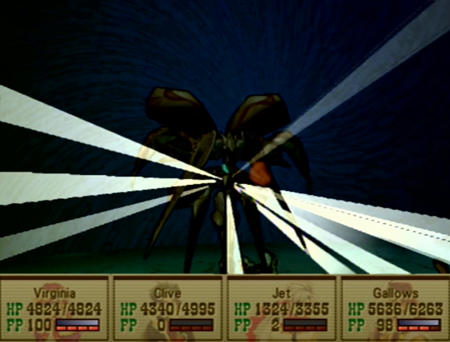
So if you unload on your first round with everybody, you will probably wind up dead. If you know what to do, it is over pretty quickly.

Our reward is the Dragon Idol. This is why the Abyss’s first ten floors are mandatory: this is the only way to find the Dragon Idol, and thus obtain the final Guardian, Zephyr.
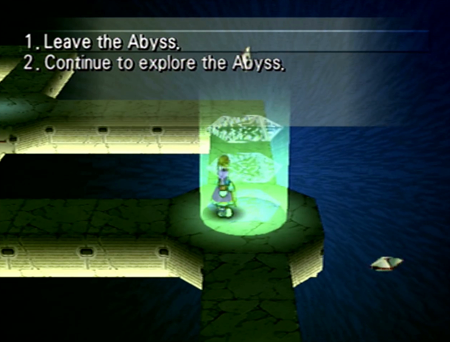
Now, it is highly recommended you leave the Abyss. Thanks to Zephyr being (eventually) plot mandated, and the simple fact that a number of useful items/Migrant Seals are also plot gated, it is a terrible idea to tackle the entirety of the Abyss on your first go. The Dragon Idol creates some sort of game-constipation here, and, if you choose not to go back to the Fallen Sanctuary and “cash in” your reward for completing ten floors of the Abyss, you are putting yourself at a serious disadvantage for the remainder of the Abyss. This even applies to a new game plus.
In the “present” of this playthrough, we are leaving, and our “normal” journey will pick up again next update.

But in the future…
Well, you can watch for yourself.
This was recorded “live” on January 31, 2023. It is the new game plus party at the absolute end of the game venturing through the Abyss. This video features most of the Even Worse streaming crew joining me for the incredible time sink that is the Abyss.
You don’t have to watch. I will summarize what happens for the purpose of this Let’s Play, but be aware there is a reason the video clocks in at three hours and four minutes long.
So the first part of this update was simply the first ten floors of the Abyss. The Abyss is, in total, one hundred floors.

As you can see, we have returned here with a full 20 Migrant Seal-fueled ECN encounter gauge, and the most ECN points that can be obtained before finishing the Abyss, 40. Additionally, we have a full set of Weather Vanes, and a number of other random boosts that we will address as we go.
As much as we all like a challenge, it is highly recommended that you tackle the whole Abyss after you have completed every other task in the game. Practically everything about the Abyss is constructed to be frustrating, and you need all the help you can get.
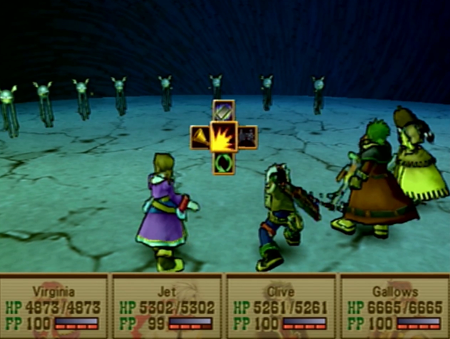
These eyeball jerks are straight out of the coliseum playbook of “no, you cannot target all of them at once”.
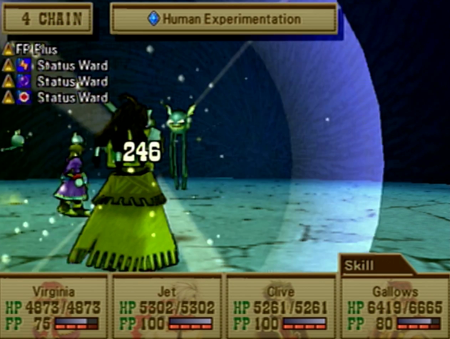
You want to equip as many status ward/protections as possible. We are still early in the Abyss, and already these jerks are busting out a move that Bad Breaths its way into possibly inflicting every status effect.
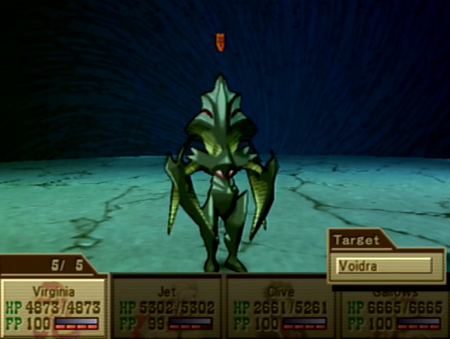
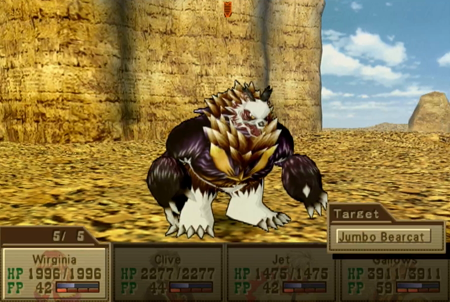
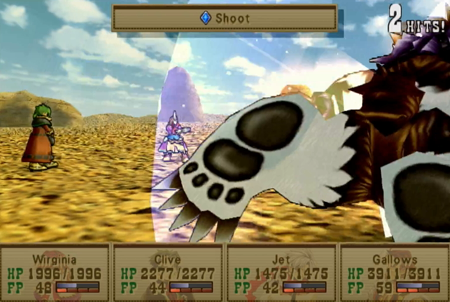
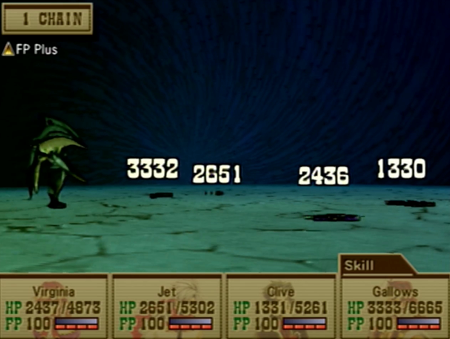
This is Voidra. If you take too long to kill Voidra, it will use an attack that sends you back to the start of the Abyss. Kill it. Kill it so fast, you are using your most powerful attacks. Expend every resource you can find to kill it immediately.
It also uses Gravity attacks, which are annoying when you are trying to maintain your HP. Not pictured: letting Voidra use its Eject attack, because I do not love my audience enough to suffer so much.

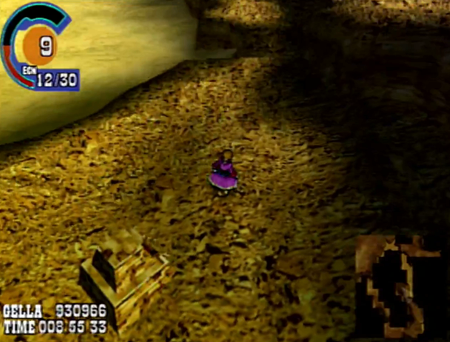
Even though you must complete the first ten floors of the Abyss, you cannot start back at floor 11 on your return trip. The only acknowledgment that you finished any part of the Abyss on a return is that the boss enemies do not return. Considering the bosses are generally puzzle-based, you would almost be better off if they did return, as you could soak up more exp/gella for relatively little risk. Anywho, this is probably a picture of Floor 11 or lower, but who the heck knows.
If I took the time to emphasize how tedious this whole experience is, we would be here all day (again: three hours!). Skipping ahead to Floor 30, where we encounter our next Abyss boss.
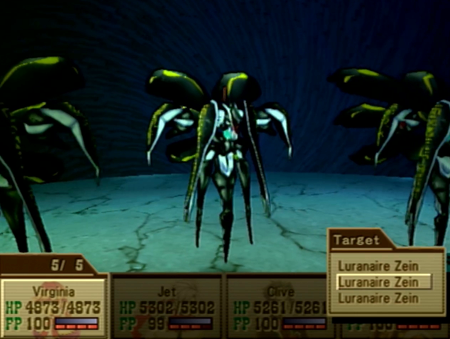
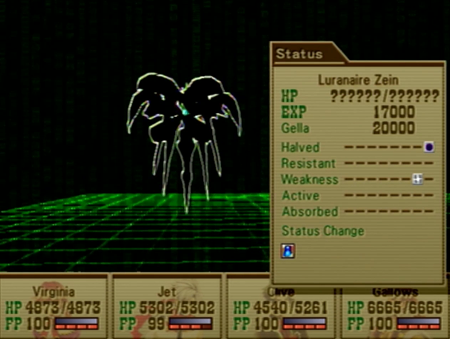
Our previous Zein boss was light-based. Luranaire Zein is further down in the hole, so it is dark-based. It is also a trio.
It is counter-based like its earlier cousin.
Every time it is attacked, it will counter with a powerful, hit-all darkness spell. The trick this time is that if you are warded against darkness attacks, you will literally never take a point of damage.
Still, you have to avoid exploiting that light weakness with the mirror magic in play.
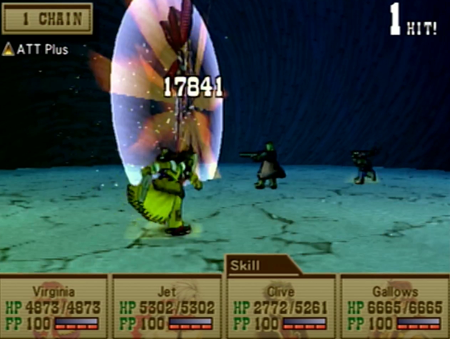
Just shoot it.
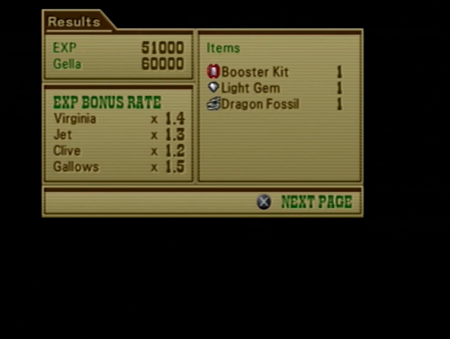
And our reward for conquering the first thirty floors of the Abyss is the Booster Kit. This is one of four Booster Kits in the game, and finding all four will mean you have 50 ECN points. You generally only need that many ECN points if you… are tackling the Abyss. Funny how that works.
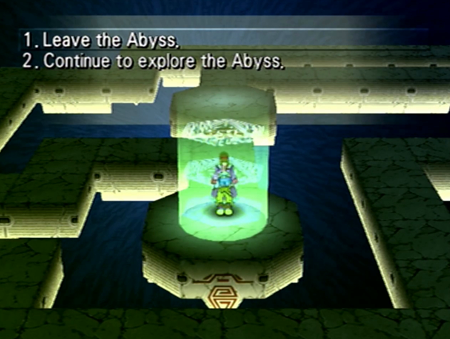
You once again have the option of leaving. Unlike with the dragon statue/floor 10, the only reason you should leave the Abyss at this point is if you are seriously low on resources. Continue on!
Ugh. Some randomly generated floors are the worst.

The Abyss is ordered in four distinct sections: Floors 1-10, Floors 11-30, Floors 31-60, and Floors 61-100. Each of the sections has a different monster table, with some monsters (like those gella lizards) appearing anywhere in the Abyss. Floors 1-10 are generally balanced for a post-Lombardia leveled party, Floors 11-30 are geared toward someone generally at the end of Chapter 3/start of Chapter 4, and everything past that is “are you level 100 yet”. So, at this point, encounters start feeling vaguely boss-like in their length and strategies.
Also, this pisses me off, as your average Wild Arms 3 “mandatory” dungeon has a meager 2-3 different monsters presented in different configurations. The Abyss has… well… I’m just going to go ahead and copy this table from SplitInfinity’s Wild Arms 3 FAQ focused on monsters appearing in one stratum of the Abyss:
Lily Pad, Obsidian Lizard, Alligatiger, Hyperion, Amon, Harvestman, Ivory Lizard, Geldam, Sapphire Lizard, Little Grey, Orgon Energy, Leprechaun, Doppelganger, Chupacabra, Ruby Lizard, Flauros, Unlucky, Radiant Crystal, Aello, Demiurgos, Gigantes, Albion, Fire Genius, Calupdis, Forbidden, Vodianoi, Spriggan, De Re Metallico, EM Being, Leonard
And that’s just for this 25% of the Abyss! All the interesting monster ideas got crammed into one hateful dungeon. And Leonard!
Also not pictured: there are monsters that can steal your experience points, and trapped treasure chests that can do the same. This means there are some encounters where you could lose levels. Keep it in mind!
Anywho, fast forwarding to Floor 60.
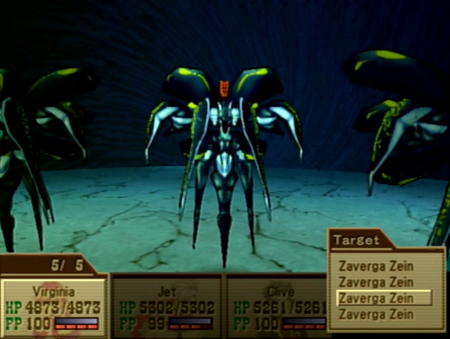
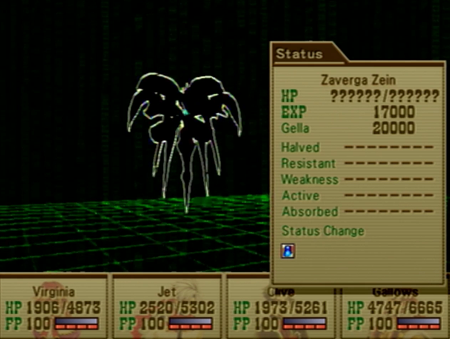
As you can guess, Zaverga Zein is another counter maniac. And it’s a fearsome foursome!
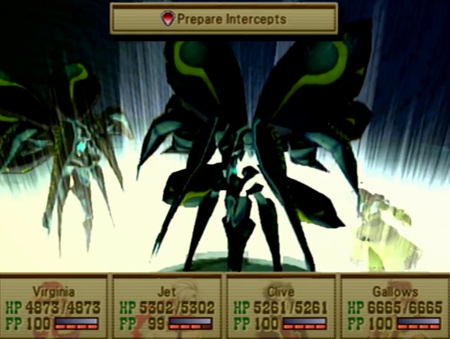
Oh, I’m prepared, buddy.
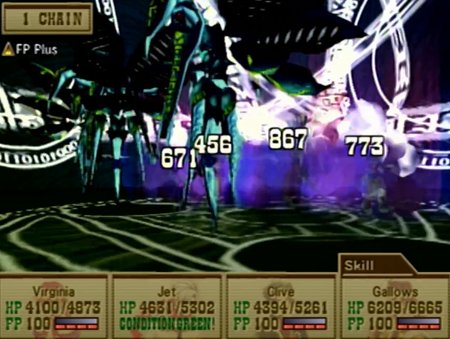
So it isn’t the hardest hitting attack in the game, but the counter this time does not have an elemental component, so you cannot ward against it like last time. And, while it doesn’t do significant damage, it will kill you if you get smacked by it by all four of these dorks.
And arcana is still out of the question. Not that this one has a weakness to exploit anyway…
So we are basically playing by Leehalt rules here. Use your most powerful attacks, but focus on one or two attackers, and have everyone else focus on healing and/or buffing.
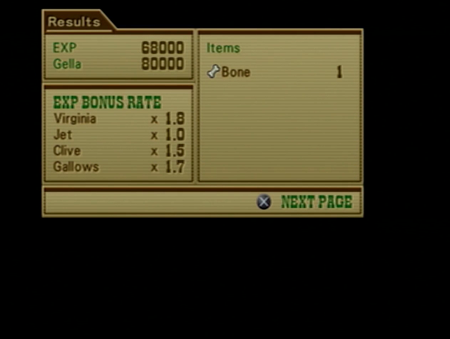
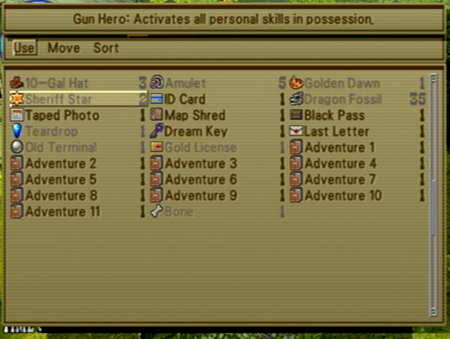
Our reward is… a bone. This whole dungeon is one big troll.
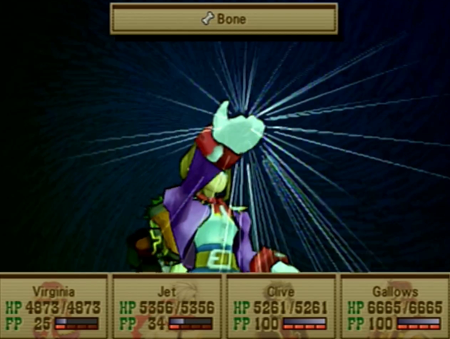
This is actually an item from Wild Arms (1), and has a very specific use: if you use Bone with Virginia’s Mystic ability…
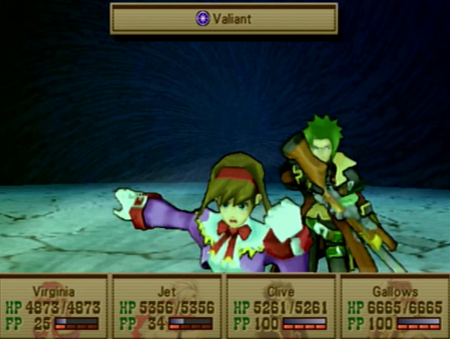
It will activate all the support arcana Virginia has equipped in one round on one target. This is reusable, and is pretty useful if you need to layer on the buffs quickly for the cost of a paltry 25 FP. Of course, the downside is that, at this point in the game, it will be useful in, like, three boss fights. Tops.
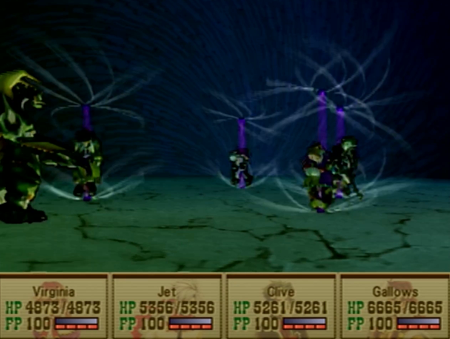
And now we’re on the final 40 floors of the Abyss. The monsters here are intense, and prone to throwing everything at your poor, tired party.
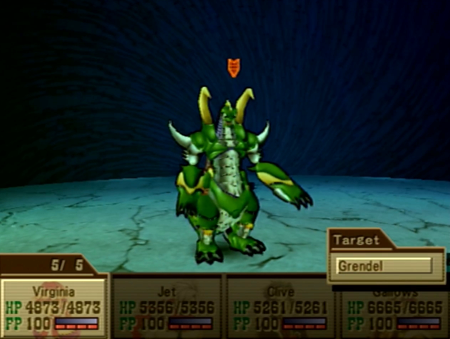
I cancelled a lot of encounters in the Abyss, because I wanted to finish this stupid thing before the end of recorded time. Grendel is a basic monster that proved I was making the right choice: it has an instant kill all attack that it used on the first turn. Good thing I am warded against that!

Grendel also has every elemental immunity, so it is one of the few things on Filgaia that is vulnerable to the Dark Luceid spell. See? I told you that when that thing works, it really works.
The lost Huskarl! I am agog!
There is no reason not to just blow through your FP during every fight. These creatures are all balanced for the dirtiest tricks in your arsenal, so feel free to slap an ATT Plus on Clive and Lock On (or Gatling!) every encounter.

Again with the risk/reward theme of the Abyss: these final (forty) floor monsters have some incredible drops, including a number of items that only appear singularly elsewhere in the game. For instance, those elemental rings are one thing, but the Prism Crown, which blocks every element, is a drop from the Agawogdent. It is a 1% drop, though, so good luck with that! You can also earn a Violator for additional casts of Finest Arts from the Vodianoi monster, so keep an eye out.
Oh! And there is a completely unique skill/equip found in the Abyss. The Necronomicon is dropped by the book monster Necronomicon (see how that works?), and it boosts the effects of any arcana spell cast. It is great on Gallows or Virginia (and pairs particularly well with Weakness), and can only be found on the lowest levels of the Abyss. Still a 1% drop, though…
No, I did not earn any of these incredible drops on my playthrough of the Abyss. I have places to be.

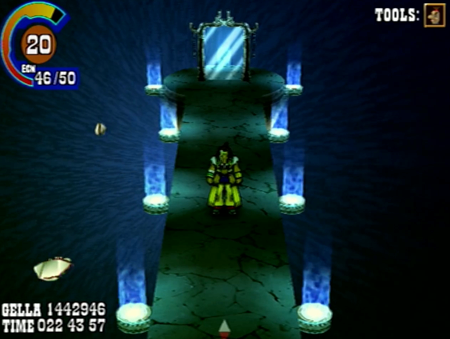
You can use the Lucky Hit summon to make it so… Oh, never mind. We’re at the end. Welcome to the final floor.
As you can see in these screenshots, there is no “floor count” as you progress through this pit. I had my audience count the floors during the stream, but this final level may come as a surprise if you haven’t been keeping careful count since the last boss landmark at Floor 60.

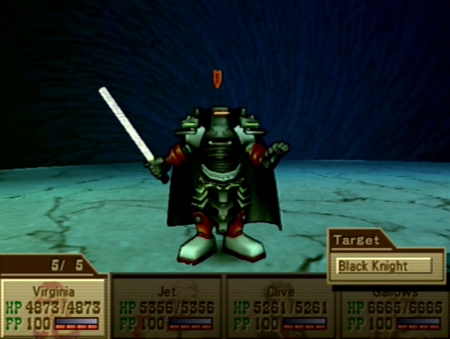
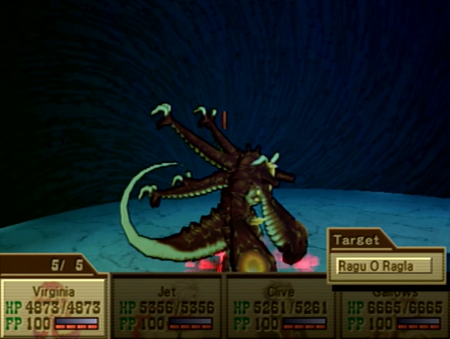
And here is our mega boss.
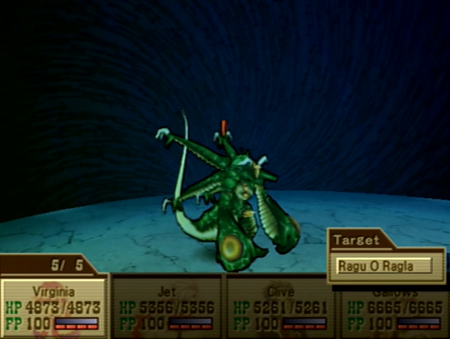
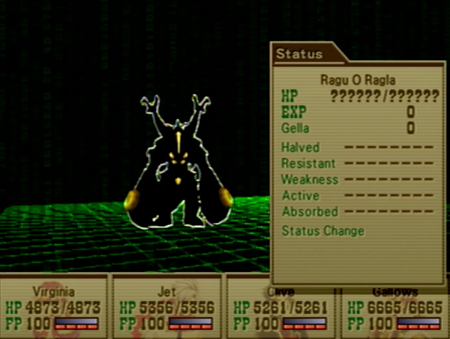
Ragu O Ragla is the most prominent recurring super/secret boss of the Wild Arms franchise. In Wild Arms 1, there was the Abyss (sound familiar?), and it was a monster dungeon built entirely for the purpose of restraining this demon among demons. In Wild Arms 2, Rags had very little backstory (like all the secret bosses of WA2), but was noted as the king of beasts, and was hidden deep(ish) in a mine. Now Ragu has his own randomly generated Abyss again, and he’s skulking around Floor 100 itching for a fight.
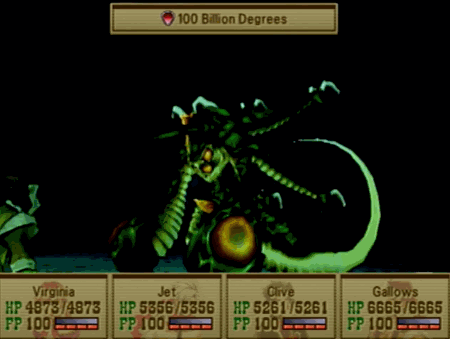
Going back to Ragu’s first appearance, this creature loves starting fires. Its signature attack 100 Billion Degrees will barbeque you if you are not equipped with fire wards. This is why I was excited about obtaining a Fire Ring earlier! You need a set of three of those (and the one Guardian that comes naturally with fire defense) if you want to survive this fight.
At least we don’t have to worry about using a lucky card to double zero experience points…

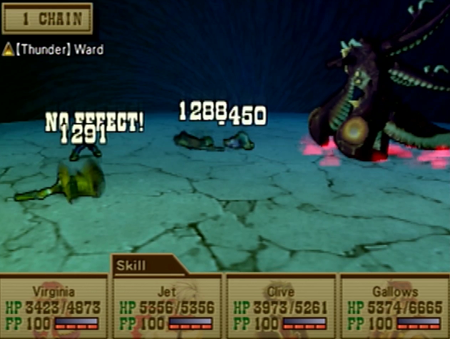
Our previous record holder for HP count was Bad News at 325,000 HP. Ragu has 750,000 HP. So you need to pull out all the stops here. Like, seriously, need. You will not outpace Ragu’s damage output unless you put ‘em in the ground as quickly as possible.
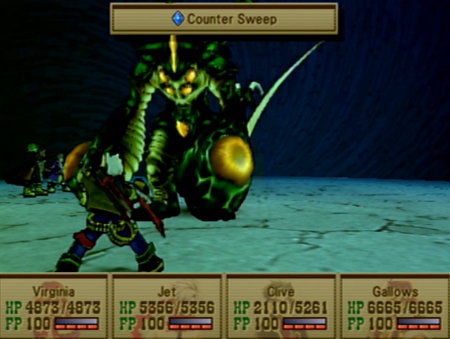
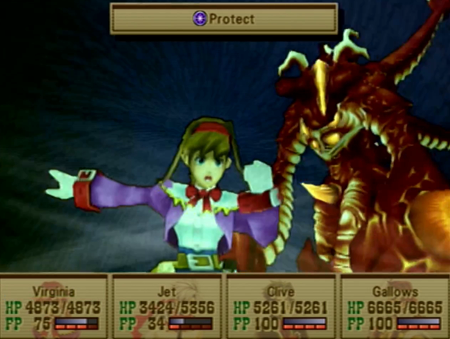
There are no super bosses in Wild Arms 3 that get to attack multiple times per turn, but Ragu will use a dangerous physical counter often when attacked. So make sure anyone attacking is healthy.
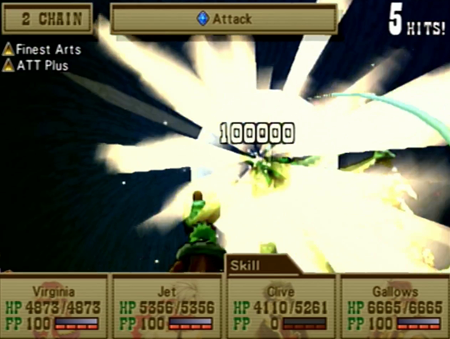
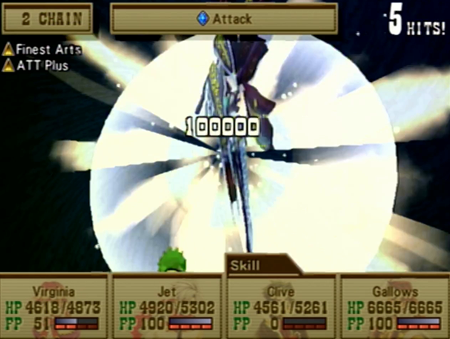
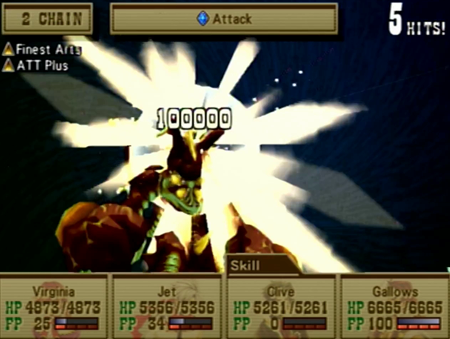
You pretty much must use Finest Arts here. Again, we’ll cover this attack more in the LP when we “for real” earn it, but, for now, recognize that that damage output is legendary.
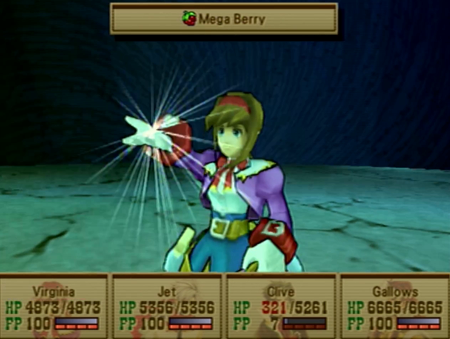
You need to enter the Abyss with a pile of Mega Berries. Maybe I should have mentioned that earlier! Whatever! Abuse the gardening quest to obtain as many Mega Berries as possible, as you might go through 60 here at the Abyss finale. Gallows using healing magic can be helpful, but you need the unparalleled HP restoration of Mega Berries now, and Virginia using Mystic is the only way to apply this to the whole party at once.
Note that you can lose to Ragu and continue like with any encounter, but you cannot lose, continue, and then “run” to go restock. You must complete the entire Abyss and its final boss on one “item run”.
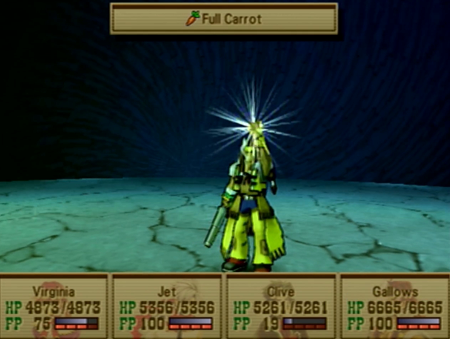
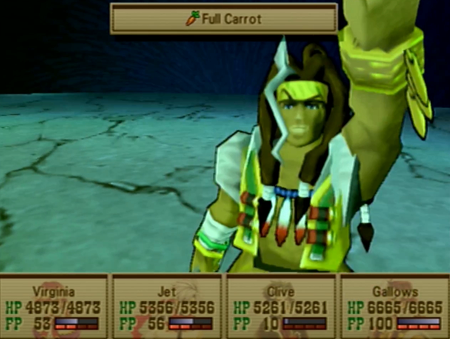
Full Carrots are not 100% necessary, but… okay, that’s a lie. Finest Arts is the only way to make significant damage progress, and Finest Arts requires (and consumes) 100 FP. You can then hope for the best by blowing a few rounds with Clive rebuilding his 100 FP for the next attack (and hopefully not dying on his way there), or just use one Full Carrot, and Clive is back in business and ready to use Finest Arts again. This is another situation where the longer this battle lasts, the more likely you are to exhaust all your resources, so chomping on a carrot or fifteen is recommended.
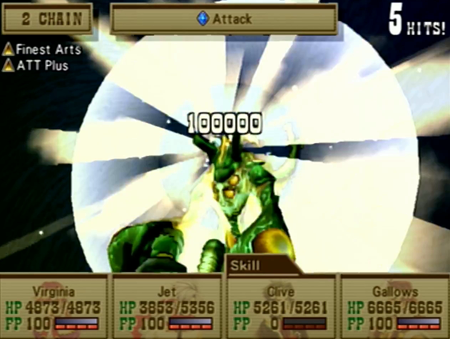
Finest Arts does five hits with an average of 144,583 damage per usage by Level 100 Hypered Clive. It really is your only viable option to knock off all that HP.

And, eventually, you win.
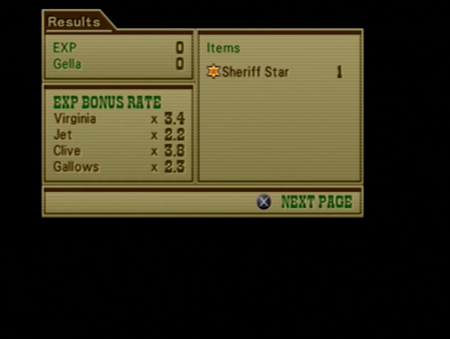
Your reward is the Sheriff Star. This is the usual prize for defeating Ragu in any Wild Arms game, and is generally just there for bragging rights. In previous games, it was just a stat boosting accessory, but equipment works differently in Wild Arms 3, so it works differently, too. Sheriff Star requires 100 points to “wear”, so it can only be equipped if you are level 100…
However, if you are level 100, wear your star proudly, and it will then activate every skill equipped on one character. By properly managing equipment and skills, this can transform one character into an invincible damage god… But what else is there to defeat in a world where Ragu is already dead?
Then again, try to leave the Abyss with your prize, and you will find there is a new obstruction on the first floor of the Abyss.
Once more unto the breach.
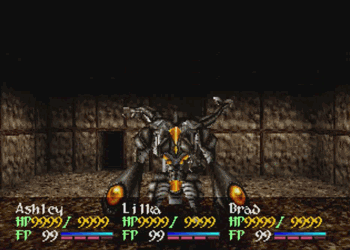
For the first time in a Wild Arms title, Ragu is back from the dead and ready to fight again.
Bro doesn’t even change his name. This is Ragu O Ragla, but madder.
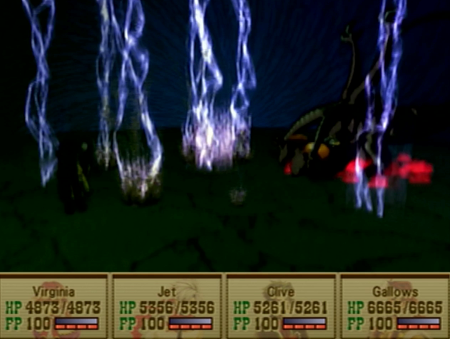
And badder. Ragu’s only hit-all spell during the previous battle was his fire elemental arcana. Now he can draw from the pool of every elemental attack.
And it hits our level 100 party like a truck. At this point, you likely have one character equipped with an item that guards against every element, and, across your party, you probably have a cumulative resistance to every element… just not on everybody. What I am saying here is that, depending on Rag’s choice of attack on any given round, you may be lucky or looking at a lone survivor.
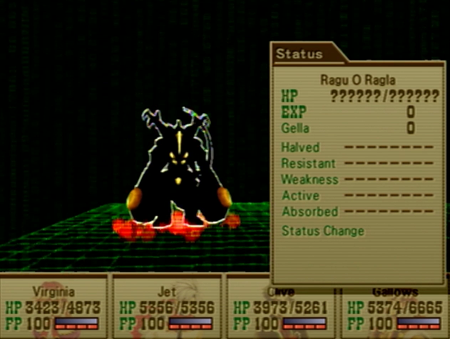
As the final “screw you” of the Abyss, Ragu O Ragla Party Mode has 999,999 HP, the most HP of any creature in the game. Additionally, its stats are solid 999 across the board, only having a comparatively insignificant 160 in evasion (as the game is nice enough to at least allow you to hit the beast). By comparison, the previous Rag had attack stats in the 900s, but only around 500 and 400 for defense and magic defense (respectively). There is literally no way a monster could be more powerful in Wild Arms 3’s battle system.

And its super attack has escalated to One Trillion Degrees. Amusingly enough, this is the best part of the fight, as, if you kept everyone’s fire wards up from the last fight, it is a free, no damage round for your allies (assuming you don’t eat a counter, of course).
So attack when you can, keep your health up, and hope for the best on Raggy using attacks that correspond to your wards.

If Clive is your main attacker (and why wouldn’t he be?) you may want to do that thing where you are always targeting him with a healing item. Keep your offensive line healthy!
A reminder that death is annoying, but also wipes out your FP, so a Clive down requires a Revive Fruit and a Full Carrot to get back in fighting shape.

And then just use Finest Arts, like, a billion times. Finest Arts is even more of a requirement this time, as its final damage output ignores Ragu’s absurd defense stats. It still only does an average of 136,291 damage compared to the previous battle’s 144,583, though. Those earlier hits in the 5-hit chain doing less damage make a difference when you are trying to reach 999,999!
Do what you have to do to have as many Mega Berries and Full Carrots for this fight. This is the only time in the Let’s Play I will advocate for abusing your gardening skills in this manner, as it is the only point in Wild Arms 3 where the game cheats so bad.
This is also maybe the one time in the game where casting as many buffs as possible is a good idea. Ragu at least did not bring a dispel ability to this fight.
I hate when a super boss magnifies the drawbacks of a game’s battle system. There are not any viable options in this fight: ward against as many elements as you can, and use Finest Arts. That’s it. That’s all you can do in the face of the hardest monster in the game.

And, eventually, it ends.

Our reward is an EX File Key. As you have likely noticed, EX File Keys are basically prizes that say “I completed this whole side quest”. So far, in the continuity of this Let’s Play, we have found one for being an effective world searcher, and one for clearing every challenge at Gunner’s Heaven. This is our souvenir for conquering the Abyss.
… That one in the Yggdrasil grove was a lot easier to obtain…
And that’s it! That is absolutely it! The longest, hardest challenge in Wild Arms 3 is now spent (editor’s note: you sicken me).
For anyone anxious to follow in my footsteps, here is what we learned:
· Ration your battles: start with all the Migrant Seals and Booster Kits you can find. Migrant Level 20, 40 ECN.
· Avoid surprise encounters: start with 3 Weather Vanes/4 Eagle Eye abilities
· Be careful of treasure: Maximize your luck, stock some small flowers (for increasing luck), and equip Robber’s Ego to avoid trapped chests.
· Money doesn’t matter: Upgrade your ARMs to maximum, and stock as many purchasable consumables that heal status ailments as possible. There is no use for money in the Abyss, and there is nothing outside of the Abyss that is more difficult.
· Watch your Garden Grow: Bring as many Mega Berries and Full Carrots as possible. Healing items are generally useful throughout the dungeon, and Full Carrots are all but required for the final fight.
· Block out 3-4 hours: I knew what I was doing with a party already at level 100, and it still took me three hours. There is no saving allowed anywhere in the Abyss. Be aware!
· You will need: Ward against as many status attacks as possible for the trip. You need fire rings/fire wards, dark rings/dark wards, Finest Arts, and Attack Plus. Generally try to find a few extra elemental wards, too. You may find all of these items (excluding Comet Star/Attack Plus) in the Abyss, but I wouldn’t count on it.
· Time is a Choice: “Farming” drops on the lower levels may eventually make Ragu easier, but do you want to waste time on potential prizes, or just suffering a longer final fight? After Ragu is down, none of those “useful” skills are required for future battles anyway…
· Just have fun with it: You have a life worth living, and there are people that care about you. Maybe don’t bother with an incredibly boring, abusively lengthy dungeon.
And those are my expert tips for the Abyss! I apparently complete this challenge once every 20 years or so, and… maybe that is too often.

Okay, never revisiting the Abyss ever again. Let’s go cash in our statue.
Next time on Wild Arms: Collecting dragons like Pokémon cards.
[…] Walking around this “bridge” area is a free trip to the abyss (not that Abyss). […]
[…] are considering the final challenges/super bosses. For an easy example, the big boss of the pit, Ragu o Ragala, all but requires a full set of Fire Rings, and it is entirely possible you will have […]
[…] will ever find (in the Abyss, there is the Demiurgos random monster that has a 1% drop rate… but we already covered what a crap shoot that can be…), it is hard to choose who “gets” this skill. Clive and his eventual Final Arts would make […]
[…] preserved are your levels, cash, and if you have a Sheriff Star (you get exactly one for defeating Ragu/The Abyss). As such, it is in your best interest to sell literally all of your items before beating the game, […]