Let’s make some more Wild Arms progress today, April 3, Fate Day. I sought to seek my fate today, so I picked a leaf of Agastia, but all that was written on it was ‘Better luck next time.’ Does it mean the answer was scratched off when I picked the leaf?
Previously on Wild Arms 3: The Abyss has, one way or another, been completed. In the far future, it is conquered forever; but, in the immediate present, we just snagged a Dragon Statue from Floor 10.
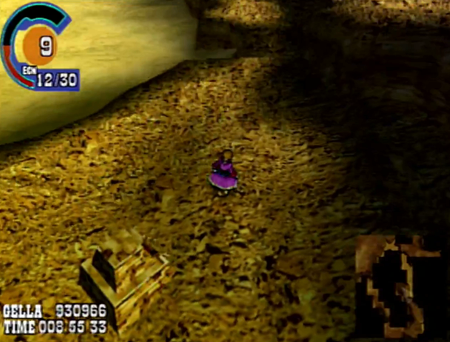
So we leave this awful dungeon that haunts my nightmares.
Try not to get murdered on your way out by the surprisingly deadly local mobs!
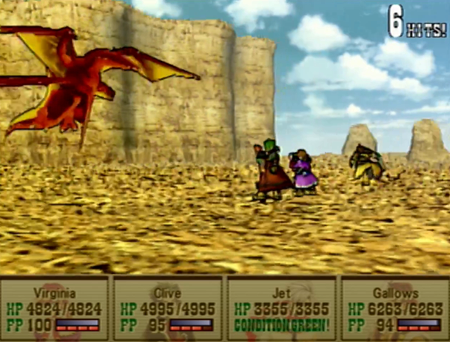
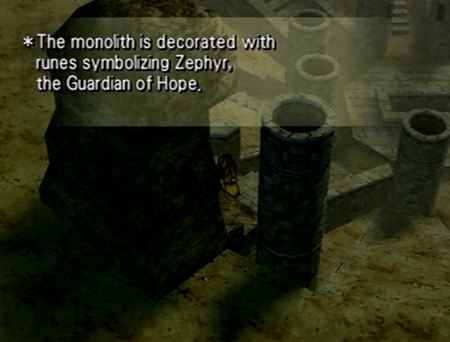
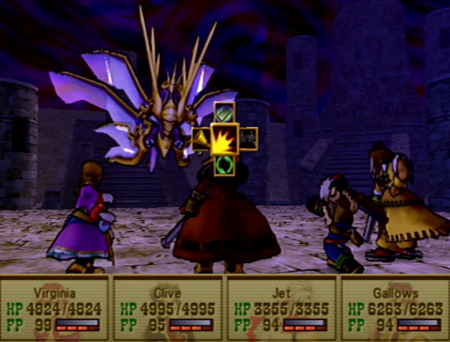
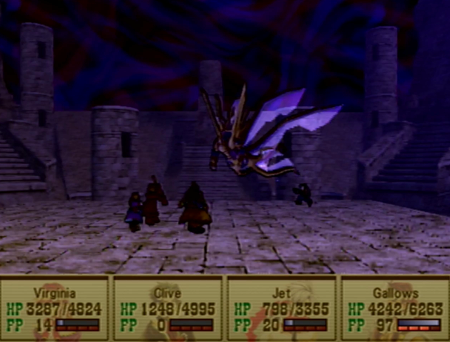
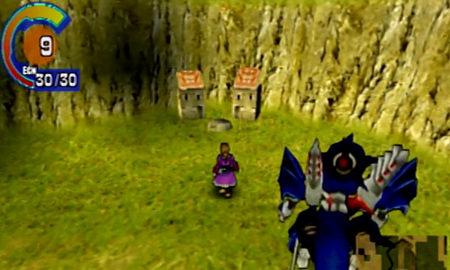
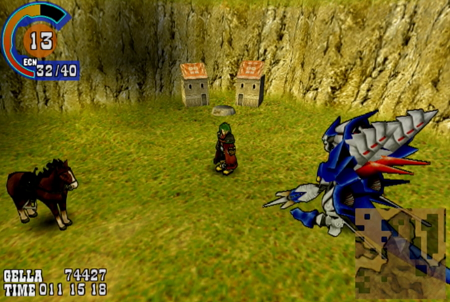
And we are back at the Fallen Sanctuary for our last Guardian Lord (though, amusingly enough, this will not be the last time we visit this dungeon).
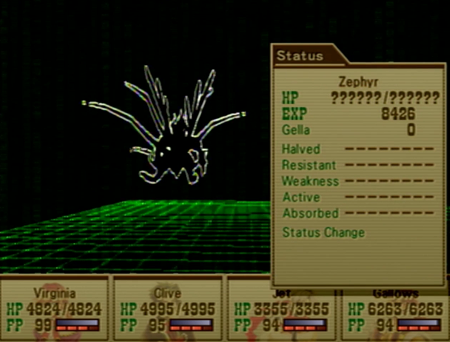
Zephyr is often portrayed as the most powerful of the Guardian Lords, and is traditionally associated with the main character of any given Wild Arms title. In Wild Arms 3, the Guardians are not distinctly “assigned”, but it always felt like weaselly ol’ Jet is the literal “hope” of this world for reasons that will be explained later.
(And for the record, in my mind, Gallows is obviously Desire, affectionate husband/father Clive is Love, and Virginia storms into Gob hideouts with unfettered Courage. Though there is also the interpretation that they are all Virginia, and she showcases all four traits across the four acts of Wild Arms 3.)
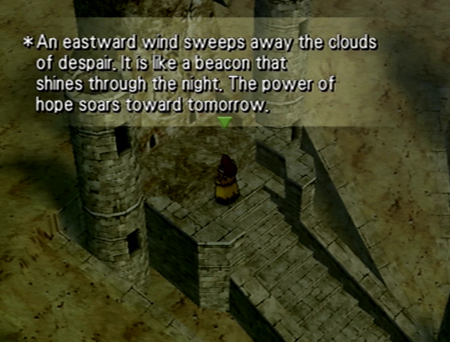
“The visions in your minds are bound together. An eastward wind sweeps away the clouds of despair. It is like a beacon that shines through the night. The power of hope soars toward tomorrow. The bearer of the Ark Scepter’s light must have the strength to fight that which has no form. Fight, and show your strength to Zephyr!”
I really, really feel strongly that the word “West” should be included when describing the West Wind.
Is is weird that "dragons" are distinctly noted as demon WMDs in Wild Arms 3, but the living embodiment of Hope for Filgaia is a dragon?
With the spikes and armor, Zephyr is trying to eat Bahamut’s lunch.
Zephyr is likely the last Guardian Lord you will fight, as his associated adventure is the only one that requires the airship, and stomping through the first ten floors of the Abyss is easily the most difficult statue quest. Probably as a result, Zephyr is also the hardest Guardian Lord battle.
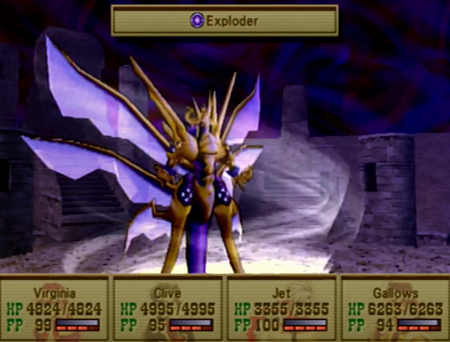
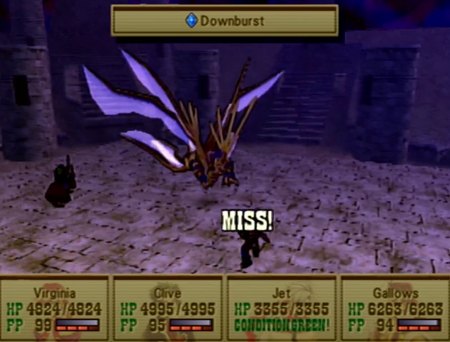
Here is the annoying bit: Zephyr uses a spell/status ailment that is only ever used by Zephyr. There is no protection against it, and there are high odds it will be effective.
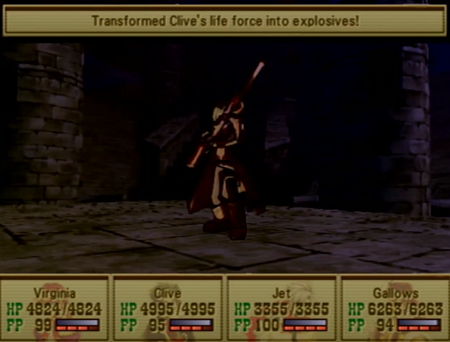
And it turns your insides into dynamite. If you are unaware, this makes your character like the noble shark, a creature that sometimes has its brains and sexual organs replaced with M80s.
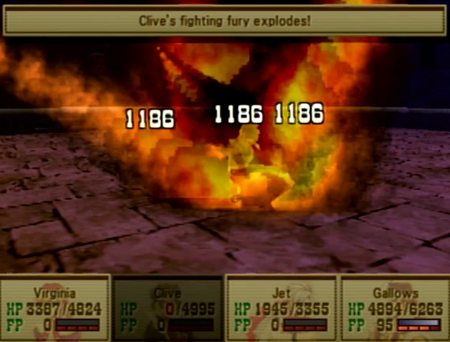
When inflicted with Exploder, a character will explode if they attempt to take any action but defending. This is instant death for the character, and lands “splash damage” equal to their (divided) remaining HP on the rest of the party. It sucks.
And this jerk has an efficient summon attack, too. The rest of the Guardian Lords were surprisingly ineffective in that regard.
However, beyond that, Zephyr does not have much in their bag of tricks. Given there is no defense for Exploder, this battle is won or lost according to whether the RNG decides to be… annoying.
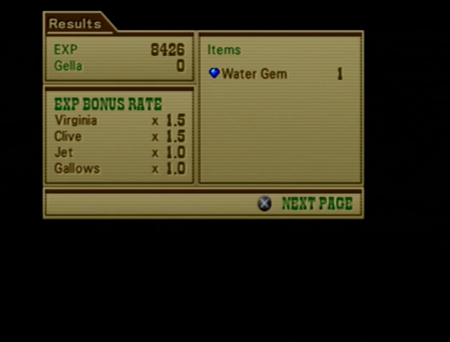
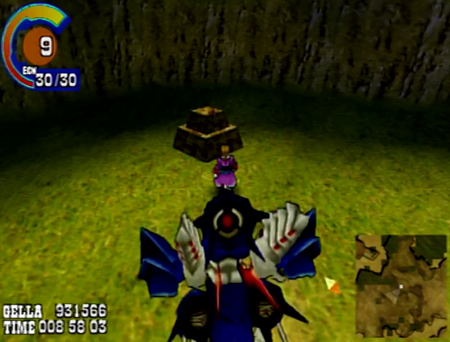
And that is our final Guardian defeated/obtained.

There are twelve Guardians in Wild Arms 3, and every one of your four party members can equip a total of three mediums. Convenient!
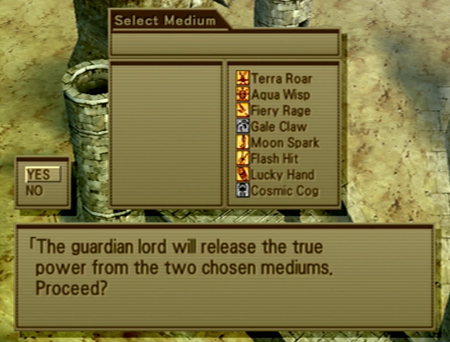
Now all the Guardians are gold, so our “equipment” is as good as it will ever get for stat ups. Note that earning all the Guardians at this stage in the game is optional, but it will be mandatory before Chapter 3 is over.
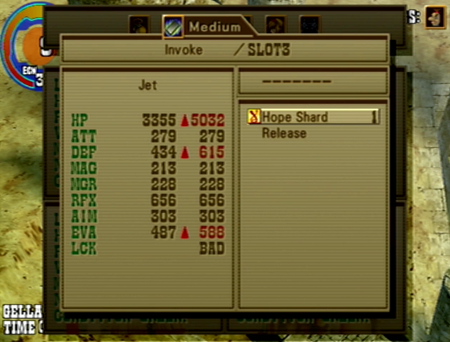
Jet gets the Hope Shard almost by process of elimination. Virginia could also use that extra HP, Defense, and Evasion, but I find she works better with the Love Medium. Gallows and Clive absolutely should use Desire and Courage respectively, as they boost their main attack methods.
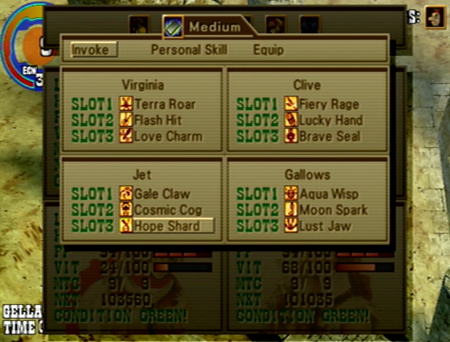
Here is the medium configuration that will work for the rest of this Let’s Play. I have seen debate on exactly who should get what, but I find this setup works well.

New spells! Arc Impulse is a non-elemental attack that is boosted according to how many characters are defending. It can be useful in the unusual situation that everyone else is naturally defending (to reload), but you are otherwise better served by having your party members attack. Exploder is that spell Zephyr kept using to turn us into timebombs, and it is effectively useless with its hit percentage in normal battles.
The two Zephyr prizes here are Attachment and Permanence.
Attachment can confer an elemental property on a character’s physical attack, which can majorly pump up Clive or Jet’s damage output when Virginia/Raftina has already inflicted an opponent with an elemental weakness. The only downside is that Attachment can only bestow an element based on its user’s current equipment (which, in this case, is merely Wind and Thunder), but it can be worth some medium juggling in longer boss battles.
Permanence is the best spell for a country mile. Permanence makes any buff… permanent. Huh. Good naming. This means that spells that protect against status ailments or buff your strength no longer last for 3-5 turns, and will stick around for the entire battle. In fact, you can buff the heck out of a character, cast permanence, and then watch in amazement as they are an invincible juggernaut until victory is achieved. Or they die. Death will disable permanence, too. It once again involves medium juggling, but some players swear by casting buffs with Gallows’s extension ability, then topping it all off with Permanence, and then sitting back and waiting for the monsters to cry for mercy.
So, anywho, Zephyr has some cool spells that work really well with other Guardian Lord spells we have already acquired. An excellent capper to the Guardian Lord quest.

And he puts a lot of heart into his summon attack, too. This deals non-elemental damage to a full party of monsters, and is the best summon in the game for doing not-weakness based damage. Of course, the main reason you want to use a summon attack is to exploit weaknesses…
LP Fun Fact: Of the four Guardian Lords, Zephyr is the only one that killed a monster in his summon example GIF. Raftina heals, Justine uses an instant death attack that missed, and Luceid attacked the weakest monster in the game… but did zero damage, because the humble Balloon monster has a darkness resistance. Funny how that works out.
Aaaaand we’re done. Let’s take a nap back at Baskar.
We have done all the relevant sidequests available at this point in the plot. There are some super bosses stalking about (and we will address them randomly across the Let’s Play as we get a little stronger), but the quest for the Guardian Lords is the real “meat” of the current offerings around the world. With that in mind, we’re going to cross a few “miscellaneous” items off the list.
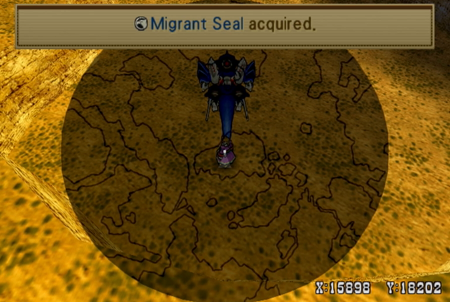
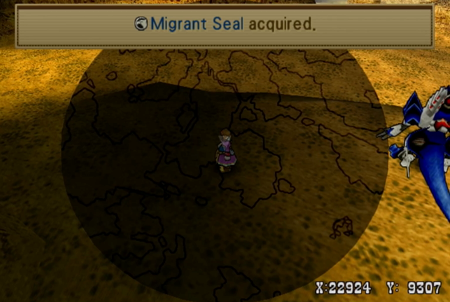
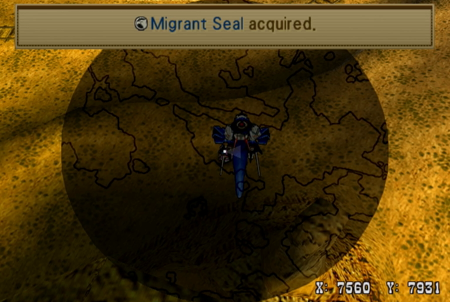
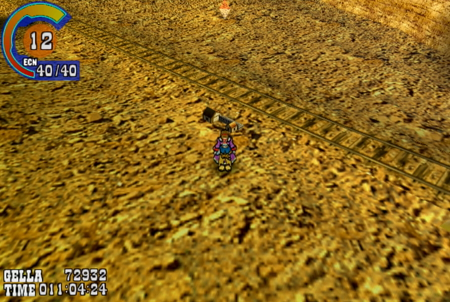
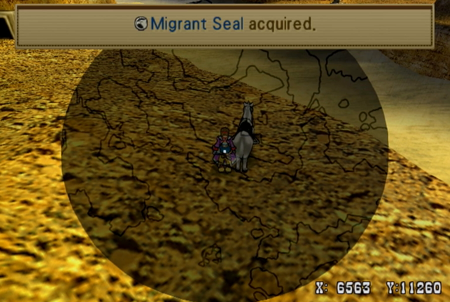
First of all, there are Migrant Seals hiding across the world. You need to have obtained the Item Scope from the Novice League of Gunner’s Heaven to find these at all, but the Item Radar from the next league up is likely the only way you will find these seemingly “randomly” hidden items.
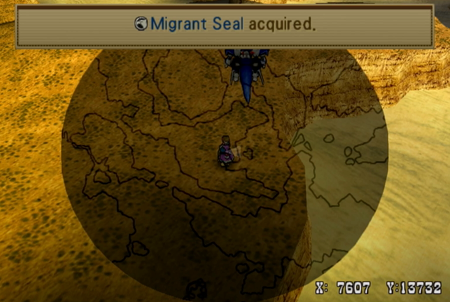
However, the Migrant Seals are always hidden at the same coordinates across playthroughs, so if you check a FAQ or a Let’s Play where coordinates are provided in screenshots (wink wink), you can make a beeline for these essential rewards all at once.
This game has a “real” new game plus mode, but this kind of thing seems like it is built for returning players that want to pump up their Migrant levels as quickly as possible. If you like walking/sandcrafting, this would be the only reason to conquer the first level of Gunner’s Heaven as early as you get your boat.
Still, kind of a weird move to stick such crucial objects arbitrarily across the world.

There is a booster kit, too. The previous two were hidden in the final dungeons of their respective chapters, and the fourth/final booster kit we saw as an Abyss prize last update.
And now for another big sidequest of Wild Arms 3…
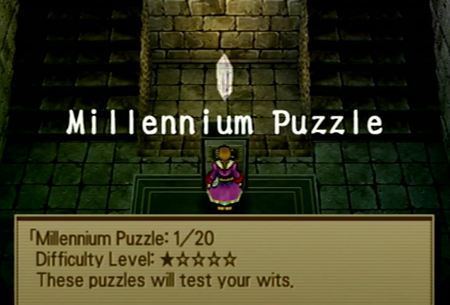
The Millennium Puzzles. There are twenty Millennium Puzzles, and any one of them may be found after you activate the quest by talking to Simon way back at the Luck Shrine. Like the overworld Migrant Seals, they are all in fixed locations, and can be found without any “assistance”, but are much easier to find with the radar (game provided by winning at Gunner’s Heaven) or a FAQ (external source). Also like the seals, you are likely to find one or two on your own when looking for “normal” dungeons or treasures, but you are going to have to go looking if you want to find all twenty…
The Millennium Puzzles are numbered, and theoretically are numbered in ascending difficulty order. That said, their numbers do not remotely correspond with how they may be discovered on the world map, so for instance, Millennium Puzzle #7 (again, of 20) is on an island that can only be accessed via airship, while Millennium Puzzle #19 is a short walk from the third town in the game. They ain’t sequential! Regardless, you should be able to reach literally any puzzle (one way or another) after you have obtained your airship. Before that, you absolutely cannot complete this quest.
And, unlike most of the quests we have seen so far, no part of the Millennium Puzzle quest is ever required. You get some great rewards that absolutely make the game easier, and they are prizes that are not combat/level-gated in any way, but they are not mandatory. I could completely skip every part of this!
That said, here are all the puzzles in video form.
This video does not contain any commentary, it is just me gradually figuring out how to solve these puzzles “live”. If you see the timer in the bottom right jump a bit, that means it took me a damn long time to figure out the solution. Enjoy my dumbassery!
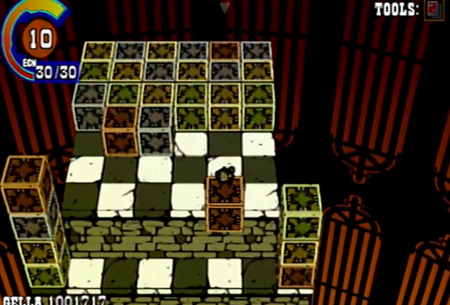
That said, this is a screenshot Let’s Play, so I’ll cover the basics here.
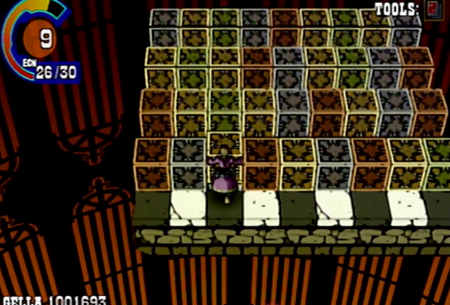
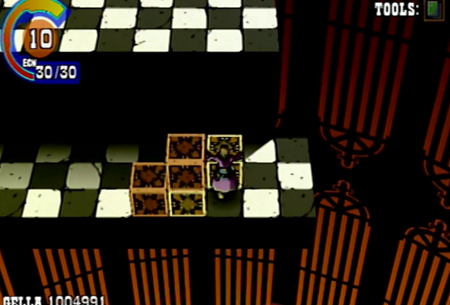
Your main goal is to match all the blocks. We are playing by loose Dr. Mario rules, so any two colors that match will disappear when they are immediately next to each other. Diagonals do not count, but two reds touching a flat edge will then disintegrate to zero reds. There are always four colors: red, green, blue, and yellow. It may just be my own vision, but these shades of yellow and green are a little too similar for my tastes.
You can push and pull blocks as long as you have one block of space to move. Note that you cannot move a block if it has a block on top of it, nor can you do anything to move a block that is “stacked up” and inaccessible. This means that a number of puzzles rely on “clearing” lower blocks so the higher blocks can fall to movable level. Also, you can put a block on top of another block if there are multiple height levels, and that will eliminate like-colored blocks as if they were adjacent.
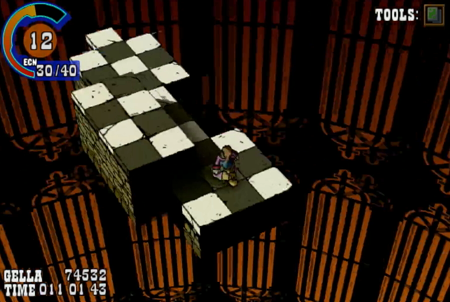
Your goal is to disappear all the blocks. You can push blocks off the edge… but then you’ve permanently lost. Don’t do that. Match all the colors until you have a blank playfield.
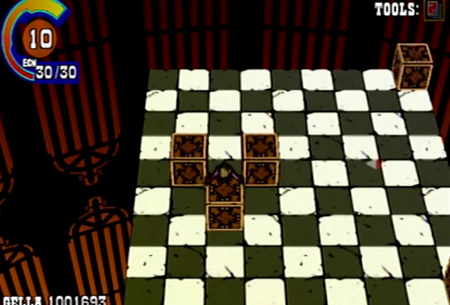
The real trick to solving these riddles is watching your blocks and counting. If you have an even number of blocks on the field, you have to be able to push them next to each other in groups of two. If you have an odd number of blocks, you have to be able to push a block between two blocks, and then eliminate three at once. In this screenshot, matching those three would eliminate three blocks simultaneously… but would leave a lone red block that would make the puzzle unsolvable.
Unless there was another block down there for a pair. That would work!
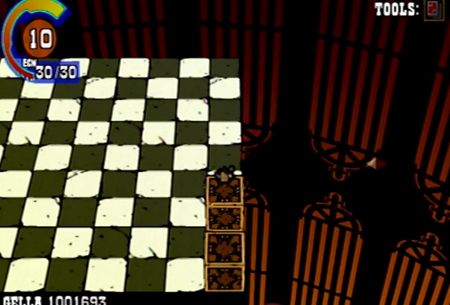
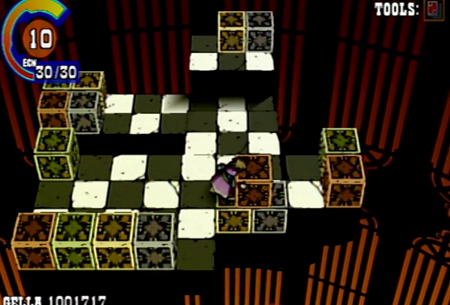
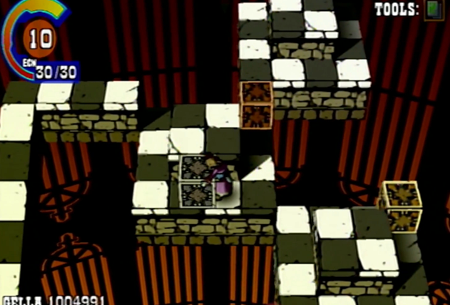
Many of the puzzles initially seem daunting, but are actually pretty straightforward. This puzzle only leaves you four movable blocks to start, so you just have to take it easy with your limited choices. Limited choices are good! They mean you don’t have to get too deep into the “wrong” choices!
Always inventory your blocks to start. This one looks pretty “equal”, but closer examination reveals there are a meager number of red blocks. Keep an eye on any colors that are limited, as you don’t want to solve “everything” only to have one odd red block left over.
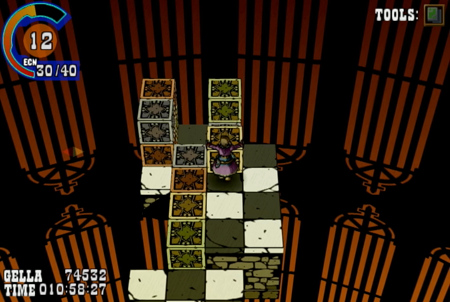
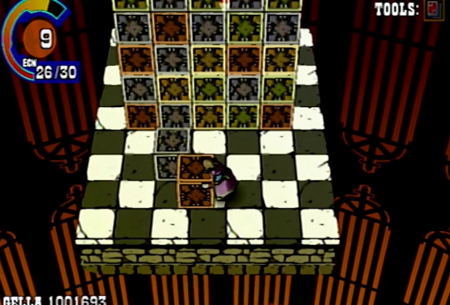
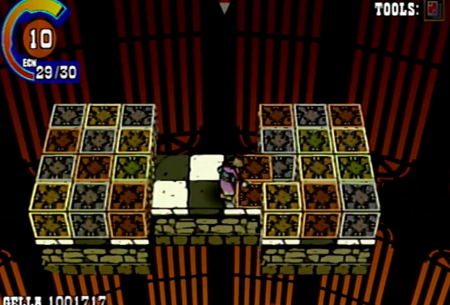
When there are multiple levels, make sure you can return if you plan on dropping to a lower level. In this particular puzzle, you never want to drop down, and the trick is to push blocks from your upper cache down to the two “pillars”.
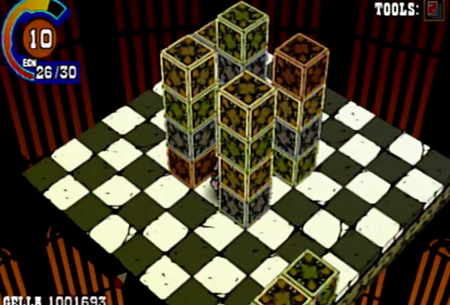
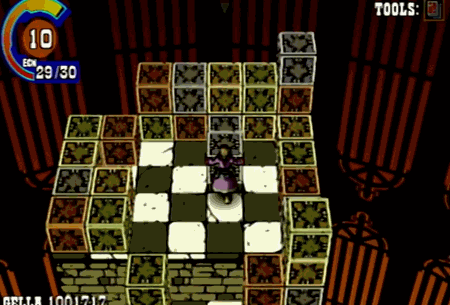
Think outside the box! Sometimes you can use your blocks to make bridges. Note that for this particular puzzle, you have to “plan” your bridges to match the blocks they will eventually erase, because the two-block wide sections mean you cannot swap their locations once they are set.
The later puzzles seem to fixate on giving you as little room to maneuver as possible. Remember that pushing and pulling blocks can “accidentally” erase a block, as if a block is near its buddy for any reason, it will disappear. It doesn’t matter if you were trying to put it somewhere else!
Though chain reactions are fun sometimes. You cannot move while a chain is happening, so there is never a “skill” component to quickly moving a block into place.
You don’t get bonus points for starting chain reactions. This isn’t a competitive puzzle game! But, hey, it doesn’t hurt.
This is Puzzle #18. It is a giant waste of time, and the “puzzle” is mostly navigating the blocks the looooong way through these narrow pathways. You can always throw yourself off the edge of the puzzle to reset everything to start… but if you fall off by complete accident, it resets the puzzle just the same. This can be infuriating, particularly how the “push/pull/grab” button is conditionally the “run” button when you are not lined up with a block…
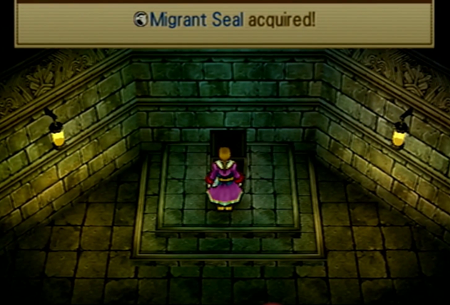
But you will want to do Millennium Puzzle #18, as the reward is an essential Migrant Seal. Each of the Millennium Puzzles offers exactly one prize upon completion. You do not need to complete all the puzzles in order, and you can make a beeline for the better prizes if you know where to look. Many of the early puzzles offer “general” rewards like Level Up Apples or Duplicators. Later puzzles include…
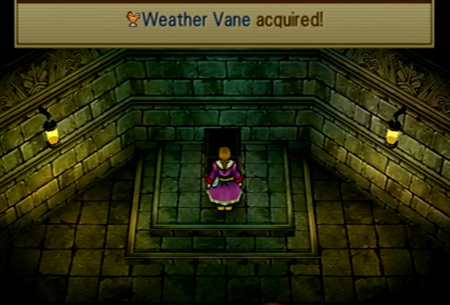
The two remaining Weather Vanes (see their importance in the previous update) for Puzzle #7 and Puzzle #11…
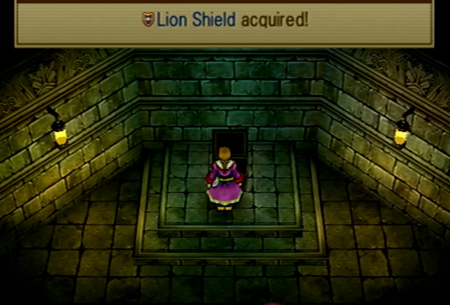
And the unique Lion Shield for Puzzle #13. This grants the ability to defend a weaker party member, which can be great on the HP-flush Gallows.
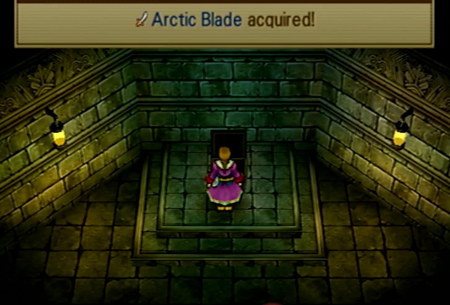
Arctic Blade is hiding in Puzzle #17, and it gives you the counter ability. Combine that with the Lion Shield to transform into the team goalie that attempts to counter every oncoming physical attack.
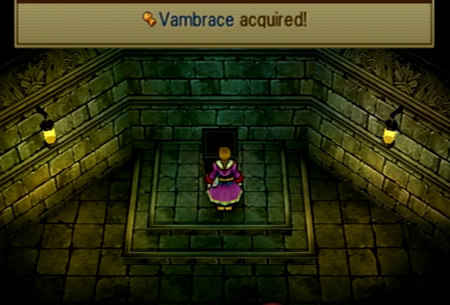
Vambrace is the Wild Arms-significant item you’ll find in #19. It can completely nullify physical attacks randomly.
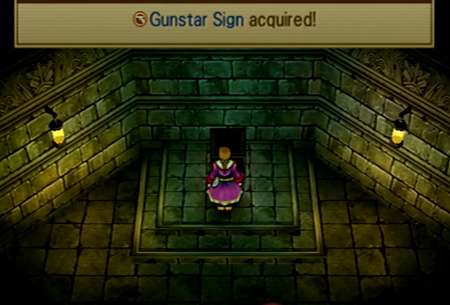
And #20 grants you the Gunstar Sign. Despite the fact that you would expect that to be some kingly item in a gun-based combat system, it just boosts your critical rate. Granted, that is very useful.

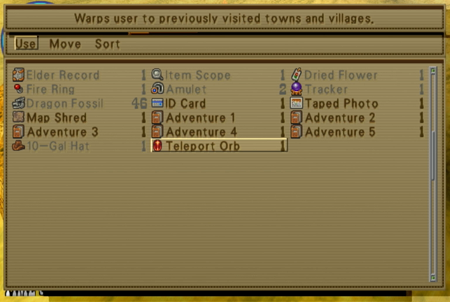
But what you really want out of this quest are the two wholly unique key items. The Tracker of Puzzle #10 is an item that toggles dungeon markers off and on. Do you remember waaaay back in Serpent’s Coils when you could flip a switch that would show you floor numbers and where you had previously been? Well Tracker is a key item that will offer that information for any dungeon. It is great for trying to find lost treasures in earlier dungeons! Though it does have the drawback of not denoting “bombable” or otherwise hidden doorways. Other than that issue, it is great for dungeon exploration.

And Puzzle #14 is so important, I have “do Puzzle #14 first” memorized. The Teleport Orb is an item returning from Wild Arms 2 that allows you to teleport to any previously visited town. You can only obtain this item after acquiring an airship in the first place, but, man does it save some time.

Speaking of the world, I have included a GIF of the world map, and the location of every Millennium Puzzle. Follow the green square!
Note that the map never indicates if a puzzle is solved or not, so if you discover a puzzle, you may as well complete it when you find it. Saves you having to visit all twenty locations again if you are trying to find one you missed completing the first time.

Of course, you do not have to solve every puzzle. But if you do…
Simon will hand over an EX File Key to showcase your mastery. Another giant sidequest down!
Note that the video of "solutions" I made is approximately an hour and fifteen minutes long, and that does not include "travel time", actively finding the puzzles, or the many times I failed because I have a toddler’s object permanence. In general, if you are sitting down to complete every Millennium Puzzle in one go some afternoon, you should probably block out about two hours.
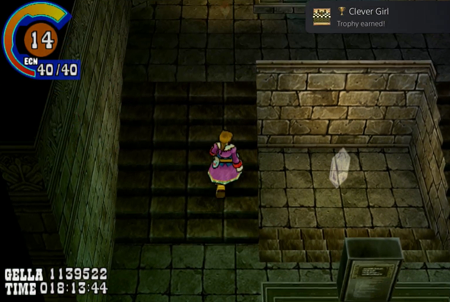
And on the later Playstation editions, if you solve all the puzzles, you get a trophy that compares you to Mr. Pilkington.
So this is a bit of a recursive sidequest update, as you need to “do” what you are going to see here to find all the Millennium Puzzles. This statement will make sense in a minute, I swear.
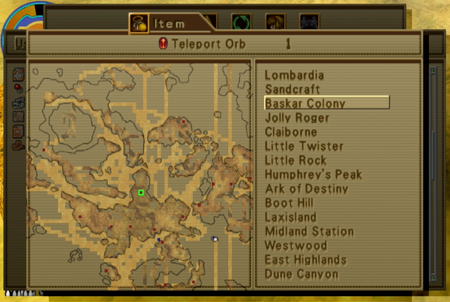
Under normal circumstances, the Teleport Orb is just an infinitely usable item that will take you where you want to go.
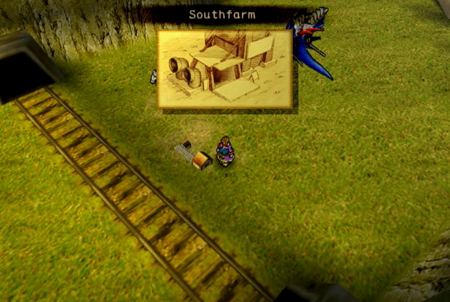
However, if you visit Southfarm Train Station, a thing you absolutely would have zero reason to do once you have an airship…
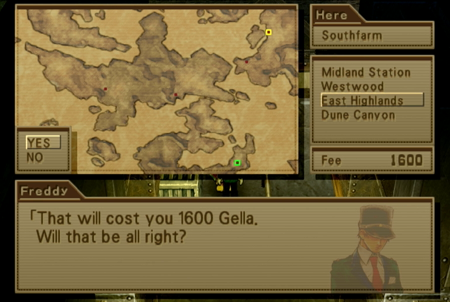
And then buy a ticket to East Highlands, which is technically as far as you can go in a train…
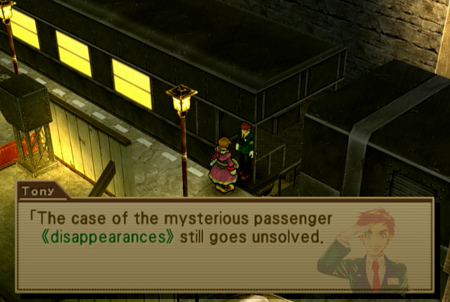
Tony will note something interesting:
“The case of the mysterious passenger disappearances still goes unsolved. If the disappearances continue, I’m afraid we’d have to shut this route down! I hope it stops.”
Apparently people that have been boarding the train with teleportation items have been disappearing. Hey! We have a teleportation item!
I’m sure it will be fine.
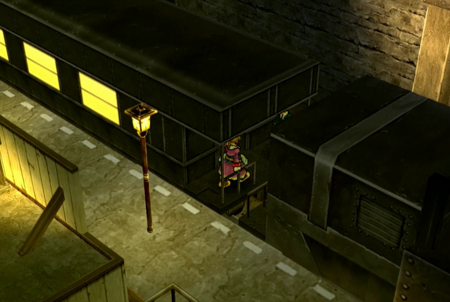
Uh-oh! Bermuda Triangled!
This esoteric quest is technically a reference to Wild Arms 2, where Lilka kept screwing up her teleportation items, and would wind up all over the world (and once at a magic shop that was otherwise inaccessible).
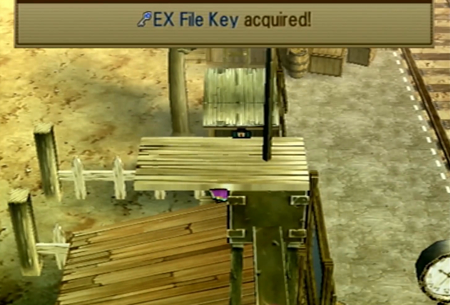
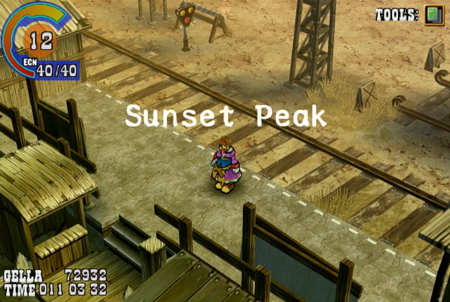
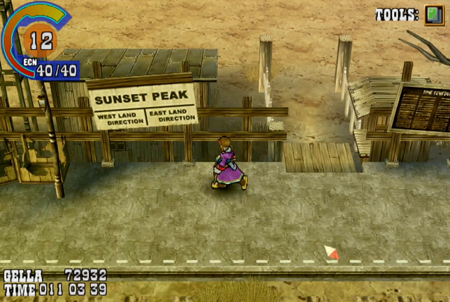
Sunset Peak is an abandoned train station in the middle of nowhere. There are no people here.
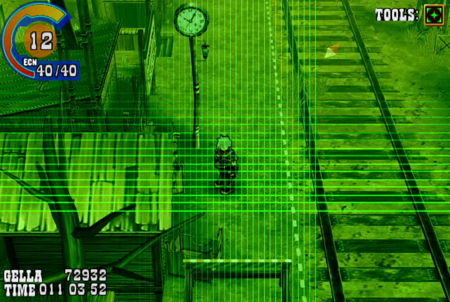
Despite the fact that the radar will claim there are no items…
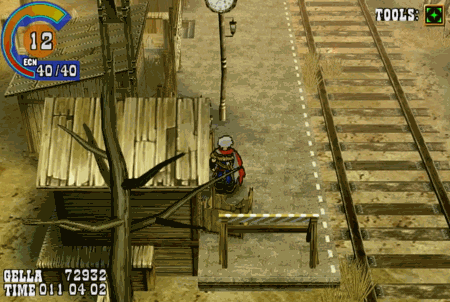
If you run directly into the clock, you will find an EX File Key. There is, like, one random sign or NPC in the world that tells you to run into stuff if you’re ever lost, but I’m not certain anyone has ever found this key “accidentally”. It is a hidden item in a hidden place that is never plot-mandated.
But that is just the auxiliary prize of discovering Sunset Peak. The real reward is that Sunset Peak is stationed in this otherwise inaccessible area that is not available by airship.
Our last overworld Migrant Seal is hidden in this area, and you can only find Millennium Puzzle #20 and Telepath Tower #15 (stay tuned for a future update on that cursed quest) here, too. Given both of those locations are the “last” spots in their respective sidequests (well, mostly last), it is clear this whole site is somewhere intended to be found late in the game.
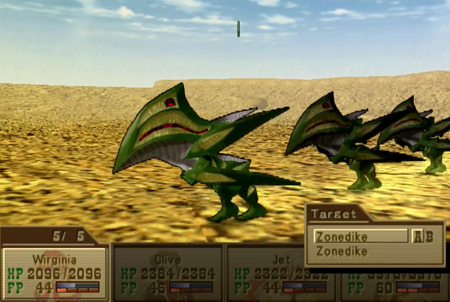
And relatedly, the monsters in this area are especially nasty. These Zonedikes have an ability that will drain your experience/levels. It is a “weak” version of the spell, but it can still be a giant pain.
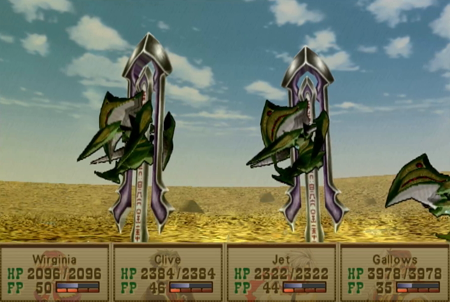
They are also strong against all elements, so they are one of three monsters weak to Dark Luceid. Always find an excuse to use that spell.
You must use a teleport orb to leave the area (as Lombardia cannot pick you up where she cannot land), and you will have to use that same orb if you ever want to return. So solving Millennium Puzzle #20 requires the prize from Millennium Puzzle #14, and we’ll come back for that Telepath Tower later.
And that’s it! We are done with all the surmountable sidequests for this point in the game. We’ll pick up the “real” plot again next week.
Next time on Wild Arms: Let’s get back to remembering the bad times.
[…] We have more details available on that one (and another video!). If you are not using a FAQ, finding all the puzzles becomes a lot easier after you win the coliseum’s Sonar Kit. […]