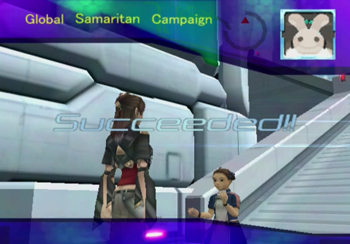
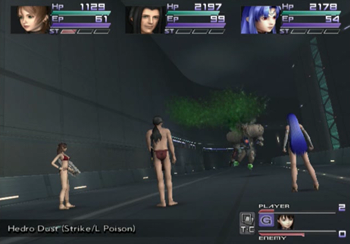
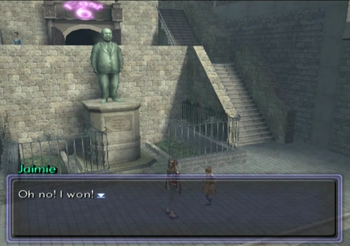
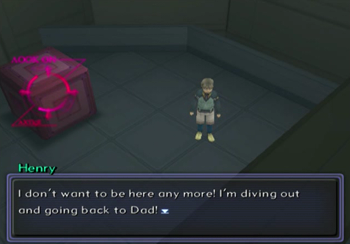
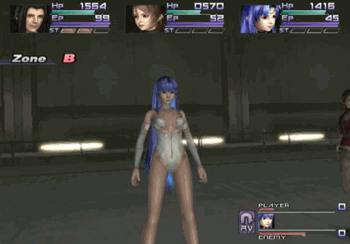
Previously on Xenosaga: We got up to the final boss, but we gave up, because it’s time for…

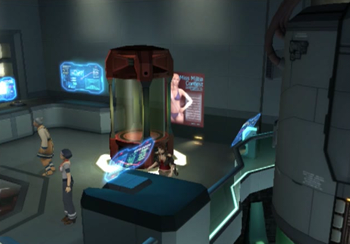
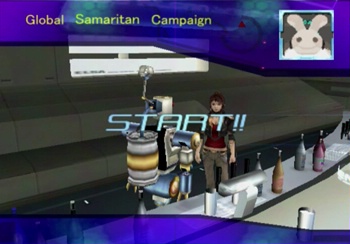
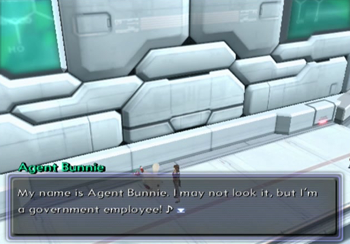
You may recall Bunnie the apparently real rabbit granting Shion the ability to participate in the Global Samaritan Campaign, a contest of sorts that challenges Second Miltia residents to help 36 or so people across the galaxy. Shion is the helpful sort, so she accepted the task, and now we’re going to see how that pans out.
Game talk: Xenosaga Episode 1 had practically nothing that was secondary from the main plot. You could deliver some seeds to Luty, track down some doors, build a robot, fight three optional bosses… and that’s it. Everything else was entirely contained to the primary quest, and once that was done, there really wasn’t much to do.
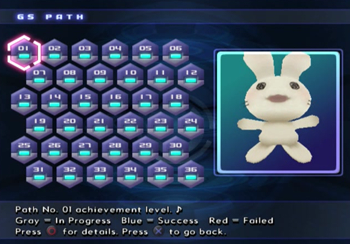
Xenosaga Episode 2 decided to rectify this oversight with sidequests on top of sidequests. Many of these sidequests are available from the first moment you have free time (give or take), and the game practically shouts at you at key points in the game, “Hey, maybe you want to go explore or something?” And, with 36 numbered sidequests, you know your exact progress, and can review your quest log at any time to check your development. This really seems to be an example of the developers seeing a clear flaw in XS1, and improving it for the sequel.
But… is it any good? Let’s take a look.
Note that almost all of these sidequests take place in four main locations: Second Miltia (Town), Kukai Foundation (Town), The Durandal, and The Elsa. Most of the other areas in Xenosaga Episode 2 are ignored, save a sidequest or two. And, while we’ll note where it happens, we rarely revisit old dungeons. That’s… not a bad thing.
Quest 1: Jacqueline
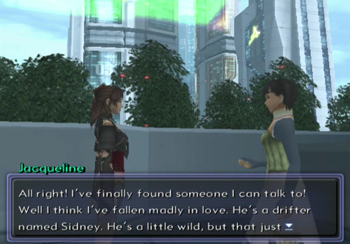
This quest was already obliquely mentioned a couple of times during this LP. Jac would like you to deliver a letter to her lover over at the Kukai Foundation. Let’s not think too hard about this quest that takes place roughly two millennia after the advent of email.
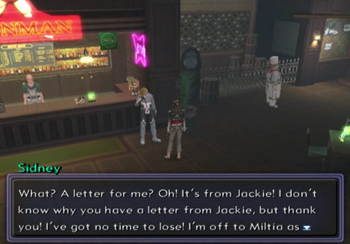
It’s pretty simple to find Sidney at the bar in the Kukai Foundation. All you have to do is talk to him, and we’re done.
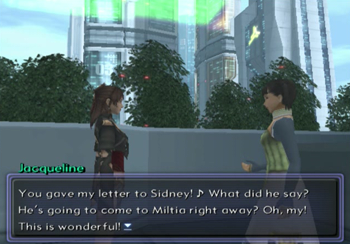
Head back and Jacqueline is elated. Job well done!

Our reward is the Psycho Pocket skill, essentially Xenosaga Episode 2’s Steal command. This skill is practically essential, so it’s good that this quest is easy to find and complete.
Sidequest Verdict: Inoffensive.
Quest 2: Sikes

Sikes is a berserk postal clerk, and he’s laid up for some reason. He’ll only offer this quest if you’ve already completed Quest #1.
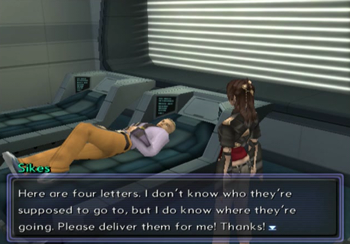
Shion receives four letters, each has a different card suite on the envelope (club, diamond, heart, spade), and you have to discover the NPC that desires each letter.

Spade letter goes to Enrico at the Second Miltia Publishing Company.
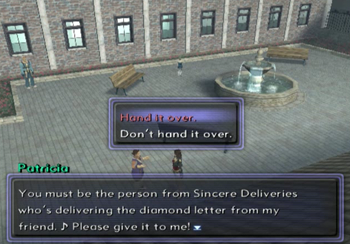
Diamond heads over to Patricia at the Kukai Foundation.
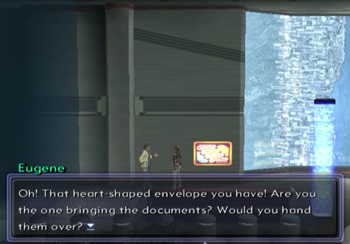
Heart is for Eugene aboard the Durandal.
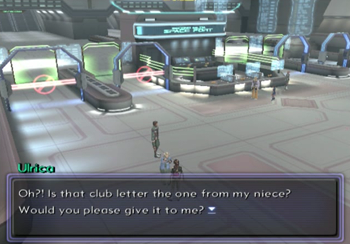
And Club goes to Ulrica at the Miltian Space Port. This last one can be tricky, because there’s a kid running around the same area that is just arbitrarily accepting all correspondence. If you give the kid the letter, guess what? You fail.
Yes, a number of these sidequests have fail conditions, and if you do the wrong thing, there’s no recovering, you failed, the end. This means you not only fail the sidequest in question, but also the final sidequest that requires absolute perfection. So, uh, don’t save if you fail. General tip.
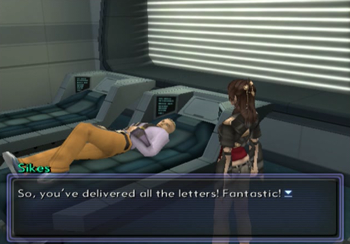
Deliver everything correctly, though, and Sikes is so excited he almost thinks about maybe getting up.
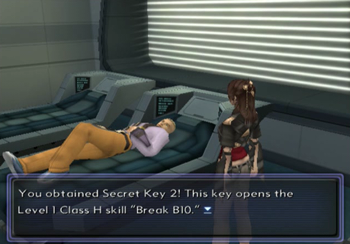
This unlocks the skill Break B10, which raises the probability of breaking your opponent. Note that you’ll get this prize even if you fail, but that failure will impact your “score” later.
Sidequest Verdict: Finding each of the NPCs is just a matter of talking to everyone in the universe. There’s a false positive with that kid, and the only real determining factor there is whether you randomly talk to the kid or the old lady first. So… I’m ranking this one as “kinda sucks”.
Quest 3: Sheila
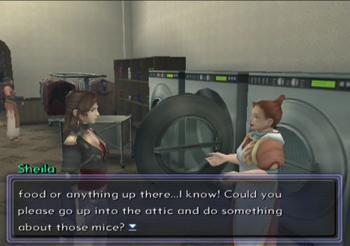
We’re done with quests that are at all related for right now. Sheila, the owner of the Laundromat at the Kukai Foundation, has a rodent problem. Want to do something about that?
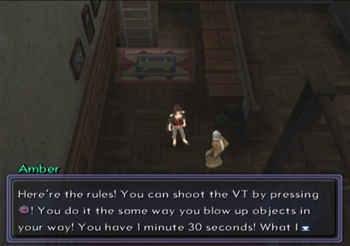
Head up to the attic, and Amber will give you a brief bit of Xenosaga Lore that explains how you can’t legally kill animals in the XS universe due to the Species Preservation Act, but you can knock ‘em out but good with something called a VT. Your job is VT ten mice within 1:30.
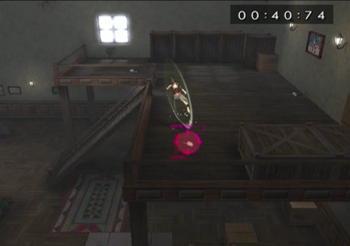
The mice move around (of course), and there are a few environmental puzzles that will help with the mission. For instance, one mouse always dashes away when you get close, so you have to drop a piece of wood to block its exit.
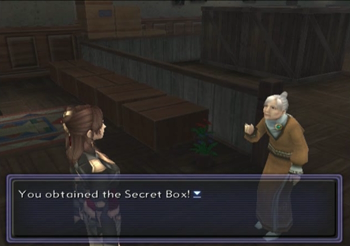
You’re allowed to fail this task; you’ll just get another chance. When you eventually triumph over a pack of defenseless mice, you’ll be told to return to Sheila with the secret box. Oooooooooh secret box.
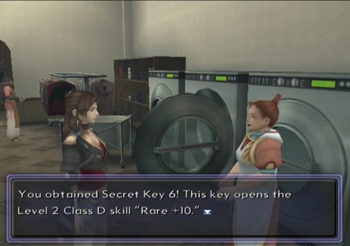
Your reward for this mission is a skill that increases the rare drop rate.
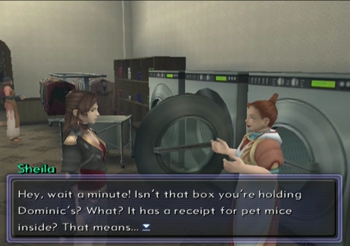
And the revelation that Sheila’s son bought the mice in the first place. Oh, those darn kids.
Sidequest Verdict: This one is fun, forgiving, and doesn’t take all damn day. Good job, XS2, keep it up!
Quest 4: Spumoni
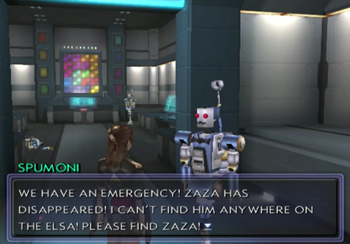
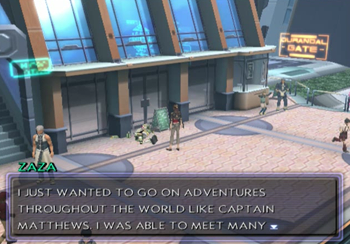
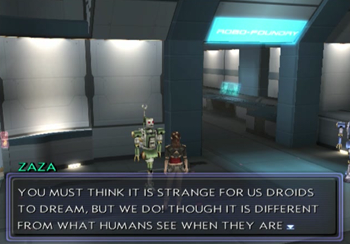
Welcome to Hell! Zaza the droid has gone missing, and it’s your job to track him down.
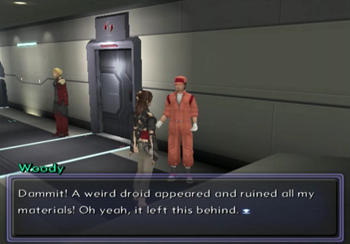
Spumoni mentions something about Zaza wanting to see where Shion works, so our first clue comes courtesy of Woody, a janitor at Vector. He leads you to…

Mika, a girl at the Fishing Pier at the Kukai Foundation. She’ll send you to…
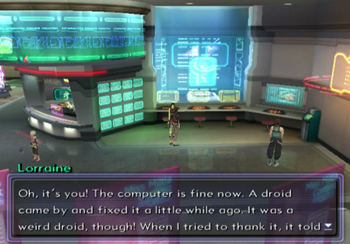
Lorraine, at Second Miltia’s publishing company. Then it’s off to…

Sean, aboard the Durandal. From there…

Yolanda, back on the streets of Second Miltia. Then it’s back to…

Jessica, above King’s Garage at the Kukai Foundation. Not done yet…
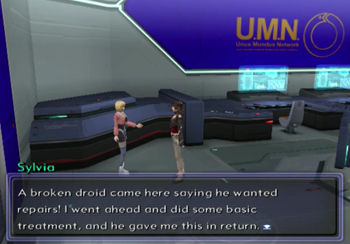
Sylvia at the UMN Building is next, and she bears the dubious distinction of being the only sidequest-related reason to return to the UMN Building. Finally, we head back to…
Kukai Foundation to find Zaza broken at the Kukai Foundation Dock. Zaza will only appear if you’ve spoken to each of the previously mentioned people in order, and each person will have given you one of Zaza’s Clues.
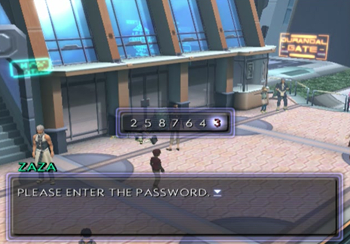
These clues each have a number, and, if you enter them in order, you’ll save Zaza.
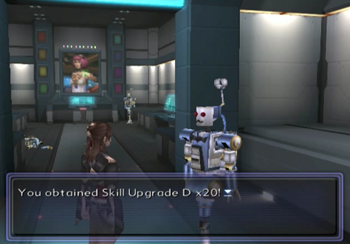
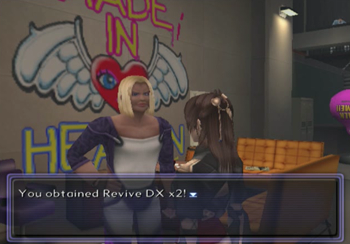
Return to Spumoni to receive your reward of a bunch of Skill Upgrades and a Revive item.
Sidequest Verdict: This one is horrid. Each step gives you a clue as to where to go next, but you are constantly ping ponging back and forth between Second Miltia and the Kukai Foundation, which takes forever. Technically, the most time efficient way to complete this sidequest would be to do it while you’re performing other tasks in each area… but then you’ll probably forget where you are in the quest chain. And it’s not like any part of this quest is hard, it’s just… tedious.
Quest 5: Jun
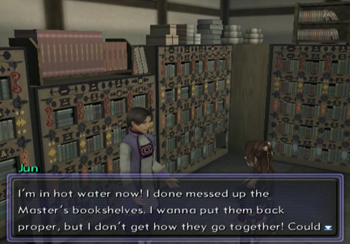
Jin has an apprentice named Jun (awesome), and Jun messed up Jin’s bookshelves.
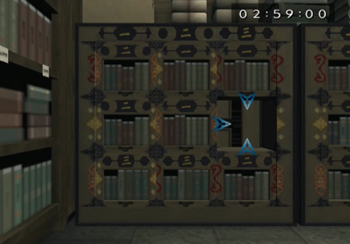
You have three minutes to complete one of those sliding tile puzzles that are so popular with five year olds and ten hour car trips. Or was that just my childhood?
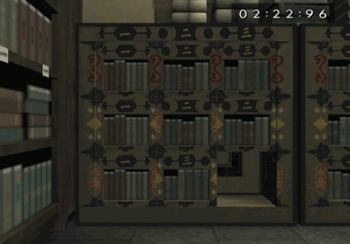
You’ll notice that each of the tiles have a (probably Japanese?) symbol and unique border, so it’s pretty easy to tell where everything goes. Jun must be an idiot.

Your reward is Decoder 01, which will unlock a red door on the Dammerung. It leads to Boost augmenting skill.
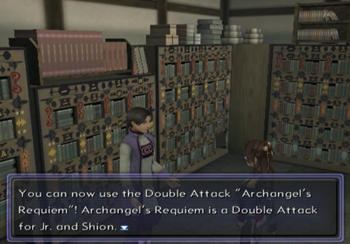
And you get our first Double Attack sidequest reward. A number of sidequests reward these Dual Techs.

Ya know, like this one.
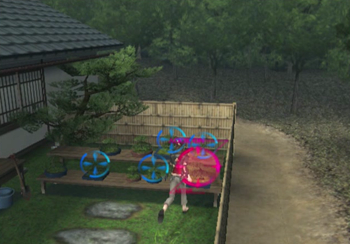
Oh, and while we’re performing the only task that requires a return visit to Jin’s home, let’s destroy his bonsai collection. This is for Shion’s childhood!
Sidequest Verdict: Quick ‘n fun. Another good one.
Quest 6: Chop
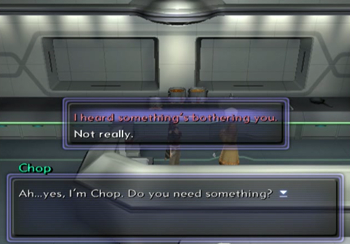
Chop is the chef at Moby Dick’s Café.
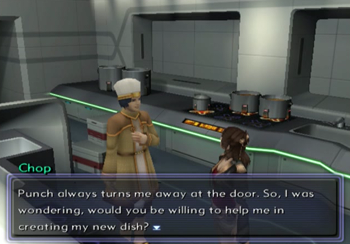
Chop would like to be better than her (?) master, Punch, so she needs some help with a new recipe.

You have 1:30 to follow Chop’s instructions and hit the right button. You will fail if you press the wrong button, but you do not fail if you take forever to actually tap the button. Take your time, follow the prompts, and you shouldn’t have any problems.

If you do fail, you don’t fail the quest, you may just try again. Succeed, and Chop makes the best curry ever, or something.

Decoder 17 will unlock that first Segment Door in the Omega System, and it grants the skill Best Ally, the “reraise/Life3” skill of Xenosaga. That should come in handy.
Sidequest Verdict: Another one and done. This one might seem a little annoying at first, but, at worst, you’ll only waste a minute and a half on a failed operation, so not too bad.
Quest 7: Miguel
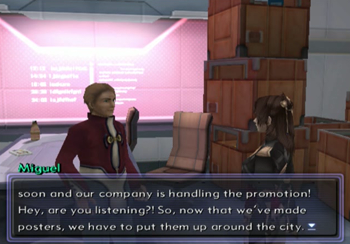
Miguel wants you to hang posters all over Second Miltia. Do you have what it takes to survive in the fast paced world of advertising?
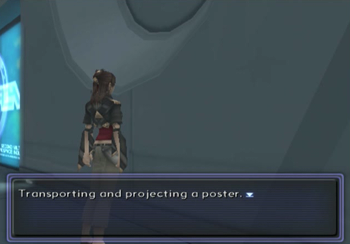
“Solve” this puzzle by running around and hammering the circle button every time you see a flat surface to hopefully get a “hang a poster?” prompt.
Amusingly, a number of poster locations are inside people’s homes. Shion knows no shame!
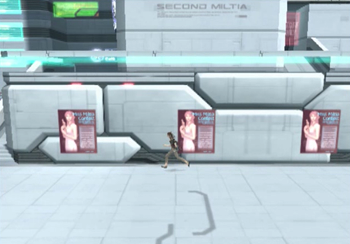
One nice thing about this quest is that it never resets. You may only hang posters within the bounds of the Second Miltia Town (none of the other Second Miltia areas, like Vector, are allowed), and you can complete this quest as soon as it’s available, but you can leave and come back later if you can’t find the right walls on your first go.
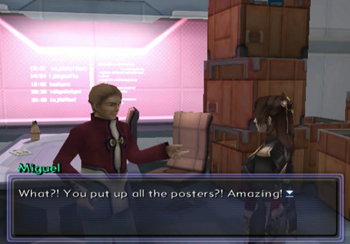
You won’t receive a notice when you’ve hung all the posters, but you can return to Miguel to see if you’re done yet. I am.
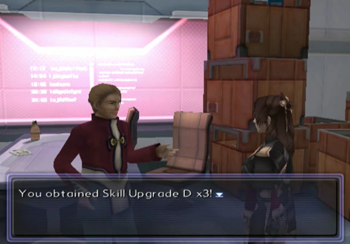
Kind of an inconsequential reward…

Oh, but we get Junior and MOMO’s swimsuits, too. Reminder: all swimsuits increase skill point acquisition, which is great for the postgame.
Sidequest Verdict: It’d be nice if you had some indicator for your progress, but, otherwise this quest isn’t too bothersome.
Quest 8: Lizzy

We’ve got to repair an electrical malfunction? Well, I guess Shion did build a robot…
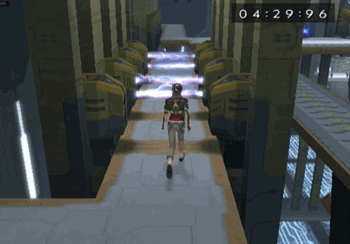
We’ve got five minutes to get through a sort of obstacle course.
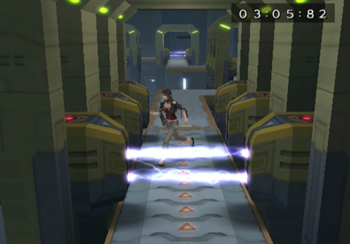
There are traps and conveyer belts… Mario Bros. this ain’t.
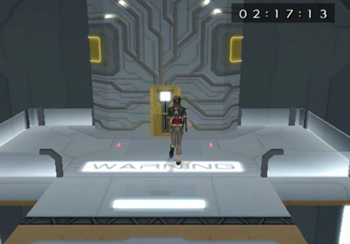
Made it with a full two minutes to spare. Not bad.
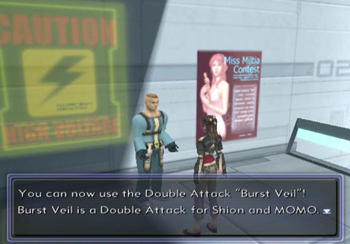
Our reward is a double tech for MOMO and Shion.

Burst Veil isn’t an offensive double tech, it just drastically increases the party’s evasion for a few turns. It would be a lot more useful if it didn’t require like three turns of setup.
Sidequest Verdict: I guess there had to be one “traversal challenge” sidequest in here. Xenosaga Episode 2 is not an action game, but I guess this is an alright diversion.
Quest 9: Maple
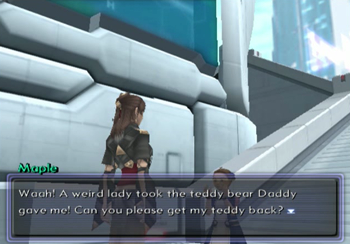
The easiest quest in the game involves a stolen teddy bear.
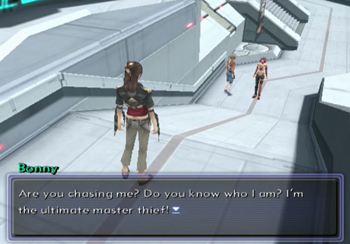
The very next screen, mere inches away, reveals the thief: Bonny, a strange lady with oddly endearing goggles.
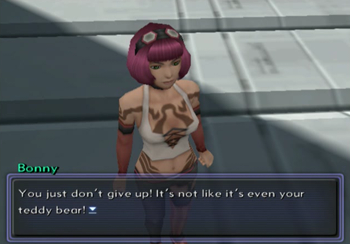
“Chase” Bonny a little further…
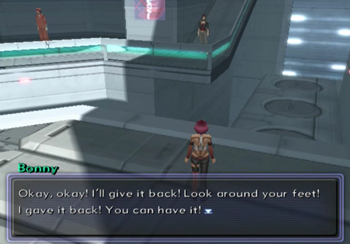
And she’ll give up the bear.
Bring it back and you’re done.

This reward feels… disproportionate.

Another double tech down.
Sidequest Verdict: This whole quest feels like a weird afterthought. You can complete this one in all of a minute. I’m not going to complain about that.
Quest 10: Luty
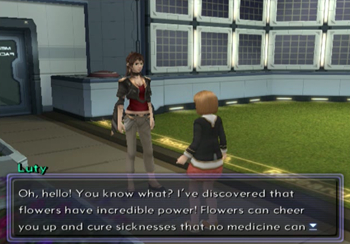
Xenosaga Episode 1’s original sidequest returns with… exactly the same thing.
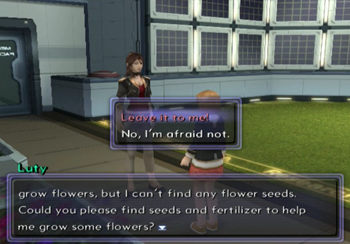
Luty is talking now, and she wants you to do the same flower quest as last game. Let’s get to it!
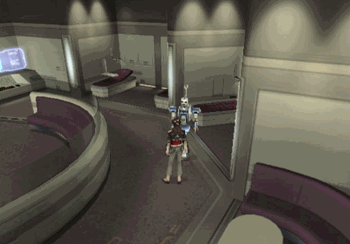
Okay, I know this is a looping gif, but this is basically how this works. See, you’re supposed to collect four helpings of Hyper Fertilizer from four different NPCs across the universe. Except… once you start the quest, there’s no flag to stop the fertilizer distributors from spreading their fertilizer around, so you can just find one (like this bot on the Elsa), and talk over and over again to get as much as fertilizer as possible in one go.

The “trick” to this quest is that you have to choose the right seed to please Luty. This bot (conveniently in the room next to the one in the last shot) holds the Spring Seed, which is exactly what you need. I believe the only indicator that this is the right choice is one NPC located in the Kukai Foundation.
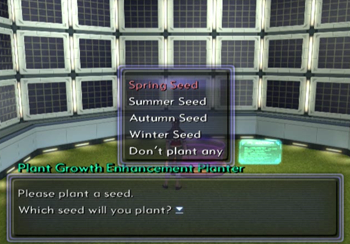
Anyway, Spring Seed, remember that. Otherwise you fail permanently.
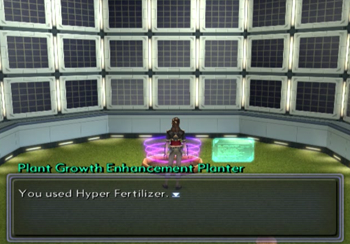
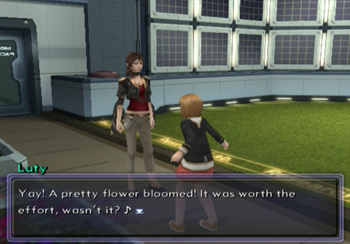
And four Hyper Fertilizers later, you’ve got a pretty flower.
Technically, with the glitch in play, this is one of the easiest quests in the game.
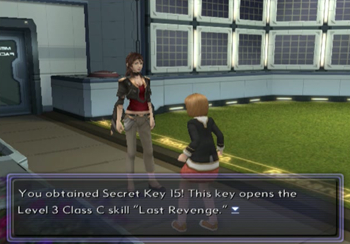
Last Revenge is a nice skill that allows a character to survive a mortal blow with one hp, and then counter boost into the action of your choice. Only works once per battle, though.
Sidequest Verdict: This one only loses points for taking forever to activate (mainly because the solution is only available on the Elsa, which only becomes accessible after the Ormus Stronghold). Everybody and their brother is talking about seeds and hyper fertilizer, and, gah, Luty, are you ready yet? Otherwise, a pretty easy quest… If you know what you’re doing.
Quest 11 Ciaran
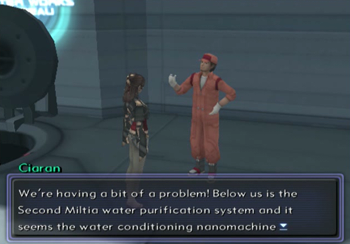
Oh how I hate this quest. There are problems in the sewers! Clearly, Shion is the only gal for the job.

First of all, this sewer area is a maze. It is very deliberately constructed to be as confusing as possible, and that couples poorly with the quest itself.
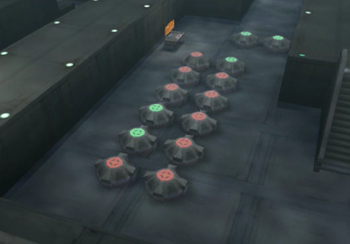
There are eight sections to the area. You must destroy all the filters that are labeled with a red mark, and avoid damaging any filters labeled green.
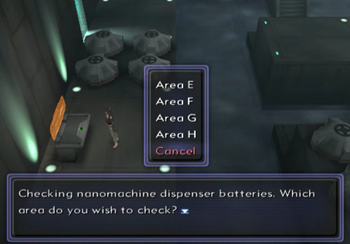
Each section (labeled A-H) will only “light up” when you investigate the section using a computer terminal. You have to figure out how each section corresponds to your current location, memorize the filters to destroy, and then carefully only target the red filters. If you blast a green filter, it’s game over (or at least quest over).

Given the shape of this place, this task can easily take a half hour or longer. If you have a strategy guide with a map handy (does such a thing exist?), things will go much easier. Relying on your own memory, though, might be an issue. And if you get bored and leave, the entire puzzle will reset, so… don’t do that.
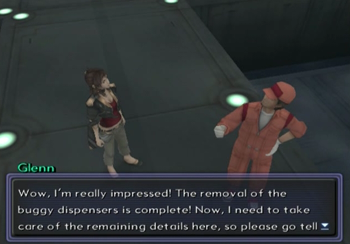
At least the quest automatically identifies when you’re done, and you’re booted back to the victory screen.
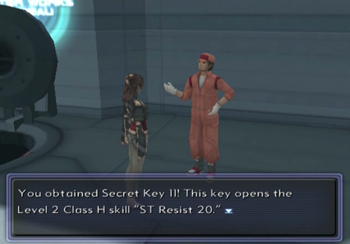
The reward here is a skill that boosts your status effect immunity. More importantly, completing this quest unlocks the next quest.
Sidequest Verdict: This might be my most hated sidequest. Everything about this one seems to be designed to slow the player down: the sewers are a veritable maze, the sections aren’t geographically sequential, and you’ll lose all your progress with the slightest mistake. The whole thing is practically an insult to the player.
Quest 12 Ray
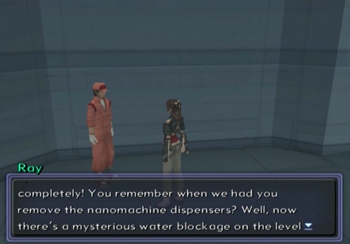
Back to the sewers!
First of all, to even start this quest, you have to renavigate the sewer maze from the first sewer quest, and that’s exactly as pointless as it sounds.
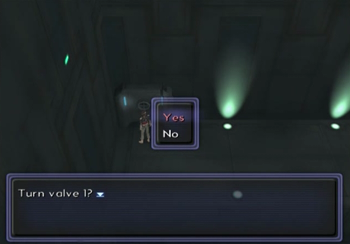
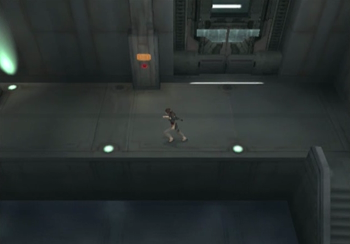
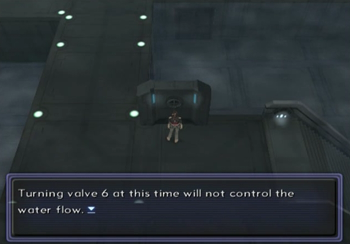
This quest is vaguely Water Temple-esque, and that’s never a good thing. You have to release a number of valves to raise and lower the water level to make progress toward Valve 6.
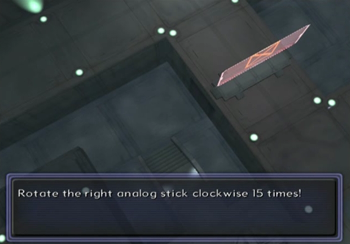
Each valve involves rotating your analogue stick a whole bunch of times. You have to move kind of slowly, and each proper rotation will be rewarded with a rotatey sound. It takes a little getting used to, even for someone experienced in the art of piledriving.
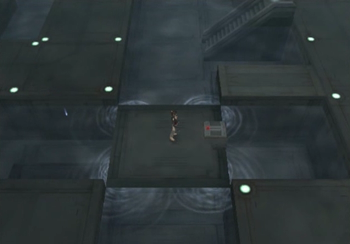
This “maze” isn’t too bad, because the valves must be turned in order. So, don’t worry, you can’t get stuck or have to restart because you raised/lowered the wrong valve.
Pretty straightforward.
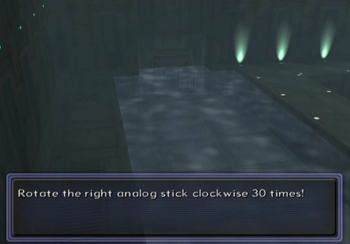
The final valve requires a lot of rotating.
Once you’re done, head back topside (revisiting all sewer mazes, but in reverse!), and you’ll get Safety Level, another skill that will keep you at 1 HP after a fatal blow.
Sidequest Verdict: Not as bad as its predecessor, but still a giant waste of the player’s time. There’s a nugget of a good idea with the whole “water level maze” concept, but this one is just a rote exercise in walking from place to place and rotating your controller. Does any of that sound fun?
Quest 13 Glenn
Last trip through the sewers! Something else is wrong, and Shion is just a regular gal that should own an orange jumpsuit.
We have to cut across all the sewer mazes again. Wooooo.
Finally, just beyond the end of the previous quest, we can unlock this door to find…
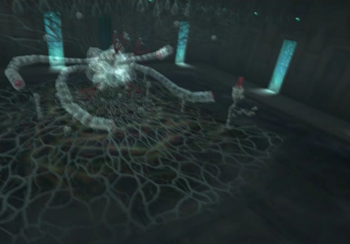
A giant freaking gnosis!
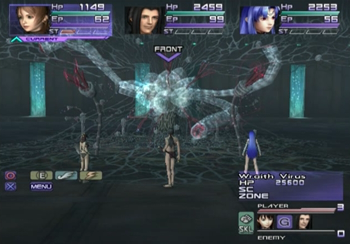
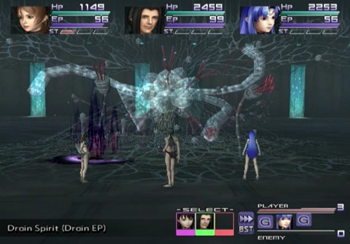
Hope your party is prepared for battle (because there wasn’t much to indicate this would be one of the rare combat-based sidequests). Wraith Virus is the main enemy here, but its two tentacles on either side are independent monsters, too.
The tentacles are very good at draining your HP and EP. Keep an eye on that.
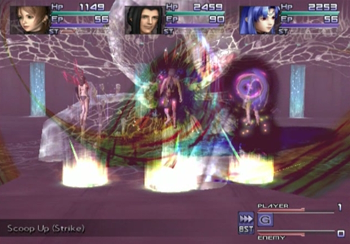
Wraith itself will mess you up. This sidequest is only available after completing the game, and you can use Wraith here as a ruler to gauge how prepared your party is for the other optional bosses. If this guy is a problem, you’re not going to get very far. Wraith does not have a break zone, but it is weak to fire, so chain a bunch of fire attacks on this creature, and hope for the best.
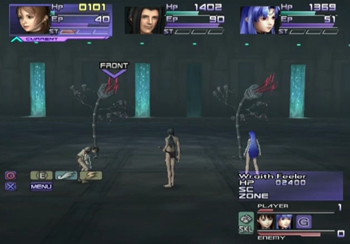
The stupid tentacles will respawn if you spend any time on them during the battle proper, and they’ll even stick around after Wraith goes down. Luckily, they don’t do that much damage, so they won’t outlive their master for very long.
Once the battle is complete, you can walk aaaaaaall the way back to claim your prize.
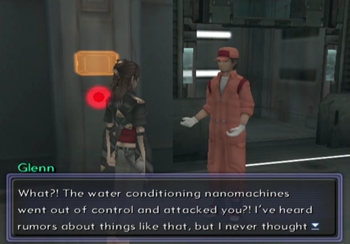
Nanomachines? Gnosis? Whatever. Tell it to Kojima.
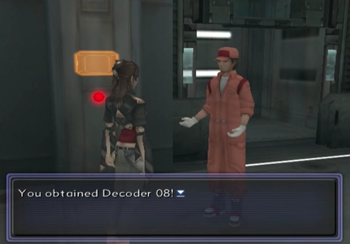
Decoder 08 sounds like a lame prize for this series of inordinately annoying quests, but this key will eventually unlock the final piece of a certain super fighting robot, so it’s worth your trouble (and, as far as I’m concerned, entirely mandatory).
Sidequest Verdict: This quest itself isn’t too bad, but the fact that the previous two turds are a prerequisite is kind of a bummer. Also, it would be nice to have a little warning that a boss battle more difficult than the final boss was hiding down there.
Quest 14 Kate
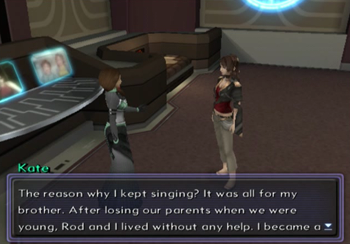
This is Kate. Every day she wears the same thing.
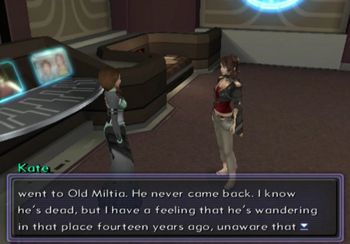
Also, she thinks her brother has become an angry ghost. Shion can relate. Guess we should go to Old Miltia to check on that.
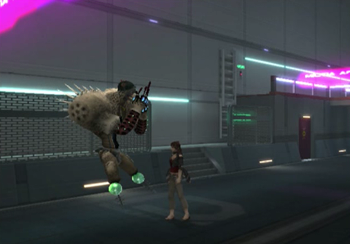
Head to the Encephalon, revisit Old Miltia of the introductory area, and you’ll eventually find this completely unique gnosis.
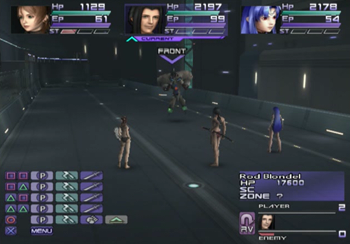
Rod Blondel (this is literally Kate Blondel’s brother’s name) is another battle.
Rod is particularly fond of poison attacks, and seems to carry that status effect with a number of moves.
Otherwise, Rod is pretty frail, and he’s weak to a host of elements, so he shouldn’t be much of an issue for even a swimsuit-clad party.
Yay! Jewelry!

Yeah, uh, we kinda killed your brother’s ghost in a computer simulation. We’re a little bit concerned about the ramifications of that.

Hey, an Experience Bonus skill. Always good.
Sidequest Verdict: A simple little battle mission. You’re pretty much given directions on where to go, and the battle isn’t too hard, but kind of interesting. And it subtly reinforces the whole “gnosis are restless spirits” thing that isn’t actually addressed in the plot proper. Not bad.
Quest 15 Mallory
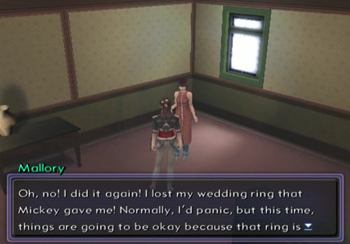
Remember this woman from XS1? She’s lost her wedding ring again, and Shion has to find it again.
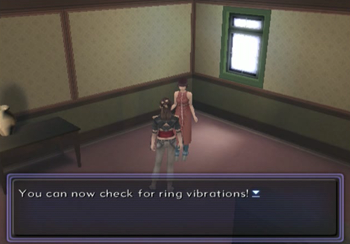
This starts a weird little quest. While within the Kukai Foundation, your (real life) controller will vibrate a particular sequence near certain areas. The idea is that Mallory’s ring vibrates at a precise frequency, and you’re supposed to find the object that matches. Basically, this quest relies on you properly matching the vibrations.

Of course, if you know where to look, you can just find the ring immediately. It’s hiding in a corner of the Laundromat.
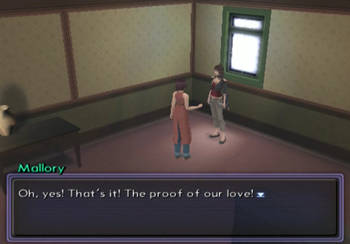
You can fail this quest by finding a ring anywhere else in the Kukai Foundation. Like other fail-possible quests, you’ll still get the loot, but it’ll be a black mark on your GS report.
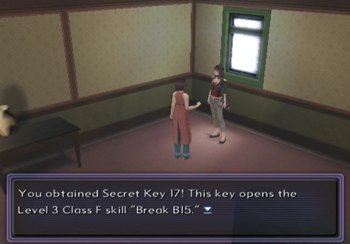
Your reward is Break B15, basically an upgraded version of the skill from Quest #2.
Sidequest Verdict: Nothing too complicated here. The vibration-based treasure hunt is a keen way to squeeze every last bit of gameplay out of that dualshock. Remember the rumble holes in Ocarina of Time? Good times, good times.
Quest 16 Margoyles

Margoyles is looking for an old music box.
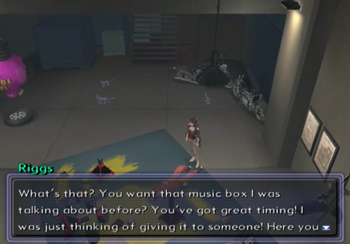
Riggs over at King’s Garage has the music box. He talks about having a music box well before this quest can be activated, so if you’ve been paying attention at all, this one is pretty easy.
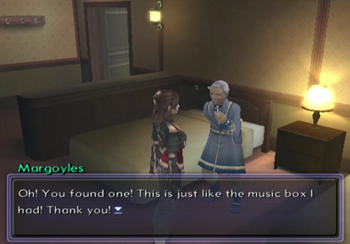
Here ya go. The end.
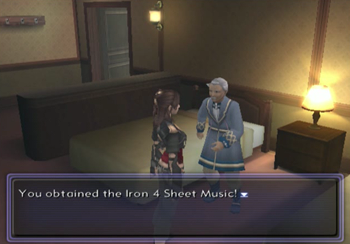
You’ve got a victory mark for completing this quest, but the reward is just some sheet music. Any way we can use this to our advantage? Maybe there’s a dragon somewhere that is really weak to a particular song? No, that would be stupid.
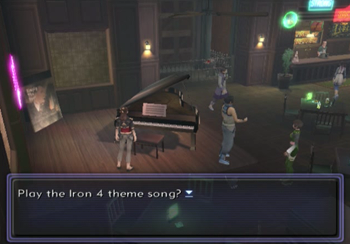
Ah, here we are. Play the song on the piano at the Kukai Foundation Bar, and…

A panel will slide away, revealing a Red Segment Door. This door holds a robot piece, so hooray, and whatnot.
Sidequest Verdict: Another quest that feels more like an afterthought than anything. Talk to two people, the end. I guess it’s amusing that the reward itself is a sort of miniquest, but that’s the only notable thing happening here.
Quest 17 Bonny
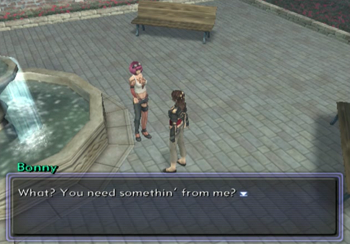
Bonny will only appear if we complete Quest 9 and another quest that comes later. Weird that this quest is so out of order.
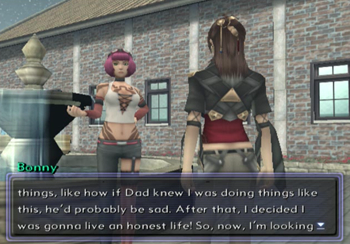
Anyway, Bonny wants to go straight and get a real job, but she has no idea how to do it. She wants to work at the Kukai Foundation Bar, but she needs a uniform and a guide to manners first.
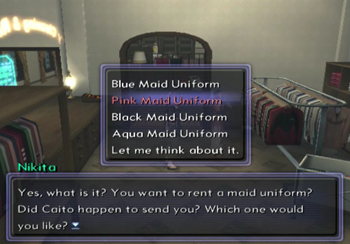
Talk to a few NPCs, and you’ll find that the Laundromat rents clothes. Talk to a few more NPCs, and you’ll find that the owner of the bar has a fetish for pink maid uniforms. Whatever floats your boat, dude.
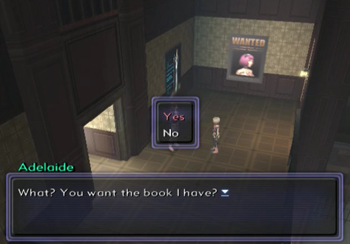
And Adelaide here, standing in front of a Bonny wanted poster, has a guide to proper manners. You can also pick up an entertainment guide from another NPC. Don’t do that.
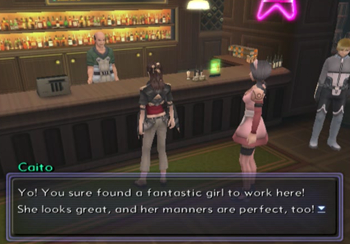
If you grab the manners book and the pink maid uniform, you succeed, and Bonnie gets the job. Choose another color or book, and you fail. Incidentally, I assumed the joke about this bar from Xenosaga Episode 1 was that it was intended to be a gay bar, but now XS2 reveals the proprietor has a thing for maids. I don’t know what to believe anymore.
Anyway, we get a dual tech whether we pass or fail. If this were a modern Persona game, this is also where Shion would earn a maid costume.

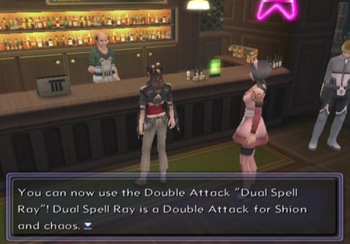
And previously independent and successful thief Bonny is stomped beneath the boot of the patriarchy.

This Dual Spell Ray is for you, Bonny.
Sidequest Verdict: I’m not liking these quests that can be failed because you spoke to the wrong NPC, but at least the “choice of color” part screams “there is a right answer”. And this quest can be completed without having to hop in and out of the Elsa sixty times, which is a plus.
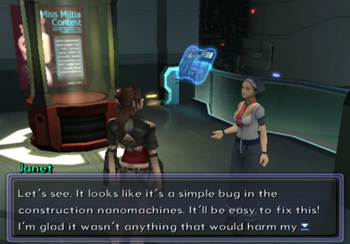
Quest 18 Janet
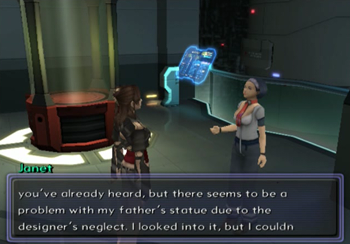
Janet, the Assistant Scott to Other Professor, has a problem with the statue in the Kukai Foundation. Hey, didn’t we destroy that thing last game?
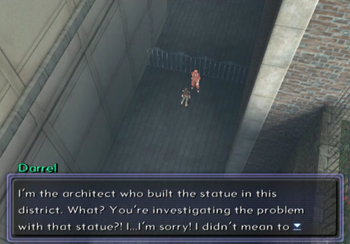
Darrel the engineer is easily found in an alley of the Kukai Foundation. Darrel doesn’t actually appear until this quest is started, so, if you’ve been over the Kukai Foundation sixty times at this point thanks to other sidequests, you’ll notice his appearance immediately.
Go back and talk to Janet, and you’re done.
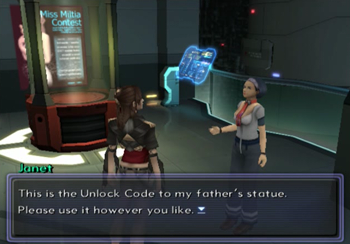
Your reward is the unlock code for the statue. Like the Margoyles quest, this means a trip back to cash-in the reward.
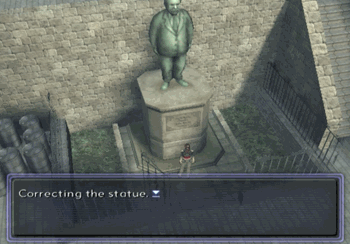
Neat! I hear Stalin’s Tomb has a similar feature.
The key to this door is available from a Realian in the park area of the Durandal. Unlock the door, and you’ll gain a skill that cuts EP cost in half. This isn’t as important in XS2 as XS1, but it’s still pretty nice to have.
Sidequest Verdict: Another simple one. Just kinda there.
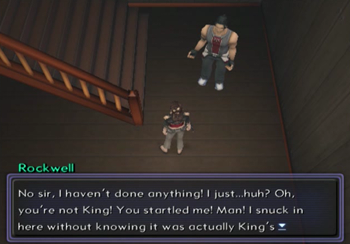
Quest 19 King
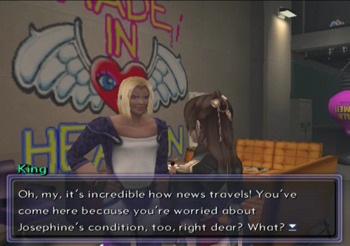
King’s cat is sick. WE NEED TO SOLVE THIS PROBLEM IMMEDIATELY.
Oh, hey, guess King and the boys converted Pink Bug into a punching bag between games. I approve.

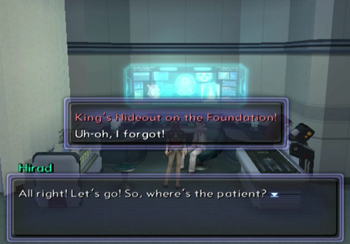
Anyway, head back to Second Miltia, and tell Hirad the doctor to go investigate the cat.
He takes a little convincing, because, as we established earlier, doctors in the Xenosaga universe are Jin-lazy.

I’m pretty sure there’s a joke at the expense of trans individuals here, as King is an effeminate man, and his apparently male-but-female-named cat experienced a hysterical pregnancy, but… I can’t figure out the punch line. I don’t know what’s going on here, but it feels vaguely mean-spirited.
Anyway, we get a couple of phoenix downs for our trouble.
Sidequest Verdict: Talking to two people is hard!
Quest 20 Kramer

Time for some good ol’ fashioned manual labor. Shion is the viper, and she vill vipe the vindows.
You’ve got two minutes to rotate the analogue stick against a series of windows. This is very similar to the valve release nonsense earlier, and you have to rotate the stick rather slowly. Like with the valves, you’ll hear a sound every time you do it correctly.
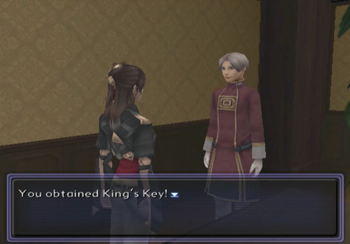
This one might take some practice, but once you have it down, you’ll win King’s Key.
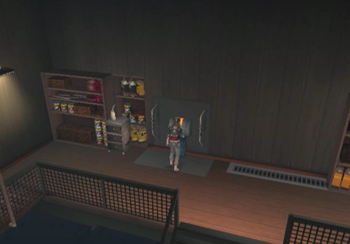
King’s Key unlocks that same secret passage in King’s Garage from XS1.
Amusingly, the programmers didn’t code a real “door” in this area, so you have to speak to this guy to “teleport” in and out of the passage.
Follow the hallway and you’ll obtain another Skill Upgrade set. Simple quest, simple reward.
Sidequest Verdict: I’m pretty sure this party is better suited to saving the universe than maid services, but whatever. It beats sewer maintenance.
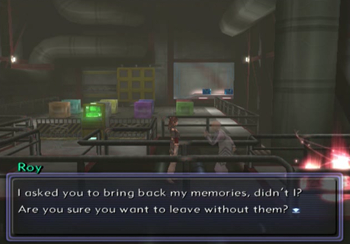
Quest 21 Roy
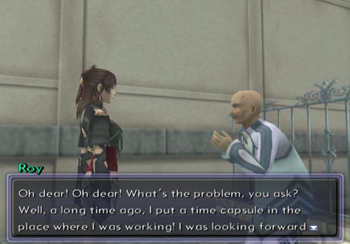
Roy needs you to dig out a time capsule. Do I need to talk to a random NPC, or…
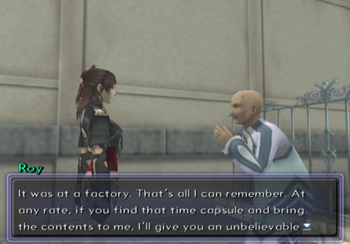
Have we been to a factory in this game, yet? Nope! And the Dammerung doesn’t count.
We’ll cover this time capsule as part of the bonus Factory dungeon that appears in the next update. It’s kind of hard to miss if you’re doing the bonus dungeons.
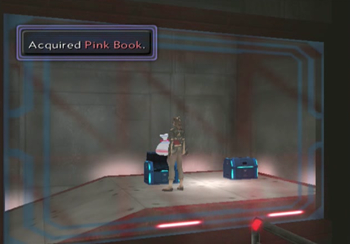
… Pink Book?
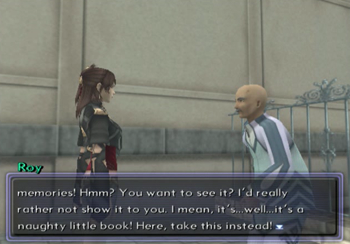
Yay! Another JRPG where you randomly acquire some porn!
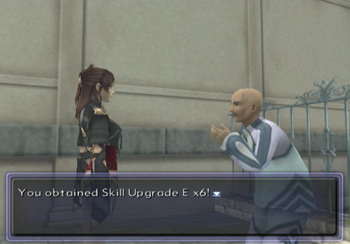
But we can always use more Skill Upgrades.
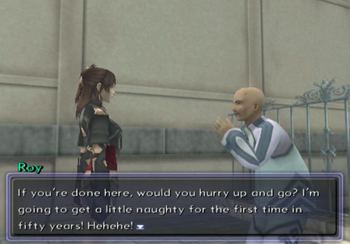
Jesus Christ, Roy, there’s just some things you don’t talk about in public.
Sidequest Verdict: This one barely qualifies, as it’s basically just there to get you to “know” there’s an extra dungeon out there. I suppose it succeeds at getting the player to acknowledge that there is more game to be played, so hooray and whatnot.
Quest 22 Johnny
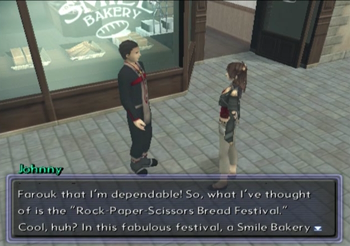
This is Johnny. There are at least three NPCs around the Kukai Foundation that will tell you that Johnny is an idiot. They are all correct.
This is just terrible. You have to run around the Kukai Foundation West Side and challenge every NPC to a rock-paper-scissors game. The idea is to win as many matches as possible, so the “losers” get a discount coupon. This is still just rock-paper-scissors, though, so it’s completely random. Oh, and it’s best two out of three, and you always play the third round, even if you or your opponent already won two rounds in a row.
And, yes, if you lose too many matches, you fail this mission.
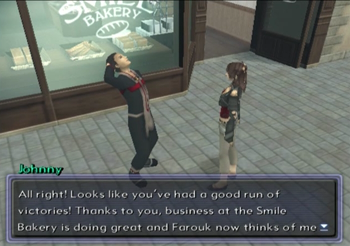
Obviously, you still want to win for that all-important perfect GS score. But either way you’ll receive the reward of…
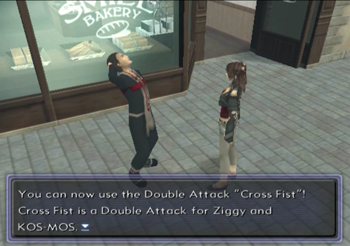
The dual tech Cross Fist.

Ah yes. Is the physical “two heroes make a giant X” attack the platonic ideal of the dual tech? I believe it is.
Sidequest Verdict: There’s nothing more fun than random chance, right? Who had the bright idea to base an entire sidequest on luck, anyway? If there’s another quest like this, I’m going to scream.
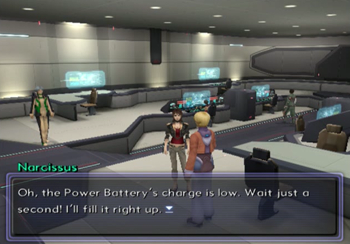
Quest 23 Panache
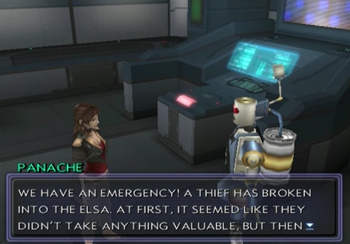
AAAAAHHHHHH!!!!
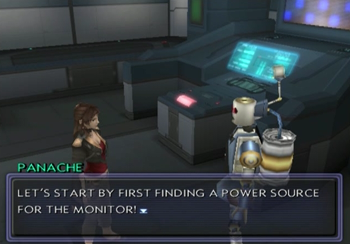
This dumpster fire of a sidequest begins because Bonny… I mean “an unknown thief” stole Captain Matthews’s Log. This is the other prerequisite quest for Quest 17.
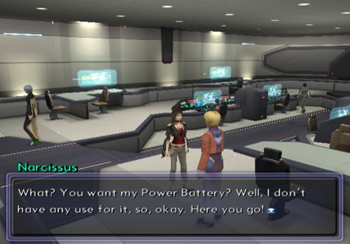
First, you need a power source, which is the Vector Power Battery, obtainable at the Vector Second Miltia Office.
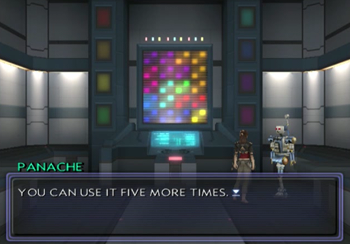
Each Power Battery allows five uses of this hellish device.
Each time you use the console, it will randomly cycle through the eight blocks on the side of the monitor, and “reveal” a piece of the image corresponding to the block. Given there are eight blocks, and each battery only holds five charges…
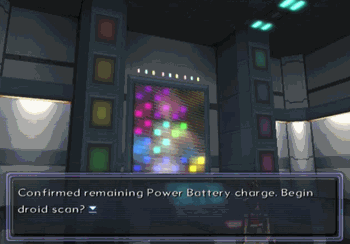
You’ll have to run back to Vector to get a new battery at least once.
I say “at least once” very optimistically. While you’re guaranteed to lose a few blocks with your first few spins, it is very likely that the console will “miss” and repeatedly land on “done” blocks when you’re down to the last few blocks. And then it’s back to Vector all over again.
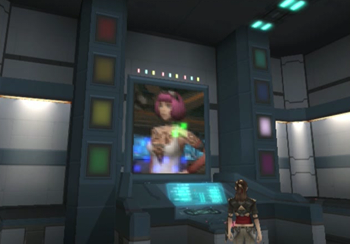
Look, guys, it’s Bonny! It’s very easy to see that! It’s easy to see that after like two blocks! But, no, have to go back to Vector all over again because the stupid cursor won’t stop on the right stupid block.
I believe I had to run back to Vector six times to complete this quest.
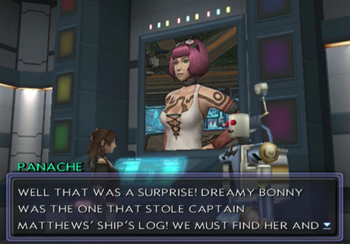
Big fat surprise, you stupid robot.
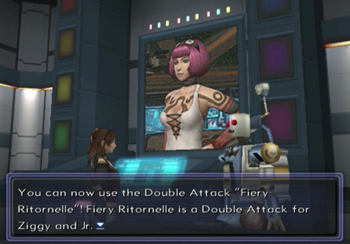
Double Attack get. The Playstation 2 turning into some kind of handjob granting device would not be enough of a reward for this stupid sidequest (that, incidentally, is a prerequisite for two other quests).

Here’s your damn double tech.
Sidequest Verdict: Nobody knows the trouble I seen. Nobody knows, but chaos.
Quest 24 Simon
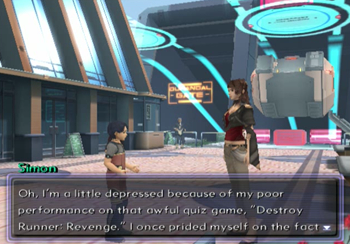
Simon, the boy quiz king, wants us to beat Destroy Runner Revenge, a quiz game lurking in the Kukai Foundation Inn.
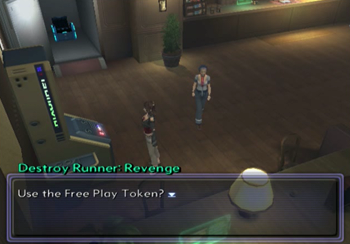
Oh boy, quizzes!
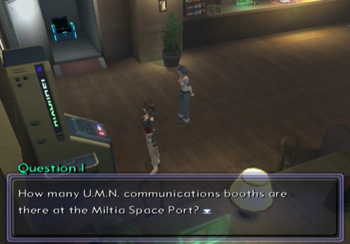
This quiz consists of twenty questions that test how observant you are. The answer to all of these questions is “GameFAQS exists”.
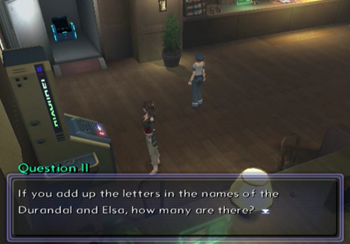
Though some questions are pretty basic math.
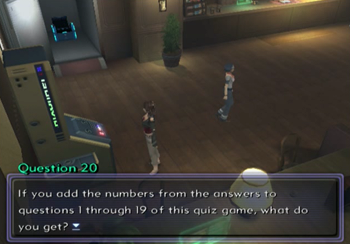
I literally cannot imagine playing this quiz “for real”.

“Cheated like a boss. What’s my prize?”
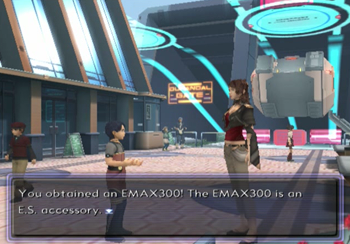
This is a worthwhile accessory that allows you to use ES special attacks that are only accessible with 300 special points. As you may be able to guess, these attacks are pretty damn powerful. If you don’t care about your ES, you can sell this thing for a pretty penny. Either way, pretty rad prize.
Sidequest Verdict: The quiz is either screw you difficult or an absolute cinch, all dependant on how likely you are to cheat. Though is it really cheating, or just using all available resources? Yeah, that’s the ticket.
Quest 25 Stella
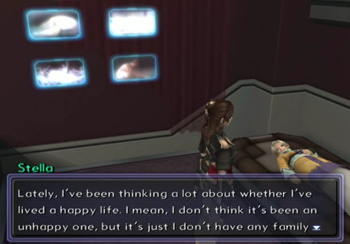
Stella is a retired dancer that is considering coming out of retirement.
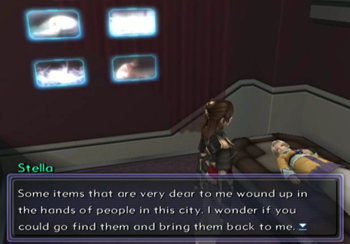
She’d like you to collect some items from random NPCs.
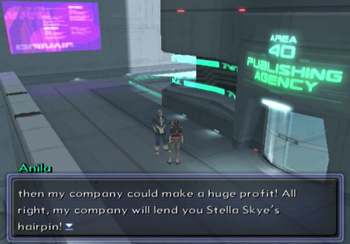
This is another one where you just have to talk to the right people. Anila has a hairpin.
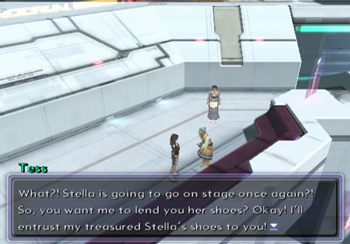
Tess has some shoes.
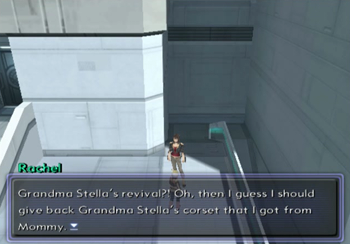
And young Rachel has Stella’s corset. I’m glad I’m a boy, as I’ve never had to consider wearing my grandmother’s corset.

Return the items to Stella, and you’ll get a few Class Upgrades.
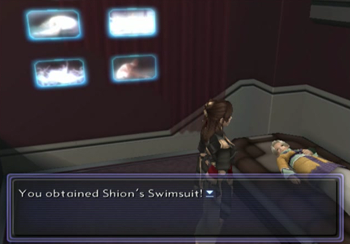
And chaos and Shion’s swimsuits. Let’s go to the beach!
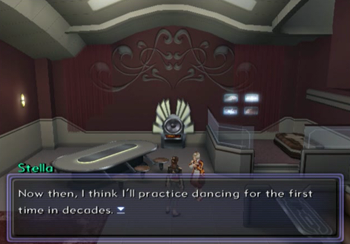
If you return to Stella after completing the quest, you’ll find her up and practicing. It’s amazing what a corset can do for a person.
Sidequest Verdict: Talk to random NPCs, improve someone’s life. Sound familiar?
Quest 26 Pitt
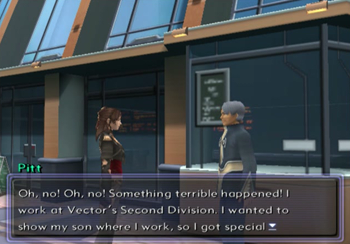
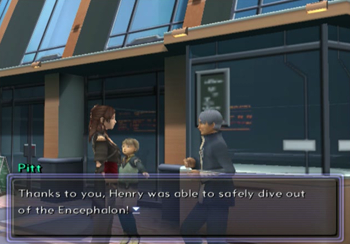
Pitt’s finished! He lost his son in an Encephalon Dive, and you’ve got to rescue the kid. Take your Child to Work Day kills.
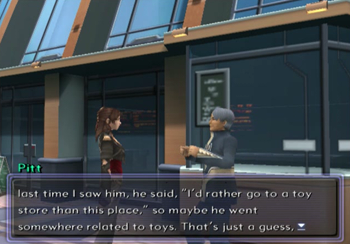
He went to a Toy Store? I know this one!

You may recall that we passed the Toy Store in Old Miltia (14 Years Ago) and Old Miltia (Yesterday).
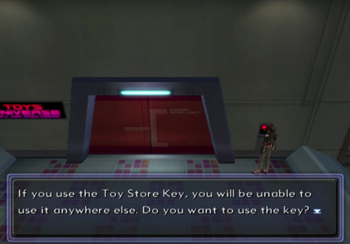
You have the choice of visiting either Toy Store… but if you choose wrong, you will be responsible for the death of a child (and, incidentally, fail the mission). The right choice (indicated by absolutely nothing in the game) is 14 Years Ago.
Looks like Bunnie Dolls are pretty popular.
And Pitt’s son is being menaced by a Griffin of some sort. Note that if you chose Toy Universe, Yesterday Edition, all you’ll find is a literal pile of bones. Whoops!
Grips Sister (I’m guessing this is a weird translation, but maybe not?) isn’t that difficult. Oddly enough, the future and the past versions of this boss use different elemental attacks, which seems odd, as you technically can’t fight both within the same save file. Anyway, this gal is about on Rod’s level, so you should be eating Griffin stew pretty soon.
You can run from this “optional” boss, so some people steal/farm Skill Upgrades to help with Matthews’s debt. Or help with acquiring skill points. Either way, I ain’t got time for that.
Yay! Saved a child!
The joy of killing a mythical creature is thanks enough.

The key to Inner Peace is a fine reward, though.
Sidequest Verdict: Being forced to properly guess the right toy store is kind of a dick move, but the rest of this quest is alright. I’m just happy to finally get to do something with that damn inaccessible Toy Universe.
Quest 27 Adonis
Adonis wants you to find the perfect hangover cure for hard-drinking Captain Matthews. Caution, he is a boozer.
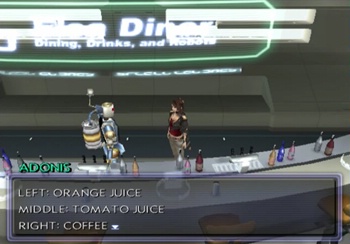
You’ve got to determine the proper ratio of orange juice, tomato juice, and coffee. Sidenote: ew.

The solution to this puzzle is determined by talking to some nearby droids and participating in a math puzzle. It’s one of those “Jimmy finished the race two places ahead of Timmy who finished right behind Bimmy what rank did Jimmy finish” things that were all the rage when I was in fifth grade. The answer is 3 2 2, because I hated being in fifth grade.
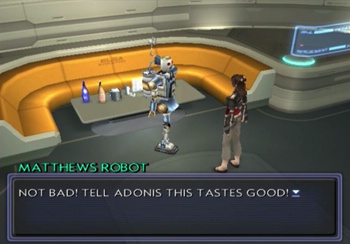
This robot is programmed with Matthews’s exact taste buds. Where does one buy one of those?
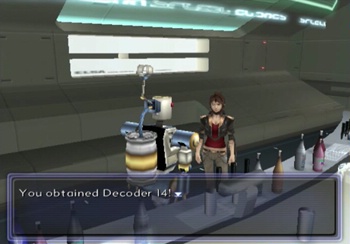
The prize here is Decoder 14. This key will eventually earn arms for a certain robot. This is more important than usual, and we’ll talk about it next update.
Sidequest Verdict: Who doesn’t like math puzzles? I mean aside from a healthy portion of the population.
Quest 28 Caito
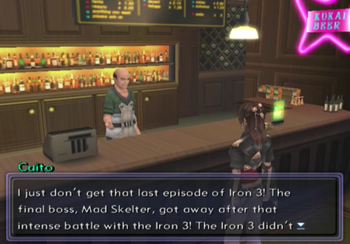
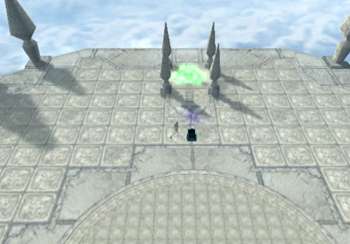
Caito asks that you slay Mad Skelter. He offers no hints as to how to do this, and seems to indicate that Mad Skelter is a fictional character, too. This doesn’t sound crazy at all.
This sidequest requires that Quests 9, 17, and 23 (the awful battery one) all be completed. It also can’t be completed until clearing another of the bonus dungeons. We’ll look at that one in more detail next update, but this boss (unlike the Pink Book in Quest 21) is completely optional and kinda hidden.
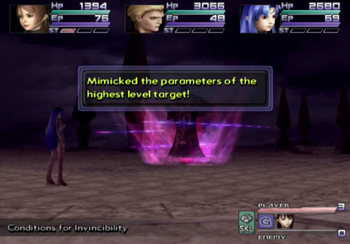
Mad Skelter is a gnosis type enemy that starts the battle by copying the general stats of the highest leveled character. This isn’t an exact copy (so you can’t, say, drop a low level party into the match and expect an easy time), but it will augment Skelter’s preexisting stats with a bonus based on the copied character. You really don’t want to have a high level, evasive character in the lead here.
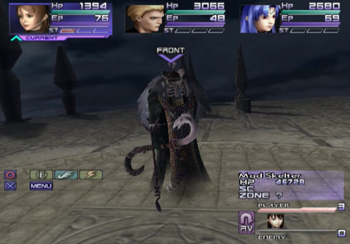
However, the copy is one-time only, so feel free to start with a lame party and then switch in your “real” heavy hitters.
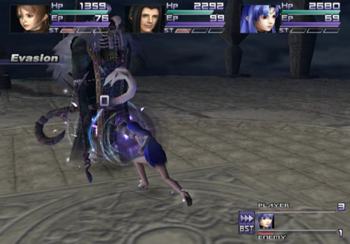
Mad Skelter is a gigantic jerk, as his starting evasion is far too high. Considering the whole break system is based on actually hitting your opponent, this can screw up even the best strategies.
But he’s by no means impossible.
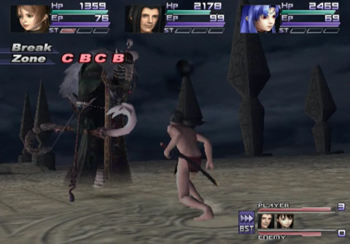
He’s fond of status effects, but he generally doesn’t hit that hard, so you should be able to survive easily enough.
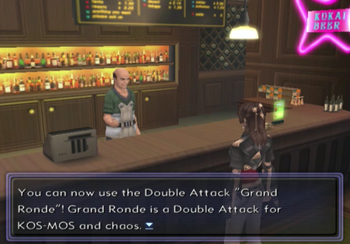
And we get a double attack for our troubles.

And what a double attack! The cosmic ballet of chaos and ORDER. Only problem is that Mad Skelter is probably one of the absolute last bosses fought in the game, so it’s unlikely you’ll have many opportunities to enjoy this ronde.
Sidequest Verdict: This is basically an excuse to fight one of the final optional bosses in XS2. But at least you’re guaranteed a prize for this super boss.
Quest 29 Butch
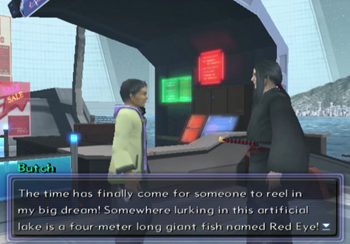
Mandatory JRPG fishing quest!
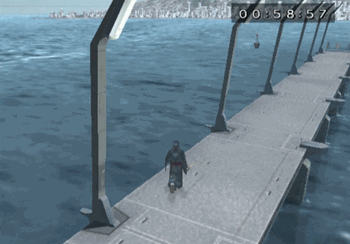
You’ve got a minute to find a spot, cast off, and reel in Red Eye, our target fish. I’m getting tired of these quests that involve slowly rotating the analog stick.
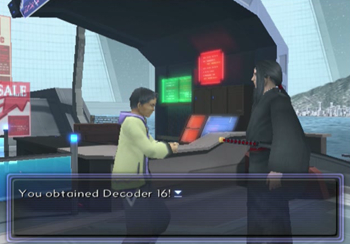
Red Eye is random, but if your minute ticks away, you may just try again. The prize is Decoder 16, which matches to the door we found during Quest 16. Oh, that’s appropriate. It also nets us a robot part.
Sidequest Verdict: Getting mad at a JRPG fishing sidequest is like being annoyed when it rains. I mean, it has to happen, otherwise we’d all die of dehydration. Or… something?
Quest 30 Clive
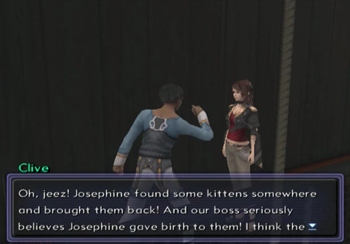
And now King’s cat is bringing home kittens to compliment his earlier hysterical pregnancy.

Each of the five kittens has a personality, and you’ve got to match that personality to a random NPC somewhere in the universe.
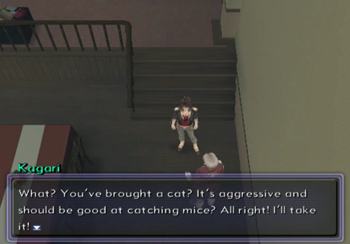
Kagari at the Laundromat gets the aggressive cat.
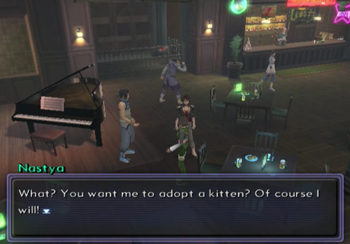
Nastya at the Kukai Foundation Bar wants a lil’ ball of fuzzy love.

Marcela at the Miltian Spaceport is looking for a travel companion.
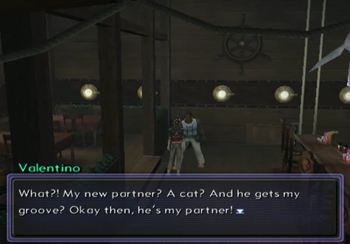
Valentino, Moby Dick’s sole customer, is looking to boogie down with some hip cat.
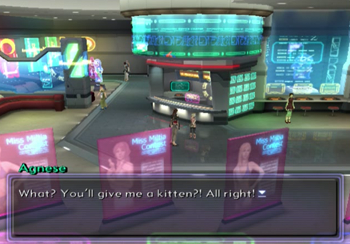
And Agnese from Second Miltia’s publishing company is just happy to have a pet.
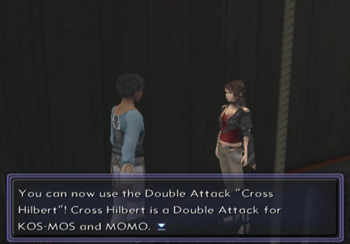
Cross Hilbert is our reward for becoming a kitten distributer.
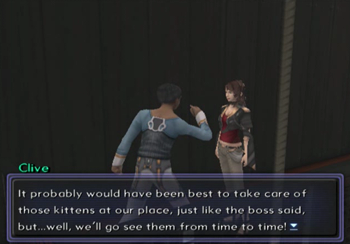
Amusingly, the cats are basically items, so you can grab the whole litter, and then face the final boss, knowing full well that Ziggy has a pocket full of kittens as he saves the universe.

And here’s Cross Hilbert. This is the offensive double attack that only inflicts a status effect. The effect is “Lost”… and I seem to have lost any information on what that status effect actually does.
Sidequest Verdict: Yet another quest that involves traipsing all over the galaxy and finding the exact right NPCs. At least these quests are pretty straightforward when a FAQ is handy.
Quest 31 Layla
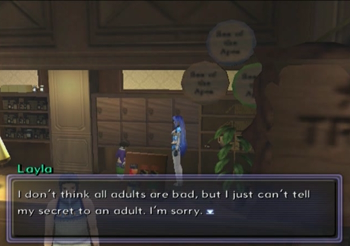
Remember Layla? She’s the little girl we rescued during the Kukai Burning event last game. Despite the fact that we saved her life, she will only speak to other “kids”, so stick Junior or MOMO in the lead.
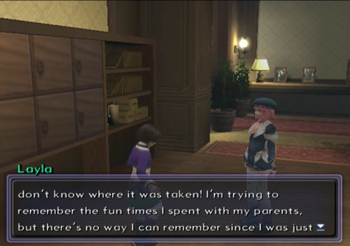
Remember that family portrait on the top floor? Well, Layla wants to know its origins, what with her parents getting axed last game.
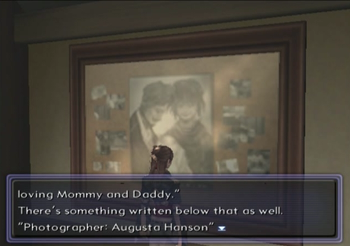
The picture itself provides the name of a photographer… and you’d think Layla would have taken the time to find that…
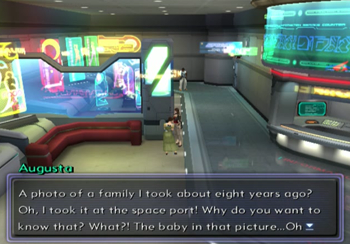
Augusta is back on Second Miltia, and all you have to do is talk to her.
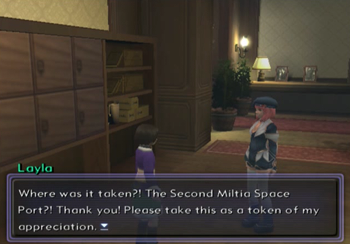
And we’re done.
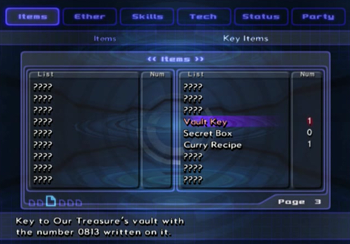
Layla provides the combination to a nearby vault. Note that this is not the same combination from XS1.

And we get some X-Potions for our trouble.
Sidequest Verdict: We just robbed an orphan of emergency medical supplies! Score!
Quest 32 Kamikaze
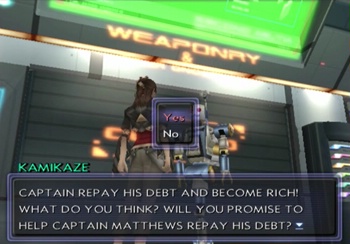
This is the infamous “Pay Off Matthews’s Debt” quest. While you can technically “start” this quest from the moment you have control of The Brews, you can only accept the quest (and the prize) when you gain access to the Elsa at the start of Disc 2.
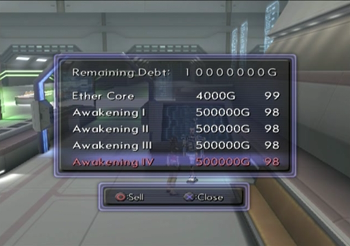
There is basically no way you will pay off this debt through normal gameplay. SpoonyBardOL already outlined one way to do it, and there’s also the time consuming “mug the final boss” method that is always available, or you can play with that Griffin I mentioned earlier. Or you could sell off all your ES gear. Or you can cheat like I did.
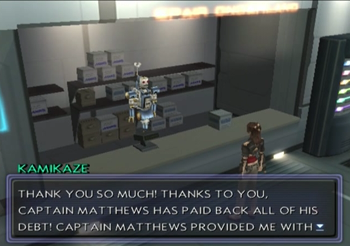
When the debt is repaid, Kamikaze opens his own shop on the Elsa.
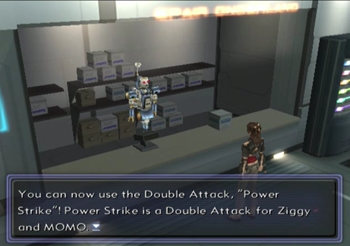
And you get some Skill Upgrades! And a double tech!
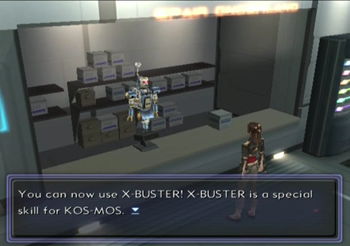
And KOS-MOS’s X-Buster! And Jin’s swimsuit!
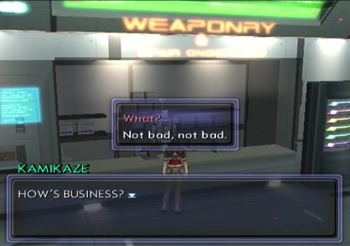
And you can make small talk with Kamikaze!
Here’s that X-Buster. It got kind of underwhelming between games.

And have another double tech. Poor Ziggy, that guy would take a meteor to the chest to keep MOMO happy.
Sidequest Verdict: I’m in a good mood because I cheated my way to victory, but, under normal circumstances, this quest is completely impossible. Look, when the quickest route to completion involves hours of grinding, you’re doing something wrong. Come to think of it, the Xenosaga franchise has a major problem with the game grinding to a halt every time money is involved.
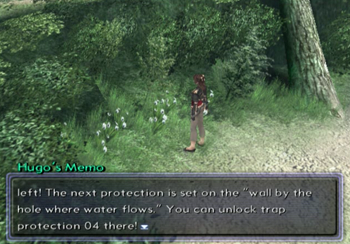
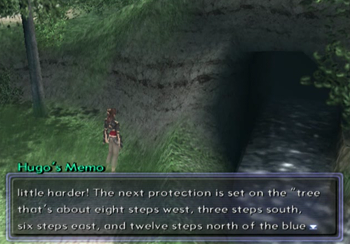
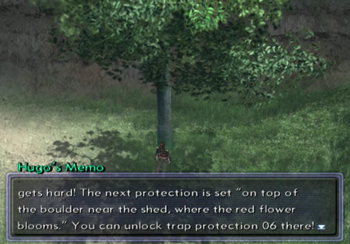
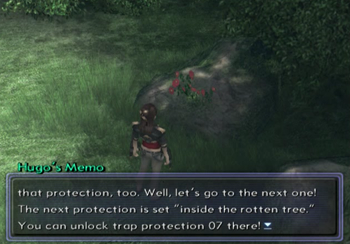
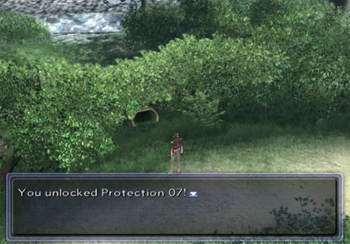
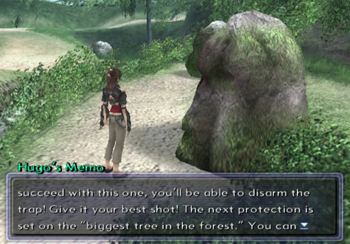
Quest 33 Hugo Bravo
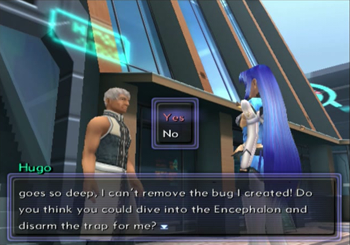
Hugo is the jackass responsible for the sidequest that requires we revisit MOMO’s subconscious. Mrgrgrgr.

This is basically a scavenger hunt that takes us all over the stupid dungeon that was stupid the first time. Like all great wastes of time, this one starts in a gas station bathroom.
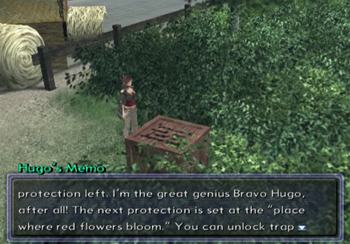
Then there’s this crate at the end of the highway to nowhere.
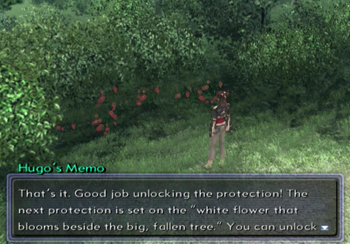
And some pretty red flowers.
Then there are white flowers in the next area. Note that the enemies are still skulking around this dungeon, and, thanks to the way the XS2 battle system works, it’s not like you’re ever in any danger, but being “overleveled” for the area doesn’t make the battles move that much faster.
Gotta check out this cliff side in the next area.
Then this tree further north. (I’m trying to emphasize how tedious this quest is… bored yet?)
Then we’ve got this rock that’s closer to the beginning of the dungeon than I’d like.
And this log that reveals a picture of a mushroom.

So off to these mushrooms.
And then this weird rock.

And finally this giant tree that opens a hole in the ground. All told, this whole stupid thing took a half hour of my life I’ll never have back again.
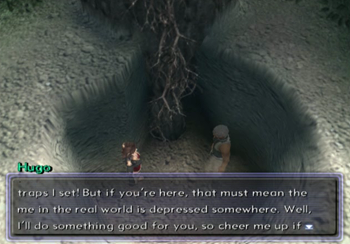
Our reward is this virtual Hugo…
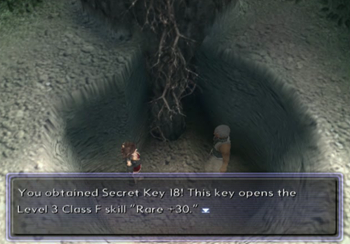
Who provides a skill that will dramatically increase the rare item drop rate. Ugh, kinda worth it.
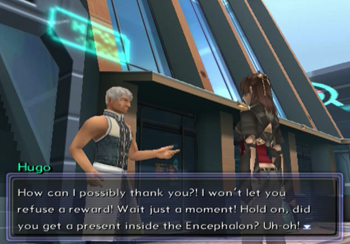
And when we return to Hugo for our official completion… he has nothing to offer. Lame!
Sidequest Verdict: Atrocious sidequest in the worst dungeon? This sidequest is so bad, I’ve literally been complaining about it for multiple updates.
Quest 34 Carlos
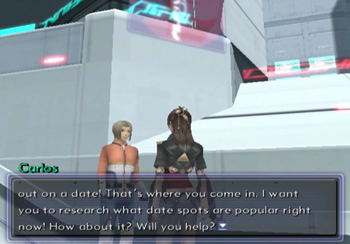
Here’s an easy one to get back on track. Carlos wants to know the best date spot.
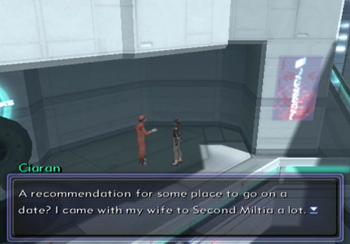
Talk to the locals and get everyone’s opinion. Add up the votes, and the answer is…
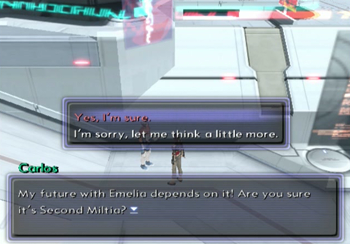
Second Miltia. This is always the answer, so you’re welcome.
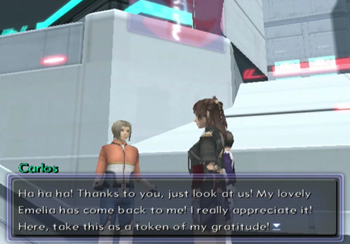
Leave, come back, and you’ll receive your reward. As you may have guessed, you’ll fail if you choose anything else.
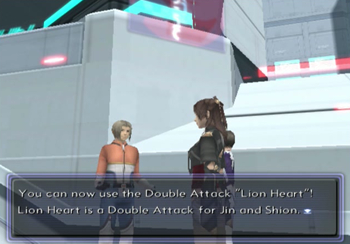
Another double tech. Woo.

Oh, those Uzukis and their swords.
Sidequest Verdict: Nothing much to report. It’s a “talk to NPCs” quest, but at least this one requires a little more memory than others. Or, again, just look at a FAQ, and solve it in ten seconds.
Quest 35 Camille
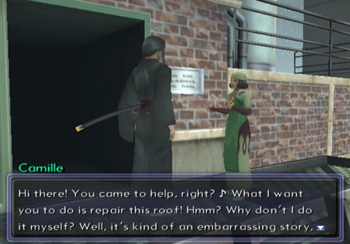
Raise the roof! Wait, no. Repair the roof!

You’ve got a minute to run around the rooftop and hammer the circle button to repair each damaged area. Note that you are using a frying pan as a hammer because… it’s funnier that way?
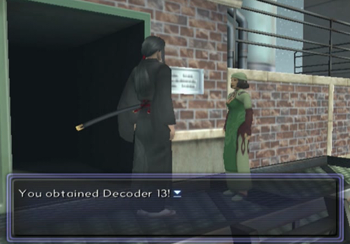
Another one that you can try repeatedly. Win and you’ll score a decoder that will eventually score you a robot part.
Sidequest Verdict: Yet another minute in your life that you’ll wish you had a Turbo button. At least it isn’t more stupid analog rotating.
Quest 36 Winona

And here we have what is paradoxically the easiest and most difficult GS mission.
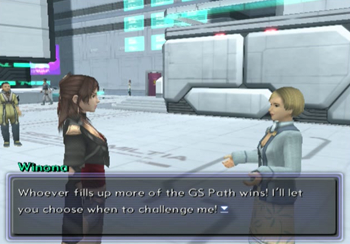
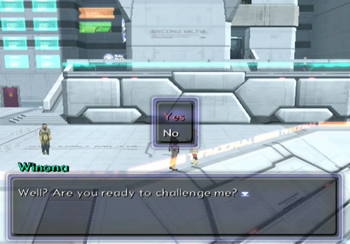
DO NOT TALK TO WINONA UNTIL YOU’VE COMPLETED EVERY GS QUEST. Otherwise you will irrevocably fail. Well, okay, to be accurate, don’t talk to her twice.
This little jerk is the reason you have to succeed in every GS quest, which, to be clear, means you have to do everything I’ve outlined in this update, and never, ever fail.
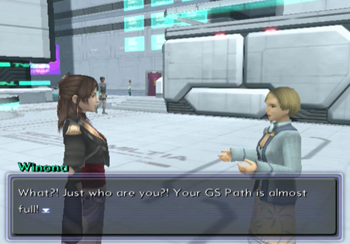
Assuming you’ve done that, though, you instantly “win”. Yay!
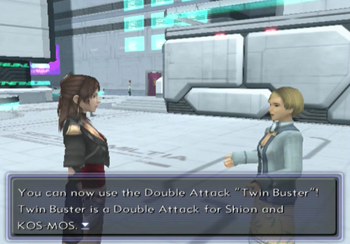
And our prize is what better be the best double tech in the game. Again, if you fail a single GS mission (including this one), this attack is forever out of reach.

Of course it features Shion and KOS-MOS. And, of course, at the point that you earn this attack, there is like nothing left in the game to kill.
Sidequest Verdict: Schrödinger’s cat.
And that’s it, everybody! Every stupid quest that’s part of the GS campaign. Let’s look at some charts!

This is a breakdown of the types of quests in the GS campaign. Fifteen of the quests (in blue on the chart) are based entirely on “talk to one person, now talk to everybody else”. Ten quests (red) are minigames, usually timed, that involve some skill or trial that has no relation to anything else in the actual game. Six quests (pale, Halloween Whopper poop green) are entirely tedious bullshit, and involve nonsense like running through sewers or charging batteries. And a mere five quests (purple) involve combat.
What does this mean? Well, for one thing, only the five combat quests provide EXP or any other benefits that may help in the main quest and its challenges. Additionally, the overwhelming number of talking time quests portrays a game that has no real idea what to do with its sidequests. Seriously, has “talk to a specific NPC” ever been fun? Do people play JRPGs because they enjoy hearing about how times are tough? No, I’m not saying NPCs should be eliminated (sorry, Lightning), but is making “talk to everybody” mandatory to so many quests at all a good thing?
And, while we’re at it, here’s another chart:

This is, obviously, subjective, but, for my money, 26 of these quests (yellow) were good… or at least tolerable. The talking quests, by and large, were not bad, and, even if they could be kind of annoying, at least they’d be FAQ-solvable. 10 of these quests (black), however, were absolutely abhorrent, and often encouraged me to give up on this whole stupid “completion” concept and watch sloth videos or something.
And, when you get right down to it, there was not a single quest in this whole GS Campaign that I’d like to do again.
Not a single one.
Oh yeah, if you return to the Bunnie that started this whole stupid mess, he still acts exactly the same as when you began the quest twelve billion hours ago. I want my certificate of completion, Professor Oak!
Bah, at least we’ll always have this screen.
Next time on Xenosaga: You didn’t think that was the last of the side content in Xenosaga Episode 2, did you? Oh no, we still have a country club membership to earn! I mean… giant robot!
[…] guess because Shion performed all those mind numbing sidequests last game, Second Miltia granted the woman her own private island. Nice! There’s not much to do […]
[…] change from XS2, where you were expected to return to Second Miltia repeatedly, and you could solve all those sidequests at your leisure before and after the final […]
The good vs bad pie chart is a Pac-man. Cute.
[…] – The canonocity of Xenocomi is discussed, and, yes, since KOS-MOS acquires cat abilities in time for XS2, this silly story is canon. KOS-MOS did nearly kill everyone in pursuit of an imaginary cat. Also, […]
[…] not save the optional content entirely for some final “round-up” update like I did during the Xenosaga Let’s Plays. This was deliberate, as Wild Arms 2 “locks” its optional areas behind actual exploring. You […]
[…] always mandatory in every game? Roll the stick to turn the valve to open the door. I am having Xenosaga flashbacks, and I don’t like […]
[…] So I cannot tell you how many times I have either grinded materials from an easy source (aka a monster that goes down smooth and always drops a specific item), spammed “fast travel” to rejigger relaxed resource spawns, or just plain hacked in 999 of every piece of vendor trash I could get my hands on. I might challenge myself by not hacking in 999 for every stat or useful item, but I sure as hell am not going to let my OCD fixate on how I need to collect a pile of used bandages to synthesize a godly gauze so some anonymous dude in a hospital will survive to see the ending (and I also get 500 g for my troubles). This is doubly accurate for “game long” sidequests, like the infamous bit in Xenosaga Episode 2 where you must raise enough funds to pay off the captain’s debt. I do not need to spend literally the entire game wondering if I am optimizing my gains enough to earn one double tech and a swimsuit. […]