
With Chapter 43, this LP is now my longest Let’s Play of one continuous game. Mind you, it is not yet the largest (as Wild Arms 2 contained about 1,500 more screenshots at its culmination), nor larger than the combined chapters of all Xenosaga games (60 chapters, and that was one continuous story over three[ish] games), but, hey, still a milestone. And I note this in particular because there is still a lot more Wild Arms 3 to go…
And this milestone hits the site on February 27, Nail Polish Day. Polishing nails is the graceful habit of girls and cats. Hence, those who polish nails are either a girl or a cat. Count Begucci polishes his nails, but he isn’t a girl. Therefore, we shall declare him a cat..
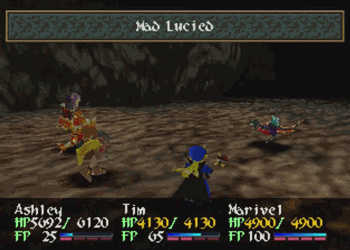
Previously on Wild Arms 3: The demons attack! With the party now completely aware of Siegfried and the Prophets menacing the world once again, a counter offensive must be launched! And in order to do that, they’ve got to do… stuff.
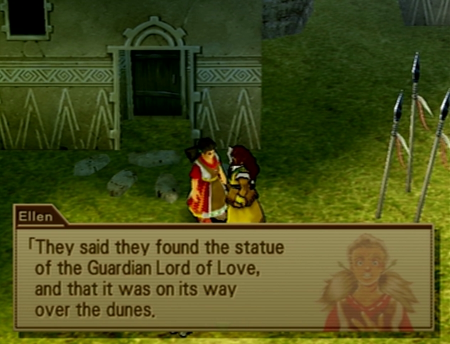
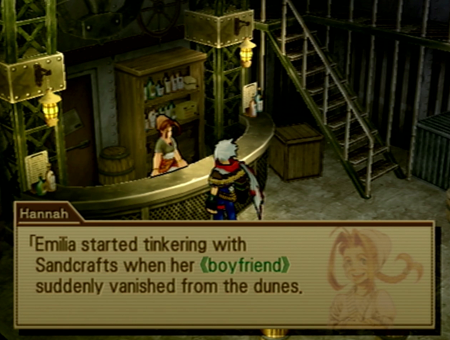
“It was about three months ago, right when you took your first step outside. They said they found the statue of the Guardian Lord of Love, and that it was on its way over the dunes. But before it arrived in Jolly Roger, the ship ran into a dune beast, and was reduced to scrap in a matter of seconds. The ravaged vessel’s skeleton is either at the bottom of the dunes, or in the belly of that horrible beast.”
As I am tired of mentioning, this portion of the game is primarily fueled by NPC gossip. Baskar, naturally, has a lot of leads on the Guardian Lords. Ellen has been good to Gallows since the game started, so striking up a conversation while Gallows leads will point you toward Jolly Roger.
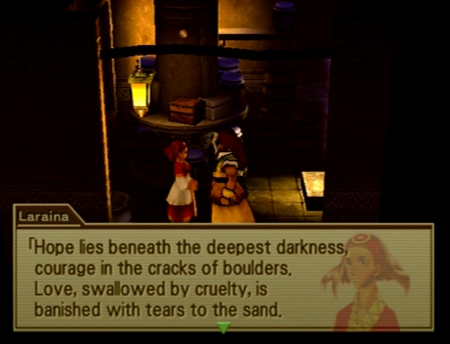
“Hope lies beneath the deepest darkness, courage in the cracks of boulders. Love, swallowed by cruelty, is banished with tears to the sand. Meanwhile, desire lies the end of mankind’s prosperity. Where do our thoughts and emotions go? As long as our souls are parched and fatigued, the guardian lords’ strength is lost.”
It all sounds metaphorical, but these are exact directions to the four lords. Just keep an eye out for deepest darknesses and ends to prosperity.
Anywho, that Jolly Roger clue was pretty blatant, and it’s a short walk over there…

Particularly when you’ve got a horse.
I appreciate that many different NPCs provide the same basic clues, but in different ways.
But we are looking for love.
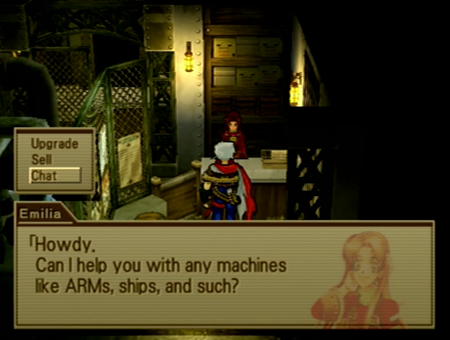
Hi, Emilia! We heard about a sandcraft crash, and thought of our favorite sandcraft mechanic.
… Only sandcraft mechanic.
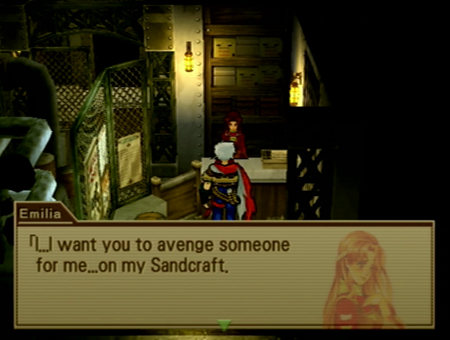
Did a sandcraft kill your dad, and now you want revenge?
Oh man! I was close!
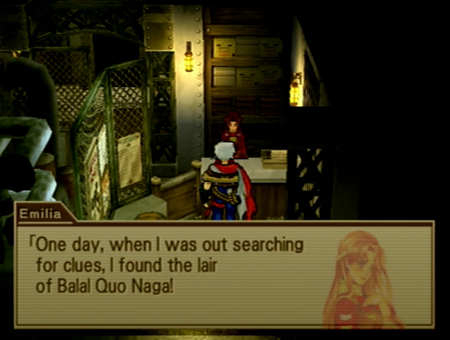
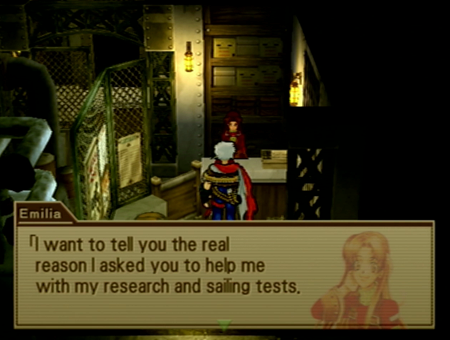
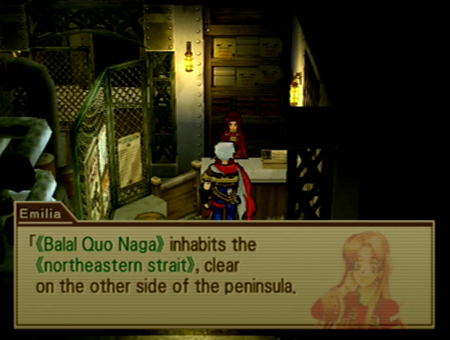
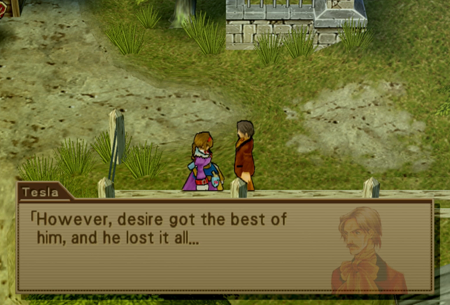
“Let me explain. Surely you’ve heard about the merchant ship that got attacked by a gargantuan, and how many people perished. Well, three months ago, the ship carrying my sweetheart disappeared. Since then, I’ve been too busy to cry. I devoted myself to researching a new kind of vessel with more speed and firepower. One day, when I was out searching for clues, I found the lair of the Balal Quo Naga! Please…take my Sandcraft and go slay the beast! You must avenge my Mario, restore peace to the region, and deliver our souls from bondage!”
So you and Mario… weren’t into bondage? Just need to confirm all the facts here, ma’am.
She makes it sound like this location isn’t like five feet outside of Jolly Roger.
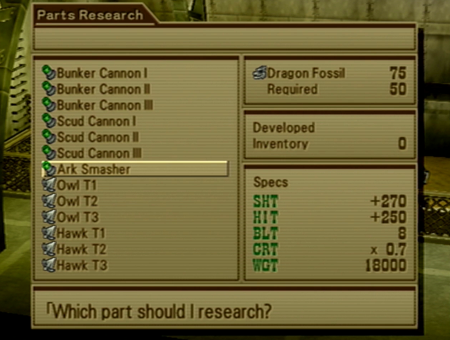
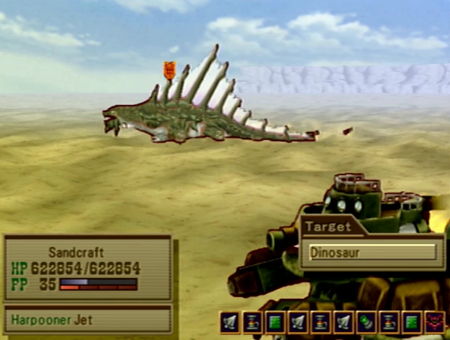
So here’s what we are going to do: buy the biggest, baddest gun on the planet. Secret Sandcraft tip: there is never a reason to upgrade your cannon before this quest, and you don’t need to upgrade anything else, either. Just buy the Ark Smasher, and, if you don’t have enough Dragon Fossils, farm those suckers at will. Practically every third monster drops them.

See those numbers? We’re going to be okay.

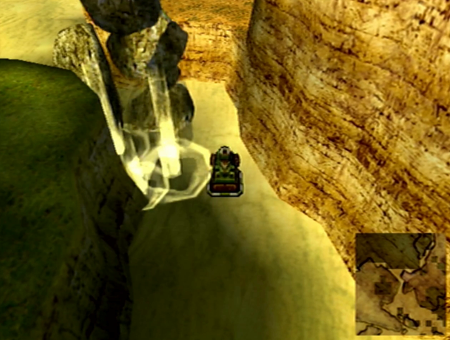
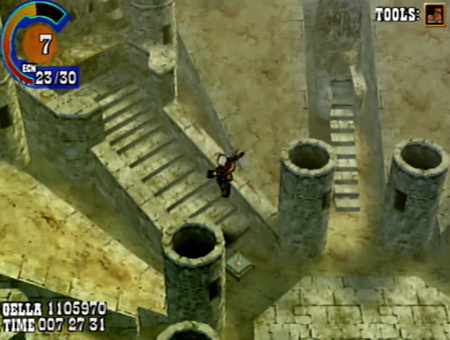
The bullet naga is hiding over here. It is a remarkably quick trip from Jolly Roger, and I must wonder how many Sandcraft pilots Emilia threw at this problem before we came along.
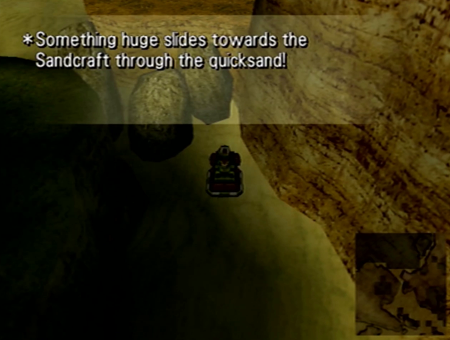
Probably nothing to worry about.
Or not.
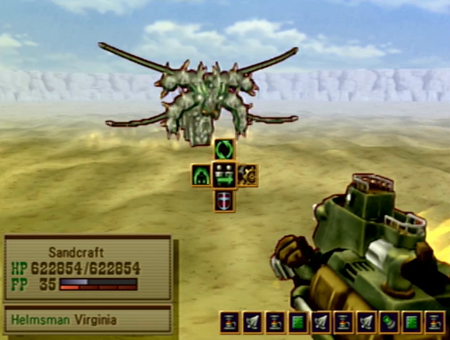
Ladies and gentlemen, the one required Sandcraft fight in this entire game.
Where does Balal Quo Naga get her name? So that thing is definitely a Naga. It has a human-ish top half, and a snakey bottom half. That part is obvious.
The rest of the name? Quo is basically Latin for “where”, which kinda sorta makes sense for a creature that notably travels the world to two distinct locales. And “balal” is Maltese for bullets. Balal Quo Naga does not shoot at you, but it does seem like an appropriate title in a game/world that is so reliant on gunplay. Seems like something the locals might call a monster, like how our reality has bombardier beetles. I realize that “it’s Maltese” seems like an outside chance of being relevant, but Wild Arms has a tendency to sample all sorts of languages (“Lilka” of Wild Arms 2 is distinctly Polish [for Lilly]). So… maybe?
Anyway, aside from all that, my guess is “it just kinda sounds cool”.
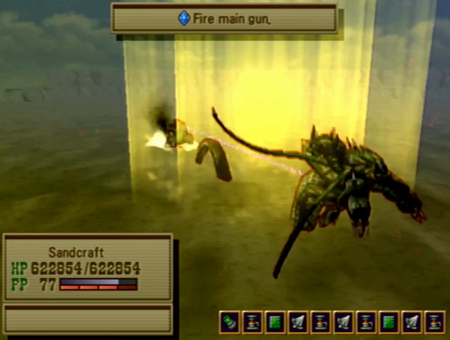
And regardless of name, when you have the best cannon around.
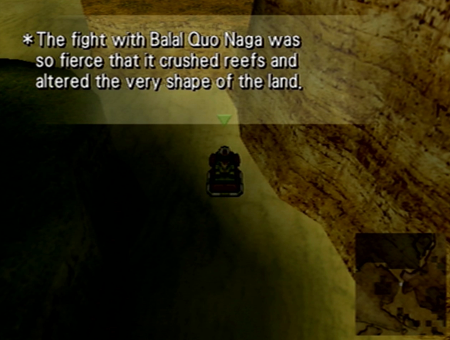
It is over pretty quickly.

Alright, let’s talk the straight dope about Balal Quo Naga.
… She sucks.
I tested all this on the normal playthrough, so understand that this is all fact, not conjecture (or 20-year-old Gamefaqs “knowledge”). Balal Quo Naga is a very limited boss fight.
Balal Quo Naga has three significant abilities:
1. A basic attack
2. “Critical Heal”, which tops off her HP
3. “Current Spark”, which presumably electrifies the sand (?), and will absolutely obliterate your HP
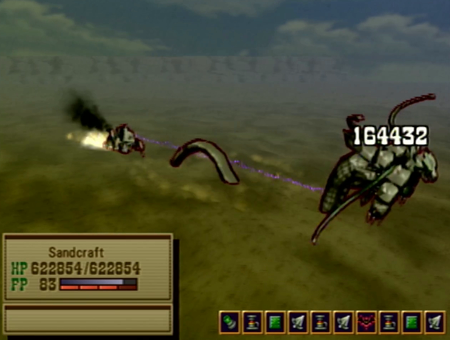
And those last two abilities are the real doozies. Thanks to the high odds of either of those skills being utilized, every one of Balal Quo Naga’s turns are about a 50% chance of the battle being reset to start (whether because you are dead, or she is now at full health). So you are forced into defeating Balal Quo Naga in a turn or two, because anything more is literally impossible.
And speaking of impossible, it is impossible to win this fight with the default Sandcraft cannon. Mind you, there is probably some once-in-a-lifetime RNG situation wherein Naga only uses her physical attack (she also has a speed boost ability that, like all buffs in WA3, ultimately does nothing), but the reality is that she will use Critical Heal or Current Spark pretty often, and you cannot outpace her healing with a basic cannon. You must upgrade your Sandcraft to a stronger cannon, and, to be absolutely clear, alternative part upgrades will not cut it. The cannon upgrade line is the only one that will boost your attack sufficiently to overcome her healing, and anything else is literally a waste. Having more HP or speed sounds nice, but that full heal of hers will just drag the fight out into infinity.
So the actual “battle” is 90% prep (buy/equip a better cannon), and then simply using the “fire all ammo at once” command to do as much damage in one turn as possible. One way or another, the fight is over in a round or two.
So why does this suck? Well, because this fight is mandatory, and there is still a whole Wild Arms 3 game around it.
The Sandcraft does not “naturally” level. You must use dragon fossils (and only dragon fossils) to upgrade it. This means that if you have somehow missed a cache of dragon fossils, this is going to be an impenetrable roadblock. Additionally, you could spend your dragon fossils on something useless (like elemental ammo, which sounds like it could be useful, but never is), meaning you could be collecting dragon fossils like a good player, but still be dragon-fossil-poor enough to not be able to afford this cannon when you need it. Anyone that has played WA3 before likely remembers to focus on cannon maintenance, but, for a new player, Emilia’s advice for upgrading (available earlier in the game) has her outright state…
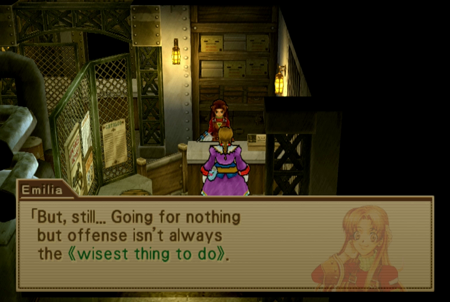
(As seen in Part 27, true believers! – Giggling Goggle Bob)
“Of course, I can increase its firepower with more dragon fossils. But, still…Going for nothing but offense isn’t always the -wisest thing to do-. Of course, the most obvious strategy is to come out with your main gun blazing. But the best way to beat your opponents is to use your head.
It’s not good just to fire your main gun all the time. The key to winning is in the use of the harpoon and the flash bombs. You have to wait until the moment comes where you can use your main gun to its full potential.”
And this advice will not work in the one mandatory Sandcraft battle.
Anywho, the point of all this is that if you “approach” this battle the wrong way, you will eventually just learn that you have to perform the dreaded grinding of enemy drops for more dragon fossils if you want to proceed. And, while we are doing this quest “early” for a playthrough, nobody likes to be told to come back later, particularly if the related goal is obscured by the boss appearing to be really strong. There is no strategy here! Just come back with a bigger gun!
And we’ll get to Part 2 of why this all sucks in a minute…
Sorry. All that ranting disturbed the local rocks.
This is a lie and you know it.
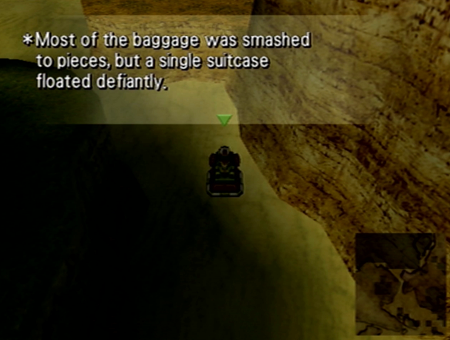
And we get designer luggage out of the deal.
So whether you are trying to find love or not, this is a mandatory quest. Defeating snakey opens up the inner sea area, and you need access to that bay to (finally) find your airship.
You don’t have to do this now in the plot (if you’re really paying attention, you can see the area from Clive’s map scrap now, and it is outside the inner sea), but it is eventually a requirement.
Keep in mind that the inner sea has much more difficult Sandcraft battles… but since you must defeat the Sandcraft boss to even get here, you shouldn’t have an issue. And that’s the other problem! You must upgrade your cannon to destructive levels for Balal Quo Naga, so literally every creature you encounter after defeating BQN has one easy answer: use your big-ass gun. The inner sea monsters are supposed to be the most dangerous titan mobs in the game, but they are all trivial, because you have to have a crazy cannon to see them in the first place. So Balal Quo Naga incidentally destroys any potential challenge to Sandcraft traveling, and thus makes every future encounter that much more pointless.
Mind you, we won’t have to rely on the Sandcraft for much longer…
Back to Jolly Roger for now, though.
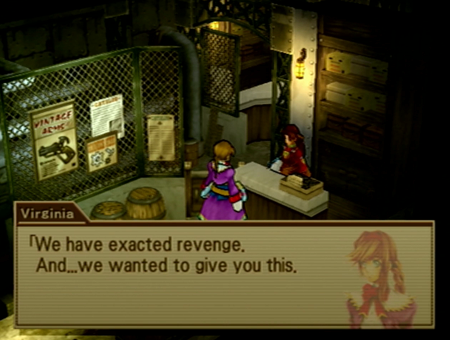
Each of the protagonists have slightly different dialogue here, but I appreciate that Virginia sounds unusually bloodthirsty. I like to think that she immediately made herself the heroine of this tale of lost love and sea monsters, and was already muttering “All my means are sane, my motive and my object mad,” on the way back into port.

“I just wanted proof that Mario was still alive. But, if that’s not possible…Then I wanted proof that he died. Because I love him. That’s why I didn’t want our souls tied to the past. I wanted a blade to cut away the past so I could live in the present. Besides, Mario hated being hesitant over the same thing all the time. Thank you…for avenging his death. And for bringing back one of his things. There’s something inside that I want you to have.”
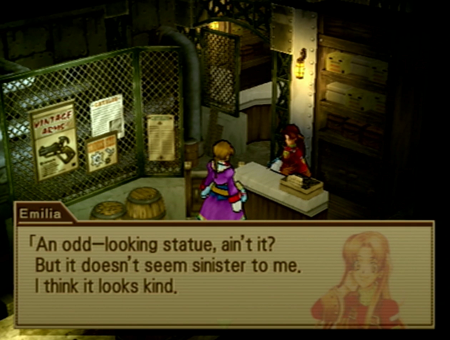
Literally the only thing that survived that whole… everything… was a suitcase containing the Goddess of Love statue. While you could make the argument that the statue is inert and just happened to survive for plot purposes, there sure is evidence that Goddess decided Emilia and Mario’s love was true, and Emilia’s heart needs to Celine Dion along to love again.
Anywho, here’s your prize, guys.
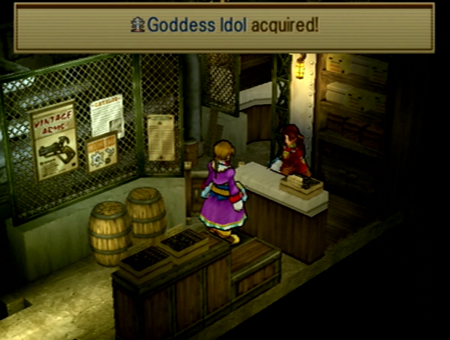
In previous Wild Arms titles, each of the Guardian Lords were manifestly tied to your protagonists. This time, the Guardian Lords are free agents, and the best you get for “human interaction” is exclusively Emilia “earning” the Goddess Idol. The other three are totally divorced from people. Well, living people, at least.

What does Emilia think is going to happen here? Does she know it can summon a Guardian? Or is she just imagining this hunk of rock really impressing Virginia’s mail person?

Remember where we got our first set of Guardians? Well guess where we will find our last set of Guardians.
Right past the entrance is this familiar arena.
But now that we have the Radical Sneakers, we can jump up to four all-new altars.

Gallows is the only character that can identify the various runes. You don’t have to stick Gallows in the lead to activate these battles, though, if you know the (consistent between games) Guardian Lord symbols because you are some kind of nerd.
To start your boss fight, please select the appropriate sculpture.
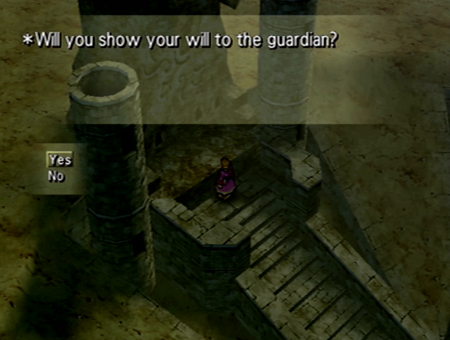
I need an adult.
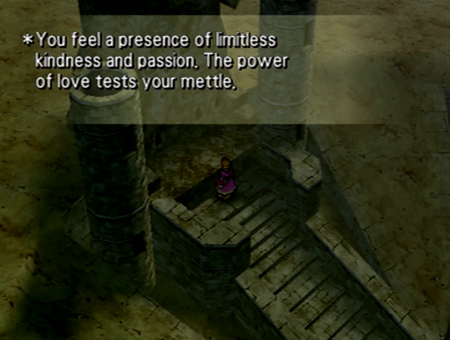
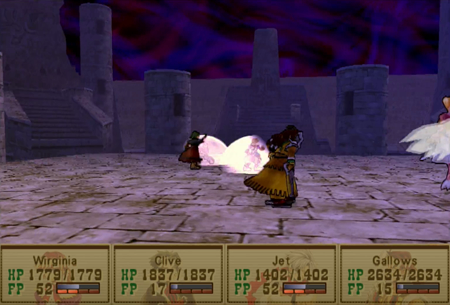
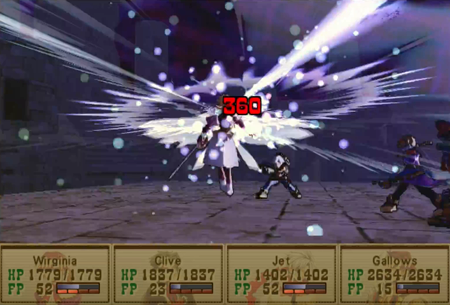
“The visions in your minds are bound together. A faint light purges your soul of stagnation. You feel a presence of limitless kindness and passion. The power of love tests your mettle. The bearer of the Ark Scepter’s light must have the strength to fight that which has no form. Fight, and show your strength to Raftina!”
Yeah! Let’s shoot limitless kindness and passion with bullets!
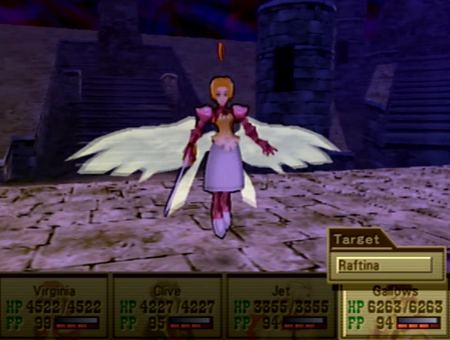
Raftina is consistently an “angel woman” throughout Wild Arms. Here, she is a little more Valkyrie than some interpretations.
Nothing to write home about.
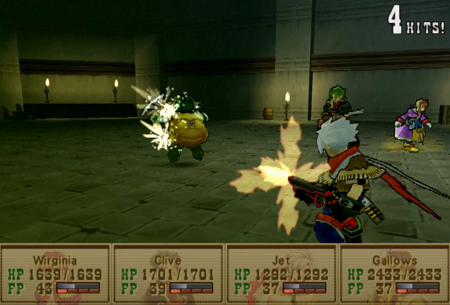
Like the earlier Guardian fights, all the Guardian Lords use the magic and abilities you will receive upon victory. Unlike the original Guardian fights, though, the Guardian Lords have much more interesting skills.
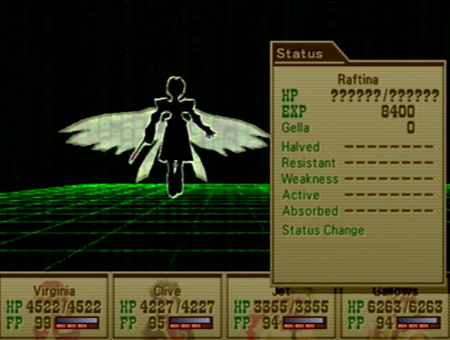
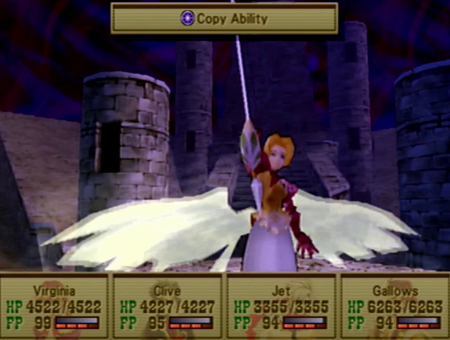
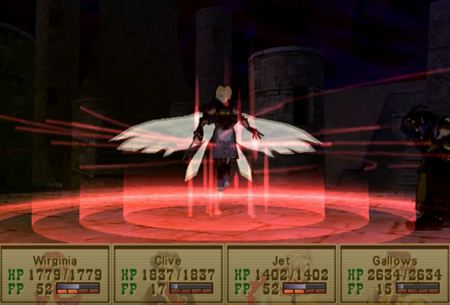
Raftina does not play fair. First, she copies all your elemental attacks for herself, and then she hits you with an uncurable status malady that makes you weak to those same elemental attacks.
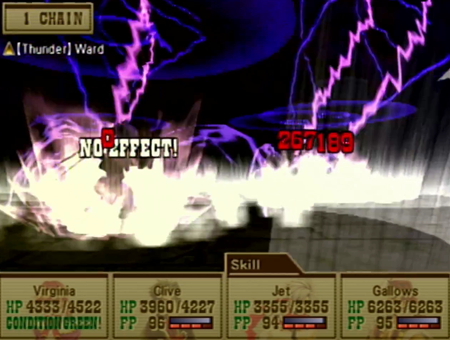
Given your party cannot naturally gain weaknesses from equipment or other means, this is the only place in the game you will see a “monster” hit you for extra elemental damage.
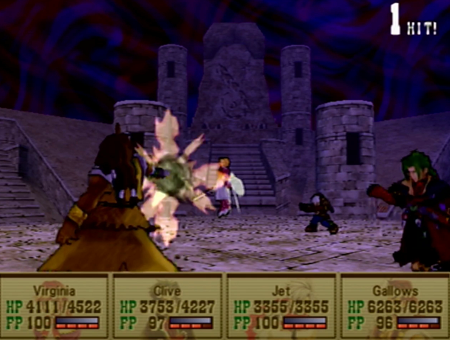
But once you get past her powerful magic, there is not much to this fight.
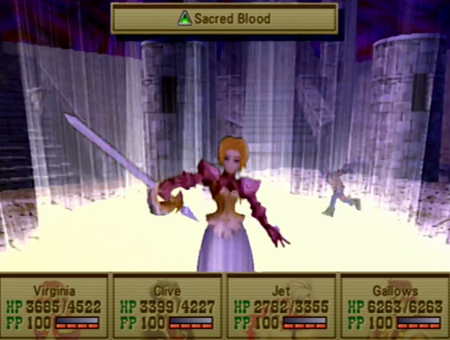
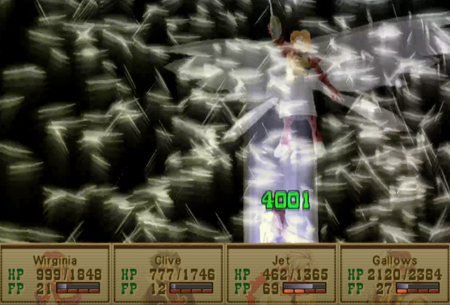
Except her summon “attack”, of course.

Sacred Blood will not hurt your party, but it will heal Raftina for an insane 4,000 HP. This could easily wipe out all of your damage gains across the battle.
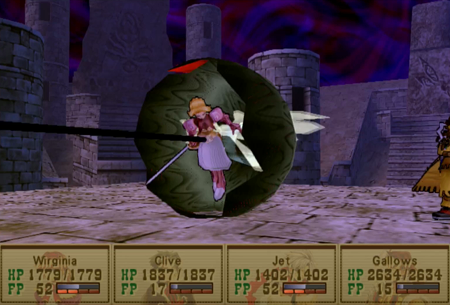
And then she remembers she has a sword every once in a while.

Nothing difficult about this fight in New Game +, but let’s take a peak over in “real” PS5 land.
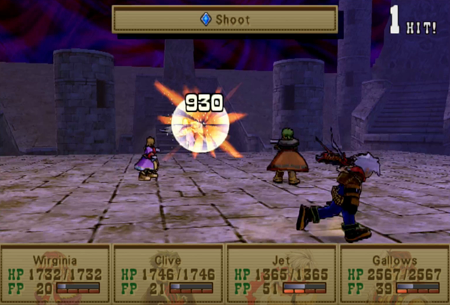
Clive, our heaviest hitter, can only pull off 930 damage at best. Other party members are focused on healing, and Jet… Jet tries, at least. But this means Raftina could undo four rounds of damage with a single summon.
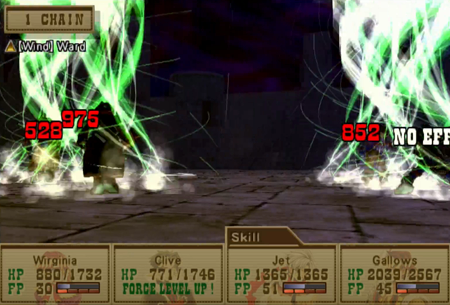
And Raftina don’t play. Those elemental weakness attacks routinely eat off 30-50% of our entire party’s HP. While one party member is likely to have an elemental nullifier equipped, she cycles through the different elements, so no one is ever 100% safe.
Just keep taunting us, Goddess.
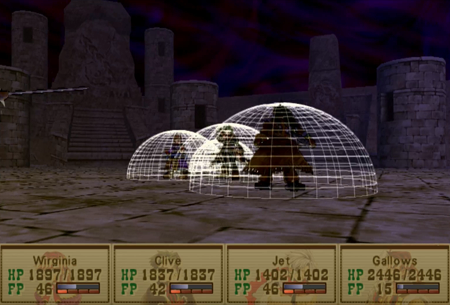
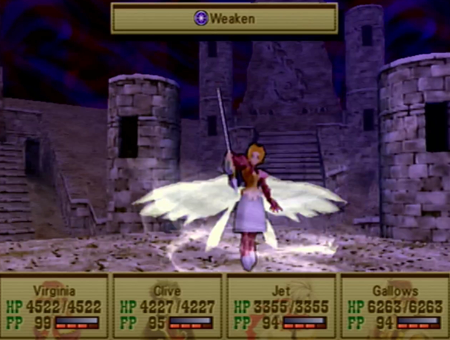
So how do we overcome this early in the game on a “normal” playthrough? Easy! Cast Reflect on the whole party the exact moment the battle starts.

Then, when Raftina casts Weaken…
It will bounce off, and inflict her with the permanent weakness to every elemental attack.
Oh, you gonna get it.
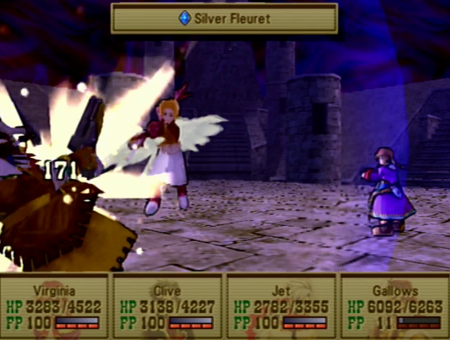
Now she will suffer a lot more damage from our mages (more if you double back with an ability obtained at the end of this update), and, if you keep layering on the reflect magic, will routinely suffer bounced magic damage, too.
Now this is a lot more manageable, regardless of when she heals.
Virginia was doing, like, 50 HP damage before this…
So we earned our love.
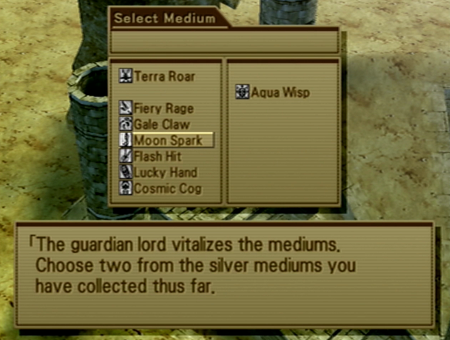
Each of the Guardian Lords also up the stats of two other “lesser” Guardians. This is basically a way for the Guardians that you earned back at the start of the game to have equipment bonuses that are relevant for the end game.
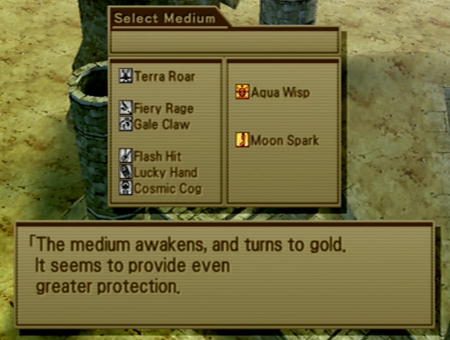
The lesser Guardians only get stat boosts, no new skills or whatever. However, it is nice to see that gold shimmering back.

You can get all the Guardian Lords in rapid succession, so it doesn’t matter too much who gets upgraded first. That said, I aim for my mages, as Gallows’s always-useful healing magic is based on stats that can be Guardian-upgraded.
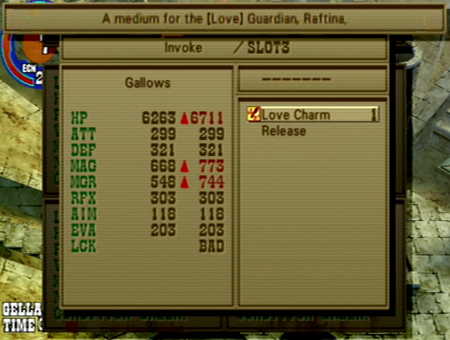
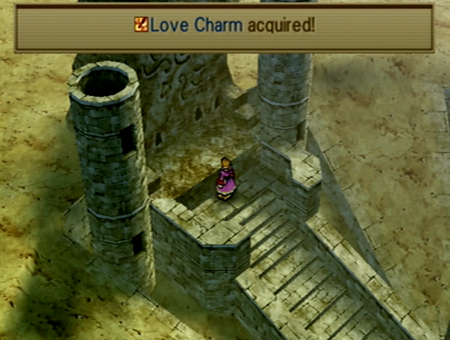
And speaking of stat boosts, we’re going to toss Virginia the Love Charm, as HP and Magic boosts are right up her alley.
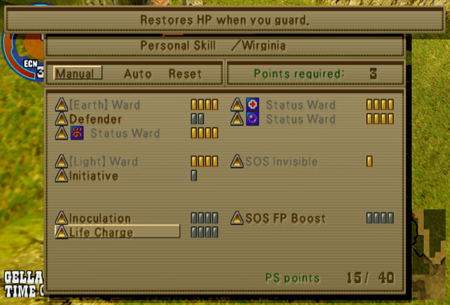
Inoculation protects against all status ailments that last after the battle, like poison or disease. It does not protect against “temporary” status ailments, like paralysis. SOS FP Boost will activate at critical HP, and kick your FP up to 100 at max level. This is situational, but a literal life saver when you need it. And Life Charge restores HP on guard, which is useful in a game where you have to defend to refill your ammo.
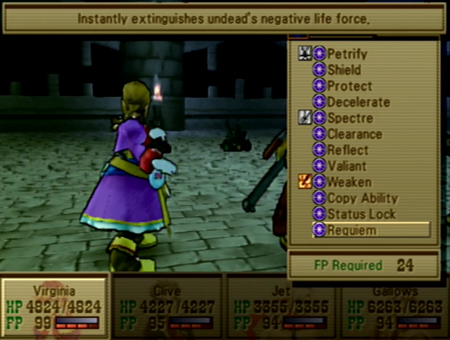
Weaken and Copy Ability should be very familiar after the last battle. Copy Ability winds up as a sort of “Blue Magic” for Wild Arms 3, but learned abilities do not last past a single battle. Boo. Status Lock is a support spell that will block all status maladies save instant death (and works well with another Guardian Lord spell we’ll earn eventually). Requiem is a 100% effective instant death spell that only impacts the undead. There are some enemy mobs that this will wreck.

And now we can utilize Raftina’s healing summon for ourselves. Note all the sword slashing that does absolutely nothing to damage anybody.
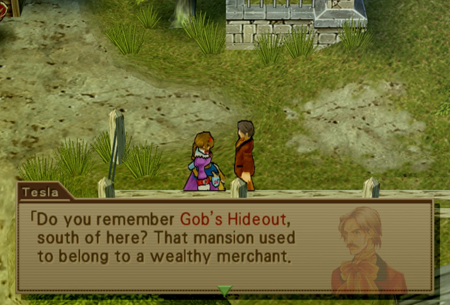
Next Guardian Lord! Stop back at Virginia’s home, and a few NPCs (including Fake Dad) will call attention to Virginia’s first dungeon.
Desire, you say?
So many flashbacks this update! – Gargantuan Goggle Bob
There was that book we read back during Virginia’s opening…
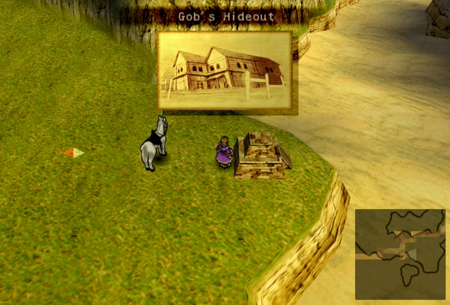
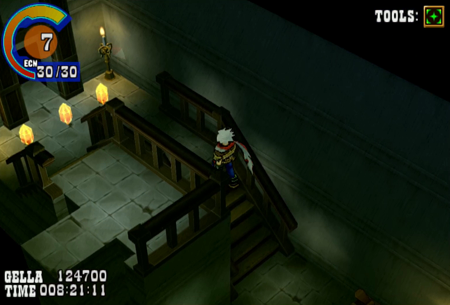
Always time to revisit an old haunt.
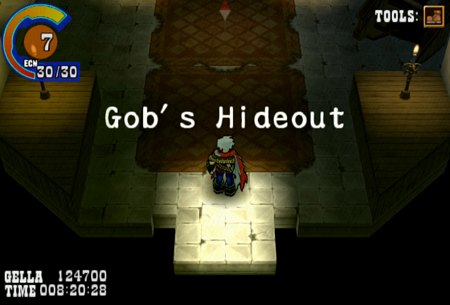
Remember how Virginia snuck in the back when she first raided the place? Well, that was literal. Returning to Gob’s Hideout sticks you at the “real” entrance, which is basically where the adventure ended last time.
Not much new here.
The encounters are still basic gobs that are intended to fight a Level 1 solo character.

But there is this door that we were never able to open…

And up in the “roof” area where we first learned about sneaking…

Radical Sneakers will allow us to reach a ladder…
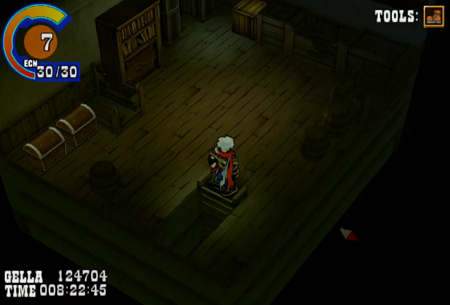
New area!
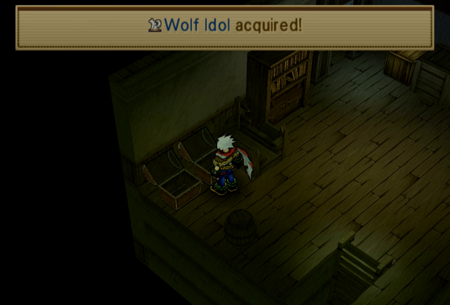
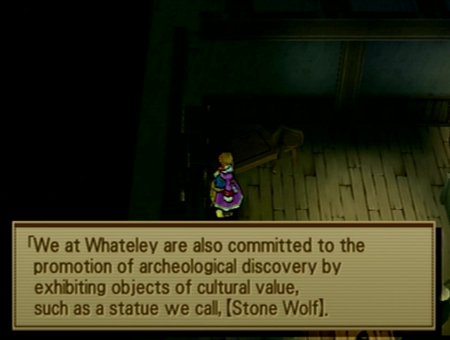
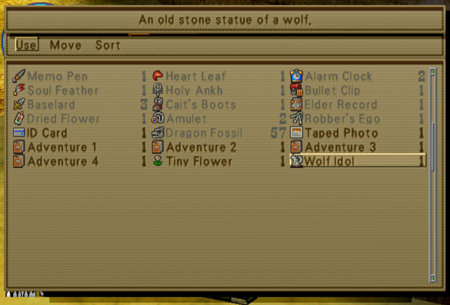
Most important is a shiny new statue. That’s right: no boss, no secret dungeon, no Sandcraft fight, no minigame; you obtain the Wolf Idol for the exclusive reason of remembering this dungeon from the absolute start of the game exists.
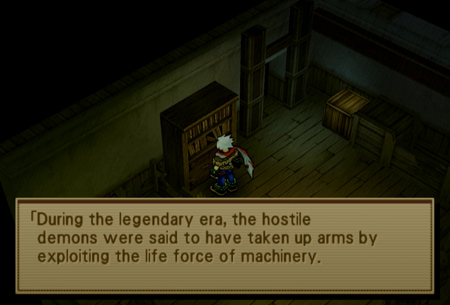
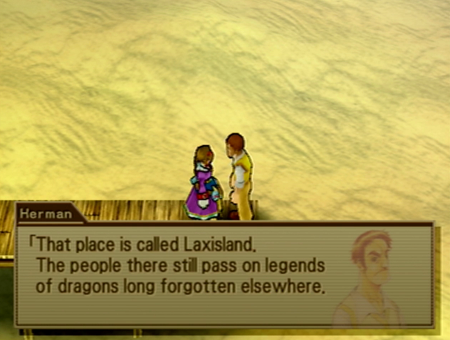
“During the legendary era, the hostile demons were said to have taken up arms by exploiting the life force of machinery. These weapons were considered to be an entity between machinery and living organisms, possessing the power to tear the sky and shatter the earth. These weapons were called dragons. It was as if they possessed a will of their own, synchronizing with the demons as if part of their limb. But as time passed…The demons disappeared, and the great war subsided on Filgaia. The few remaining dragons were deemed insignificant, and lay dormant as they began to decay. These dragons exist today as fossil resources proving beneficial to the people of today. They are found in trains and ships and other machinery, but they are most commonly used in ARMs, which is quite ironic. There is still much we do not know about dragons and a thorough analysis is needed. Dragon fossils can be mined west of Jolly Roger in a mining shaft. There are rumors however, of a living dragon found further south of Boot Hill around the Laxisland area. If these rumors of a living dragon are true, it may possess even greater powers than the fossils and prove much more useful to mankind. On the other hand…”
And lore! That we mostly already know!
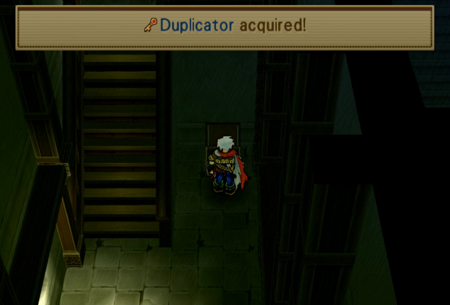
And some treasure!
And this switch unlocks that door…
Thus completing the loop. Now we’re officially done here.
With the Wolf Idol hidden here, a migrant seal hidden in Jet’s dungeon, and a hidden boss in Clive’s opening (we’ll see that monster soon enough), there is a good reason to eventually revisit all the prologue dungeons.

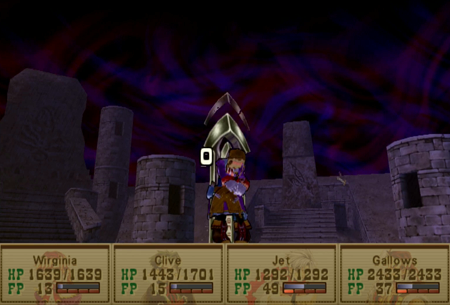
So back at Gallows’s first dungeon…
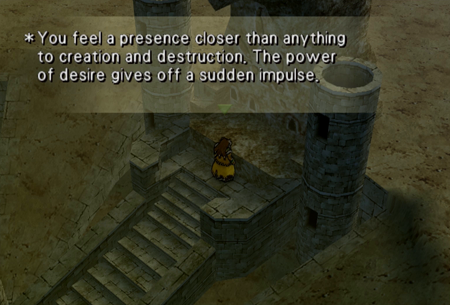
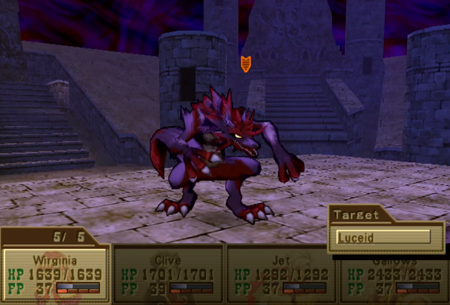
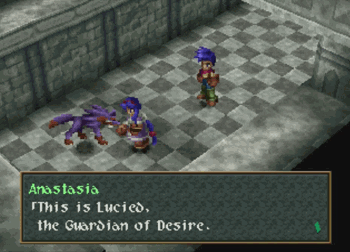
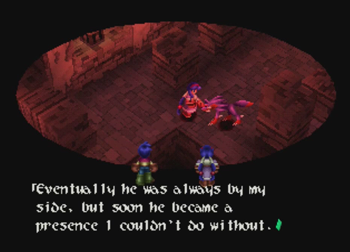
“The visions in your mind are bound together. The ripples spread quietly, but cover your minds. You feel a presence closer than anything to creation and destruction. The power of desire gives off a sudden impulse. The bearer of the Ark Scepter’s light must have the strength to fight that which has no form. Fight, and show your strength to Luceid!”
Seeing Luceid in battle is a Wild Arms tradition.
Lucy has a storied past in Wild Arms. In Wild Arms 1, Luceid was the one and only Guardian to side with the demons, presumably acknowledging that the bad guys just wanted it more. Luceid thus winds up as a recurring boss (half of one), and eventually performs some kind of magical sword merge with Boomerang, her designated demon buddy. She never formally joins the good guys (outside of the remake made after WA3), but there is some kind of implied understanding achieved when you beat Boomerang back to the fires of Hell (he’s weirdly happy about it, and if Boomerang Flash is happy, Luceid is happy).
Also, fun fact, this technically made her a subordinate of a subordinate of Siegfried.
In Wild Arms 2, Luceid is the legendary companion of the legendary Sword Magess/Saint. He is initially presented as the one Guardian that physically manifested during the Blaze of Disaster (event) and helped the Sword Magess repel the Blaze of Disaster (demon); but it is eventually revealed that he manifested for Anastasia because she really wanted this whole Disaster thing to work out well for her friends and family, and he more or less was along for the ride. Anastasia didn’t even ask for Luceid’s help! He just kind of showed up!
That is all in the past of Wild Arms 2, though, so in the present, he manifests, and “merges” with Ashley’s demon/hero form for a powerup.

From a gameplay perspective, this meant another game where Luceid does not join the party like “other” Guardians.
But he is a controllable party member for one dungeon, and is at least spiritually involved every time you use Ashley’s lightsaber.
Oh, and Luceid, as a proper physical manifestation of Desire, switches gender according to their partner’s sexual preferences. A wolf has to keep busy somehow….
Now we’ve got a bittersweet return for Luceid. On one hand, Luceid has now formally been promoted to Guardian Lord status, which was previously limited to a set of three Guardians. Additionally, for the first time in the franchise, Luceid is an actual usable/summonable medium. This is huge, as that was a major… desire… of fans for the entirety of the Playstation 1 Wild Arms titles. Unfortunately, the tradeoff is that Luceid, formally the most interesting Guardian by a wide margin, barely has any legitimate impact on the plot. They’re just kind of there, and this “position” could be filled by the cat god just as much as the wolf one. And the whole “Desire” aspect… well, I hate to judge, but it sure seems like Luceid would be a more suitable companion for Janus or the Prophets. Those guys want to succeed so badly…
Good to see our Guardian of Desire promoted, but sad that they dropped their characterization to do it.
And since we are talking about Luceid anyway, going to note that Luceid is never again seen in the franchise, except maybe as a playable character in Wild Arms XF. Throughout the story, Tony is heavily implied by actions and NPCs to be the last physically manifested Guardian, Luceid. Unfortunately, Tony can neither confirm nor deny his status as a Guardian, as he is a dog. Whatever the case, he’s a good boy.
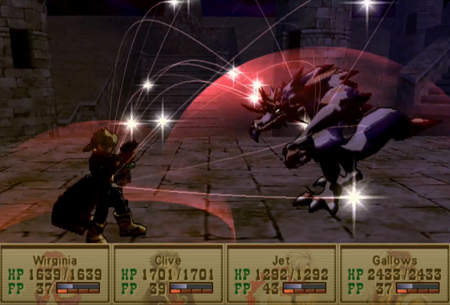
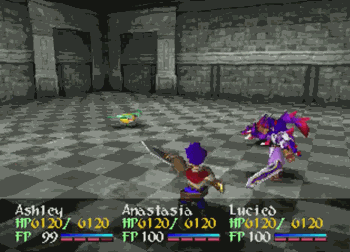
But none of that matters for this matter. What’s important is that this wolf has a drain spell, and if you are particularly underleveled or unlucky, that could make this fight take forever.
Other than that, it is a pretty straightforward war of attrition with Luceid. Complete with the literal easiest dungeon in the game hiding his idol, Luceid probably should be obtained first.
Luceid also uses the most conditional spell in the game, and, considering how often it does zero damage, it is basically a free turn for your gang.
Summon can do some damage, but if you are protected against dark, you’ll be fine.
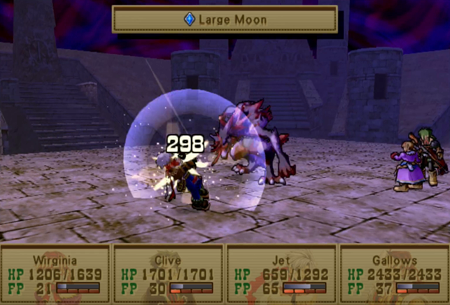
Full moon? Crescent Moon? “Large Moon” isn’t really a thing.
We are still not exactly doing a lot of damage here, but since Luceid doesn’t heal (all that much), this battle of attrition ends eventually.
I desire you to get in my pocket.
Getting all deviantart in here.

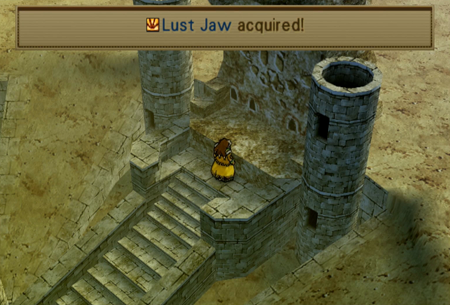
This is going straight on Gallows. Magic attack upgrade is great, and our best mage needs the other big benefit of Lust Jaw…
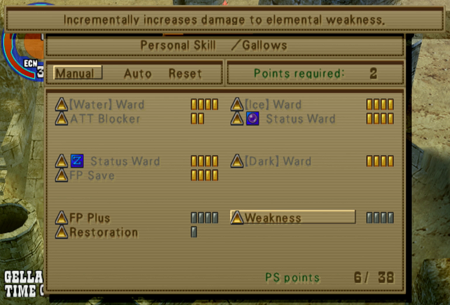
FP Plus means you earn extra FP per action… though I never really noticed that significant of a boost. It is good, just not like “difference between life and death” good. All status ailments for everyone are cleared when FP reaches 100, but Restoration will clear ailments at increments of 25, meaning most any ailment (save misery, which impacts earning FP) will be cured quickly.
But Weakness? Now there is the sweetest plum.
So magic in Wild Arms 3 is not all that exciting, but it can be exciting.
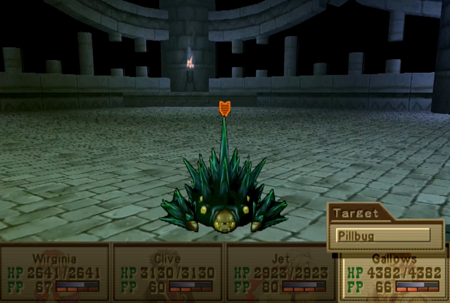
We’re going to use this poor Level 1 pillbug as an example.

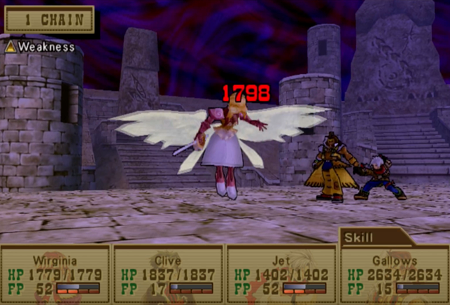
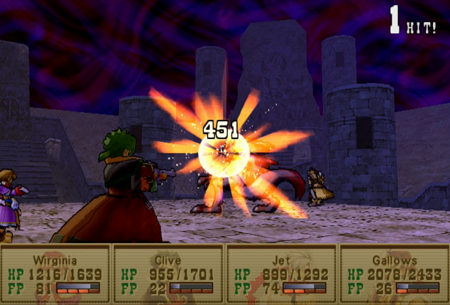
If you hit a monster with “general” magic, it does damage that is generally less than your typical physical attack. It varies between the characters (Virginia and Gallows are better magic users, Jet and Clive are worse) but offensive magic is generally ineffective compared to proper ARMs maintenance. However, when you hit a weak point…
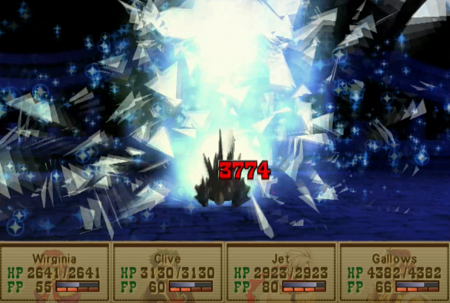
Then elemental magic shines. Same caster, same level in this shot, but Pillbug is weak to ice. See the numerical difference? At this point in the game, hitting a same-level monster’s weakness is enough to kill ‘em in one shot. This is significant, as, when it comes to regular attacks, Clive (your strongest member) is the only fighter that has a prayer of one-shotting a monster. Mind you, this seems to be deliberately balanced with how you generally face a maximum of four opponents at a time, so your average battle takes a round or two, thus allowing everyone involved to do something fun. The fights are sensible, not complete pushovers, and allow your magic users to be useful with knowing/hitting weaknesses.
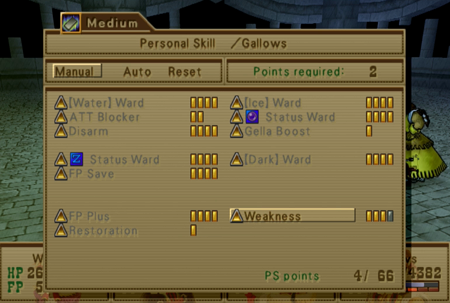
However, Weakness changes the game. Weakness will, at maximum level, deal 100% extra damage per hit.
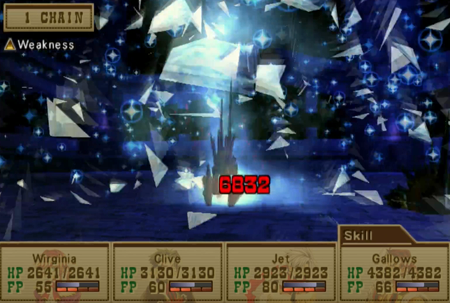
This means that “can one-shot a common monster” turns into “can deal more damage than everyone in the party”. In fact, equipping this ability on Gallows is step one of two of turning two of your party members into absolute destroyers. And we’ll get to how we pump up the other guy next week…
Oh, and if you are curious about what to do in situations where a monster/boss/super boss does not have an elemental weakness, we have a solution for that: remember how Goddess had an ability where you can “inflict” an opponent with a weakness? Well, I haven’t found an adversary that is strong to that status effect yet…
And on a “tested and approved” note, I have completed a number of optional battles on the “real” playthrough and the new game plus playthrough at this point. I am not going to chronicle both playthroughs side by side, but I can tell you the battles where I am “normal” levels, but focus on using Weakness and the other upcoming ability go a lot faster than battles where I am level 100 but not using those abilities. Literal game changer, even more effective than gaining 40 levels.

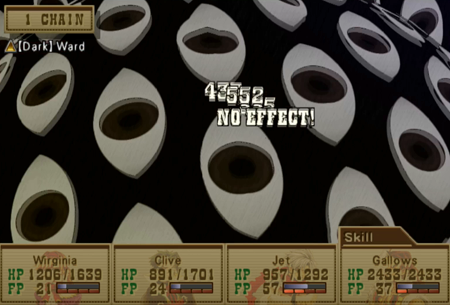
Anywho, more Magic! Dark Matter is a generic dark attack, so now we finally have all the elements available for hitting weaknesses. Lifedrain is a risky drain attack that can be pretty effective when your caster needs a fill up… but it has a high rate of missing. Curse makes an opponent more susceptible to status ailments, which is gorram useless for obvious reasons.
Dark Luceid has a completely useless description (pictured), and is very situational. Also, I have no idea if it even works like it supposed to. Theoretically, it should do damage as determined by how many elemental resistances the target has. Like, if a monster is strong against ice and water magic, it should do 2x damage, but if it is strong against ice, water, and thunder magic, it does 3x damage. That said, I have only ever seen Dark Luceid do zero damage, or craptillion damage. And it isn’t a matter of it “missing”, the craptillion damage situations are consistent, just exclusively against monsters that have every resistance. Even in the battle you just saw, Virginia received zero damage from Dark Luceid, and she definitely had Earth and Light resistances equipped at the time. And you would think the magic being used by the boss would work correctly! But it only ever seems to work if a creature has ridiculous defenses from the get-go.
So anyway, you’ll see Dark Luceid be effective, like, twice in Wild Arms 3. And you’ll be happy those two times.

Luceid’s summon is visually endearing, but otherwise forgettable. It is a hit-all darkness attack. Guess it would be useful against a party of angels.
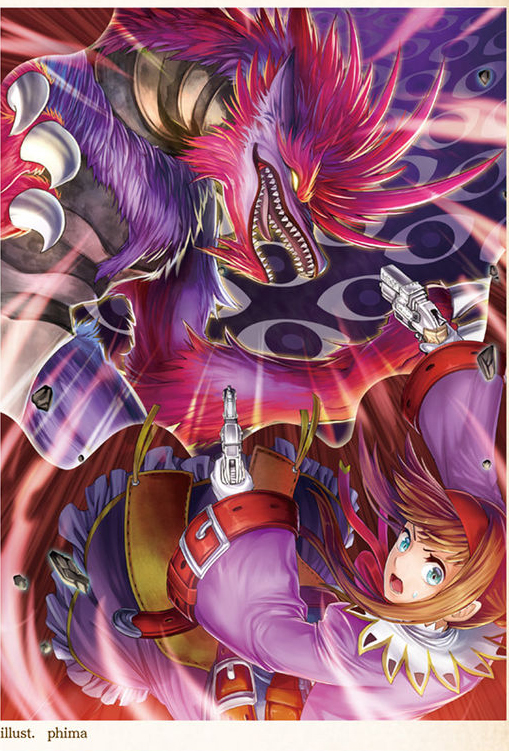
Technically, that one bit of Luceid art from the art book is exactly based on this summon (or the fight we just saw).
And that’s it for today. We’ve got a pair of Guardian Lords, and we are not afraid to use ‘em.
Next time on Wild Arms: Come fly with me.